Pass Your Microsoft Certified: Dynamics 365 Sales Functional Consultant Associate Certification Easy!
Microsoft Certified: Dynamics 365 Sales Functional Consultant Associate Certification Exams Questions & Answers, Accurate & Verified By IT Experts
Instant Download, Free Fast Updates, 99.6% Pass Rate.

$44.99
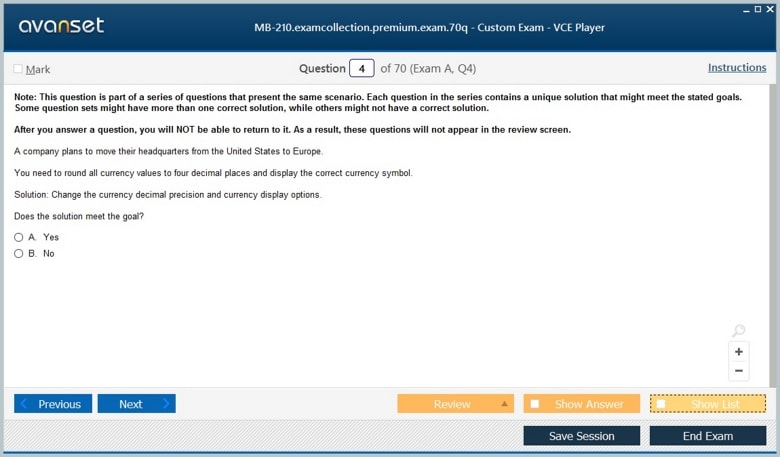
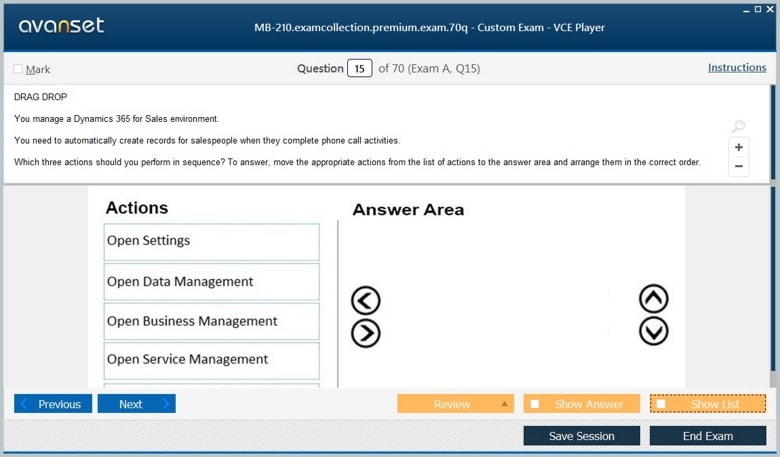
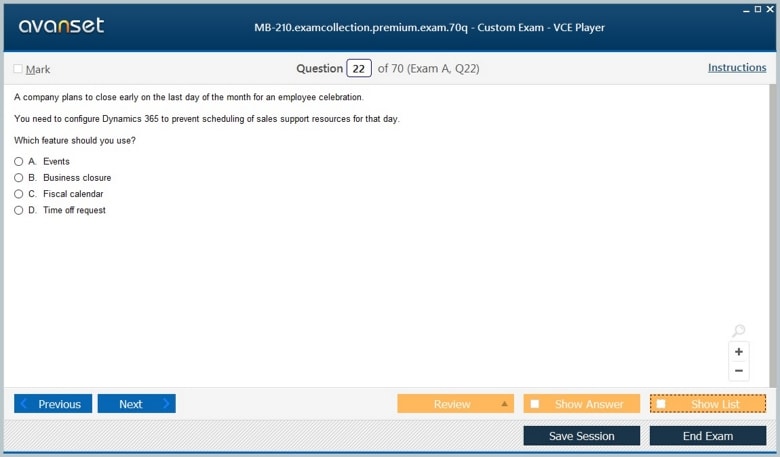
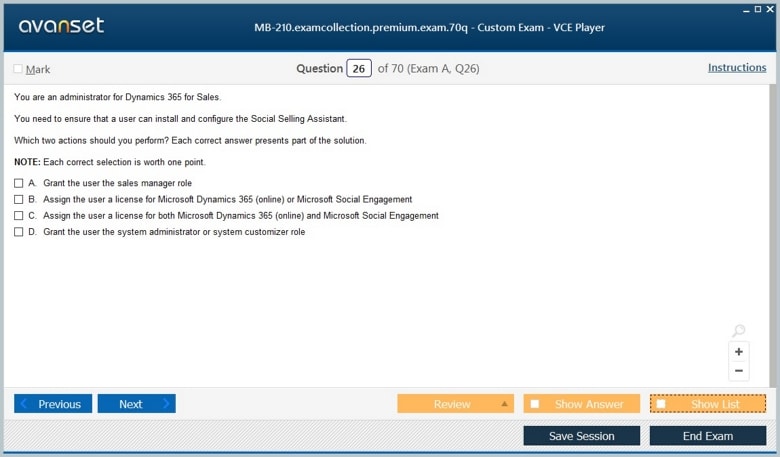
Microsoft Certified: Dynamics 365 Sales Functional Consultant Associate Certification Exams Screenshots

Microsoft Certified: Dynamics 365 Sales Functional Consultant Associate Product Reviews
Download Free Microsoft Certified: Dynamics 365 Sales Functional Consultant Associate Practice Test Questions VCE Files
| Exam | Title | Files |
|---|---|---|
Exam MB-210 |
Title Microsoft Dynamics 365 for Sales |
Files 9 |
Exam PL-200 |
Title Microsoft Power Platform Functional Consultant |
Files 5 |
Microsoft Certified: Dynamics 365 Sales Functional Consultant Associate Certification Exam Dumps & Practice Test Questions
Prepare with top-notch Microsoft Certified: Dynamics 365 Sales Functional Consultant Associate certification practice test questions and answers, vce exam dumps, study guide, video training course from ExamCollection. All Microsoft Certified: Dynamics 365 Sales Functional Consultant Associate certification exam dumps & practice test questions and answers are uploaded by users who have passed the exam themselves and formatted them into vce file format.
Microsoft Certified: Dynamics 365 Sales Functional Consultant Associate – Complete Guide to Configuration, Customer Engagement, and Career Growth
In today’s fast-paced business environment, customer relationship management is no longer a luxury; it is a necessity. Microsoft Dynamics 365 Sales offers organizations a comprehensive platform to manage customer interactions, streamline sales processes, and drive revenue growth. This solution integrates seamlessly with other Microsoft applications, including Outlook, Teams, and Power Platform, providing sales teams with a connected environment that improves efficiency and decision-making.
Dynamics 365 Sales is designed to help businesses understand customer needs, track opportunities, and close deals effectively. With features such as lead and opportunity management, account and contact management, sales forecasting, and AI-powered insights, this platform empowers organizations to deliver a personalized customer experience while optimizing internal sales operations.
For professionals looking to specialize in this field, the Microsoft Certified: Dynamics 365 Sales Functional Consultant Associate certification serves as a validation of the skills required to implement and manage these solutions effectively.
The Role of a Dynamics 365 Sales Functional Consultant
A Dynamics 365 Sales Functional Consultant is the bridge between business requirements and technical implementation. These consultants play a critical role in ensuring that sales teams leverage the full capabilities of Dynamics 365 Sales to meet organizational objectives. The position requires a deep understanding of sales processes, CRM systems, and the technical configuration of Dynamics 365.
Key responsibilities of a Sales Functional Consultant include:
Collaborating with business stakeholders to gather and analyze sales requirements.
Designing and configuring sales processes in Dynamics 365, including workflows, dashboards, and business rules.
Customizing the platform to support unique organizational needs.
Providing training and guidance to ensure proper adoption of the system.
Monitoring performance and suggesting improvements using analytics and reporting tools.
By performing these tasks effectively, consultants help organizations streamline their sales operations, improve data integrity, and enhance the overall customer experience.
Why Certification Matters
Obtaining the Dynamics 365 Sales Functional Consultant Associate certification is more than just a credential; it is a demonstration of expertise recognized by employers worldwide. This certification validates the consultant’s ability to configure and implement Dynamics 365 Sales solutions that align with business goals and optimize the sales cycle.
Some benefits of certification include:
Enhanced credibility in the marketplace, which can lead to better career opportunities.
Increased confidence in managing complex CRM implementations.
Access to Microsoft’s professional network and resources for continued learning.
A higher potential salary compared to non-certified peers.
Assurance for employers that the certified professional can deliver results efficiently.
Certification serves as both a learning journey and a professional milestone, providing a structured approach to mastering Dynamics 365 Sales.
Core Skills and Competencies
To excel as a Dynamics 365 Sales Functional Consultant, a candidate must master several core skills and competencies. These skills ensure that the consultant can not only configure the system but also align it with strategic sales objectives.
Configuring Sales Applications
Configuring sales applications involves setting up entities such as leads, opportunities, accounts, and contacts. Consultants must understand how to structure the system to support various sales processes. This includes creating workflows that automate repetitive tasks, setting up business rules to maintain data consistency, and configuring forms and views to enhance user experience.
Managing Customer Engagement
Understanding customer engagement is crucial for maximizing the impact of Dynamics 365 Sales. Consultants need to track customer interactions, manage communication histories, and ensure timely follow-ups. By implementing tools like activity tracking and automated reminders, consultants help sales teams maintain meaningful relationships with customers.
Sales Analytics and Reporting
Data-driven decision-making is a cornerstone of modern sales strategies. Consultants should be proficient in creating reports, dashboards, and analytics views that provide insights into sales performance. Key metrics include lead conversion rates, opportunity pipelines, and forecast accuracy. The ability to interpret these metrics allows organizations to adjust strategies and drive better outcomes.
Integration and Automation
Dynamics 365 Sales is most powerful when integrated with other Microsoft tools, such as Power Automate, Power BI, and Microsoft Teams. Consultants need to design integrations that enhance collaboration, automate routine tasks, and improve data visibility across the organization. Automation not only reduces manual effort but also ensures that processes are consistent and scalable.
Business Process Optimization
Beyond technical skills, consultants must understand sales strategy and process optimization. This involves analyzing existing workflows, identifying bottlenecks, and designing solutions that improve efficiency. A well-configured Dynamics 365 Sales environment enables teams to focus on high-value activities rather than administrative tasks.
Exam Overview
The certification exam for Dynamics 365 Sales Functional Consultant Associate is designed to test both functional knowledge and practical application. Candidates are assessed on their ability to configure, manage, and optimize Dynamics 365 Sales solutions in real-world scenarios.
The exam typically covers:
Implementing and managing the sales lifecycle, including leads, opportunities, and accounts.
Customizing the sales environment with dashboards, forms, views, and workflows.
Leveraging analytics and AI to improve sales performance.
Integrating Dynamics 365 Sales with other Microsoft applications.
Maintaining system security, compliance, and data integrity.
Preparation involves a mix of theoretical learning and hands-on practice. Microsoft Learn provides official learning paths, and practical experience in a sandbox environment is crucial for success.
Preparation Strategies
Effective preparation combines structured study with real-world practice. Key strategies include:
Following Microsoft Learn modules specific to Dynamics 365 Sales.
Gaining hands-on experience through trial environments or sandbox systems.
Participating in instructor-led training for deeper understanding and mentorship.
Using practice exams to identify gaps and reinforce knowledge.
Joining online forums and communities to discuss challenges and solutions with peers.
A focused preparation approach ensures candidates are ready not only for the exam but also for applying their skills in real business environments.
Real-World Applications of Dynamics 365 Sales
Certified consultants play a pivotal role in helping organizations harness the full potential of Dynamics 365 Sales. Some practical applications include:
Streamlining lead-to-cash processes to shorten sales cycles.
Creating automated workflows to reduce manual data entry and errors.
Designing dashboards and reports that provide actionable insights for sales teams.
Integrating with marketing tools to improve campaign tracking and ROI measurement.
Ensuring consistent customer engagement through automated follow-ups and reminders.
These applications demonstrate the tangible value of certified professionals in enhancing sales productivity and customer satisfaction.
Career Opportunities and Growth
Certification opens doors to various career paths within the CRM and sales technology domain. Professionals can pursue roles such as:
Dynamics 365 Consultant
CRM Specialist
Sales Solution Architect
Customer Engagement Specialist
Business Process Analyst
These roles are in high demand across industries, particularly in organizations that rely heavily on digital sales and customer relationship management. The combination of technical expertise and business acumen positions certified consultants for leadership roles and advanced career growth.
The Microsoft Certified: Dynamics 365 Sales Functional Consultant Associate certification represents a significant milestone for professionals seeking to advance their careers in CRM and sales technology. By mastering the configuration, management, and optimization of Dynamics 365 Sales, certified consultants provide organizations with the tools and insights necessary to drive sales performance and deliver exceptional customer experiences.
Achieving this certification requires dedication, practical experience, and a strategic understanding of sales processes. However, the rewards include enhanced credibility, career advancement, and the ability to make a measurable impact on business outcomes. For anyone looking to specialize in Dynamics 365 Sales, this certification is a valuable investment in professional growth and future opportunities.
Exam Overview for Dynamics 365 Sales Functional Consultant Associate
The Microsoft Certified: Dynamics 365 Sales Functional Consultant Associate certification exam is a critical step for professionals aiming to validate their expertise in configuring, managing, and optimizing Dynamics 365 Sales. This exam is designed to assess both theoretical knowledge and practical skills, ensuring that certified professionals can deliver real-world solutions that meet organizational needs.
Understanding the exam structure, content, and expectations is essential for effective preparation. The exam not only tests your technical abilities but also evaluates your understanding of business processes, customer engagement, and data-driven decision-making within the Dynamics 365 Sales environment.
Core Competencies Measured
The certification exam evaluates a range of skills that are essential for Dynamics 365 Sales Functional Consultants. These competencies can be broadly categorized as follows:
Sales Process Implementation
Candidates must demonstrate the ability to configure and manage the entire sales lifecycle, from lead generation to opportunity management and deal closure. Key tasks include:
Setting up and managing leads, opportunities, accounts, and contacts.
Designing sales workflows that reflect organizational processes.
Configuring sales pipelines, stages, and business rules.
Automating routine tasks such as follow-ups, notifications, and reminders.
A strong understanding of these processes ensures that sales teams can operate efficiently and focus on high-value activities rather than administrative tasks.
Customer Engagement Management
Effective customer engagement is at the heart of any sales strategy. Candidates are expected to know how to:
Track customer interactions and maintain accurate communication histories.
Implement activity management features to ensure timely follow-ups.
Customize forms, views, and dashboards to enhance user experience.
Utilize relationship insights to improve engagement strategies.
Mastering these skills allows consultants to help organizations build stronger, more personalized relationships with customers.
Reporting and Analytics
Data is a key driver of sales success. The exam tests candidates on their ability to leverage Dynamics 365 Sales analytics to provide actionable insights. Areas of focus include:
Creating dashboards and reports that track key performance indicators.
Using AI-powered features for sales forecasting and predictive analytics.
Interpreting metrics to guide strategic decisions and optimize sales performance.
Implementing performance tracking for individual sales reps and teams.
Analytical skills ensure that certified professionals can help organizations make data-driven decisions and continuously improve sales outcomes.
Integration and Automation
Integration of Dynamics 365 Sales with other Microsoft tools and external systems is crucial for streamlined operations. Exam candidates should understand:
How to integrate Dynamics 365 Sales with Power BI, Power Automate, and Power Apps.
Using automation to reduce manual data entry and repetitive tasks.
Ensuring seamless workflows between sales, marketing, and service teams.
Managing data consistency and synchronization across systems.
This competency ensures that certified consultants can create connected ecosystems that enhance collaboration and efficiency.
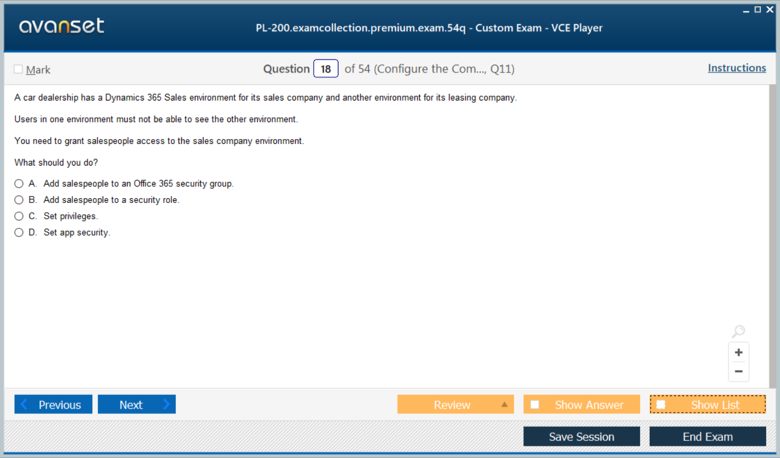
Security and Compliance
Maintaining system security and compliance is an essential aspect of any CRM implementation. Candidates are evaluated on their ability to:
Configure security roles, access levels, and permissions within Dynamics 365 Sales.
Implement data protection and privacy measures according to organizational and regulatory requirements.
Monitor user activity and maintain data integrity.
These skills guarantee that sensitive customer information is protected while maintaining compliance with industry standards.
Exam Format and Structure
The Dynamics 365 Sales Functional Consultant Associate exam is designed to simulate real-world scenarios and assess practical knowledge. While exam details may vary, the general structure includes:
Multiple-choice questions that test knowledge of sales processes, system configuration, and functional capabilities.
Case studies and scenario-based questions that require application of knowledge to solve business problems.
Questions focused on system customization, workflows, dashboards, and reporting.
Assessment of integration strategies with Microsoft applications and automation tools.
The exam typically lasts between 90 to 120 minutes, depending on the testing provider. Passing scores vary, and Microsoft provides official guidelines on scoring and question weighting.
Recommended Preparation Resources
Proper preparation is essential for passing the exam and applying skills effectively in real-world scenarios. Several resources can help candidates prepare comprehensively:
Microsoft Learn
Microsoft Learn offers free, official learning paths tailored to the Dynamics 365 Sales Functional Consultant certification. These modules cover core topics, including sales process configuration, customer engagement, analytics, and integration. Learning paths often include hands-on exercises and practical labs to reinforce knowledge.
Instructor-Led Training
Enrolling in official Microsoft courses or training programs provides structured guidance, expert instruction, and interactive exercises. Instructor-led training allows candidates to ask questions, engage in discussions, and receive mentorship from experienced professionals.
Practice Exams
Taking practice exams helps candidates familiarize themselves with question types, exam format, and time management. Practice tests also highlight knowledge gaps, allowing targeted study before attempting the actual exam.
Hands-On Experience
Practical experience in a Dynamics 365 Sales environment is crucial. Candidates should work with trial instances, sandbox environments, or live systems to configure entities, workflows, dashboards, and reports. Real-world practice reinforces theoretical knowledge and improves confidence during the exam.
Community and Forums
Engaging with online communities and forums provides opportunities to discuss challenges, exchange solutions, and gain insights from other certified professionals. Platforms like Microsoft Tech Community, LinkedIn groups, and specialized CRM forums are valuable resources for networking and knowledge sharing.
Study Strategies for Success
Effective study strategies can make a significant difference in exam performance. Candidates should adopt a structured approach that balances learning, practice, and review. Key strategies include:
Creating a study schedule that allocates time for each exam domain.
Combining theoretical study with hands-on practice to reinforce learning.
Reviewing Microsoft documentation, release notes, and updates for the latest features.
Practicing scenario-based questions to develop problem-solving skills.
Regularly evaluating progress through mock exams and self-assessment.
Consistent practice and active learning ensure that candidates are well-prepared for the practical and functional aspects of the exam.
Key Challenges and How to Overcome Them
Candidates may face several challenges while preparing for the certification. Common challenges include:
Understanding complex sales processes and workflows.
Keeping up with frequent updates and new features in Dynamics 365 Sales.
Applying theoretical knowledge to practical, scenario-based questions.
Balancing study time with professional responsibilities.
These challenges can be overcome by:
Breaking down complex topics into manageable segments.
Using sandbox environments to test configurations and workflows.
Engaging with community forums for clarification and tips.
Following a structured study plan with regular review and practice.
Benefits of Exam Preparation Beyond Certification
Preparing for the certification offers value beyond simply passing the exam. Candidates gain:
A deep understanding of sales processes and CRM best practices.
Practical skills to configure, manage, and optimize Dynamics 365 Sales.
The ability to provide actionable insights and improve organizational performance.
Confidence in implementing and maintaining CRM solutions in professional settings.
These benefits enhance professional capabilities and make certified consultants indispensable to their organizations.
Real-World Impact of Certification
Certified Dynamics 365 Sales Functional Consultants play a vital role in driving business success. Their contributions include:
Reducing sales cycle times through efficient process automation.
Enhancing customer engagement and improving retention rates.
Providing data-driven insights that inform strategic decisions.
Ensuring compliance with data protection regulations and maintaining system security.
Organizations that employ certified consultants often experience measurable improvements in sales productivity, customer satisfaction, and overall operational efficiency.
Career Opportunities and Professional Growth
Achieving certification opens doors to a variety of roles in the CRM and sales technology domain. Career paths for certified professionals include:
Dynamics 365 Consultant
CRM Specialist
Sales Solution Architect
Customer Engagement Specialist
Business Process Analyst
These roles are in high demand across industries, particularly in organizations that rely on digital sales, analytics, and customer engagement. Certified professionals often experience accelerated career growth and increased earning potential.
Continuous Learning and Certification Maintenance
Microsoft certifications require ongoing learning to stay current with platform updates and new features. Continuous education can include:
Participating in refresher courses and advanced training modules.
Monitoring Microsoft release notes and updates for Dynamics 365 Sales.
Engaging in professional communities and attending industry events.
Pursuing related certifications in Power Platform, Microsoft 365, or other Dynamics 365 applications.
Maintaining up-to-date knowledge ensures that certified professionals remain valuable assets in their organizations and continue to leverage the full potential of Dynamics 365 Sales.
The Dynamics 365 Sales Functional Consultant Associate exam is a comprehensive evaluation of both technical and functional expertise. It requires candidates to demonstrate their ability to configure, manage, and optimize sales solutions, while also understanding business processes, customer engagement strategies, and data-driven decision-making.
Effective preparation involves a combination of theoretical study, hands-on practice, instructor-led training, and active engagement with professional communities. Beyond certification, the skills acquired through preparation enhance career opportunities, improve professional credibility, and enable consultants to make significant contributions to organizational success.
For professionals aspiring to specialize in CRM and sales technology, obtaining this certification is a valuable investment that validates expertise, increases marketability, and provides the knowledge required to drive impactful business outcomes in today’s competitive sales environment.
Configuring Dynamics 365 Sales for Business Success
Successfully implementing Microsoft Dynamics 365 Sales requires more than technical knowledge. It demands an understanding of business processes, sales strategies, and organizational goals. Dynamics 365 Sales Functional Consultants are responsible for configuring the platform to meet these requirements, ensuring that sales teams operate efficiently while providing exceptional customer experiences. Proper configuration optimizes workflows, automates repetitive tasks, and provides actionable insights that drive revenue growth.
Setting Up the Dynamics 365 Sales Environment
The foundation of a successful Dynamics 365 Sales implementation is a well-structured environment. This involves creating entities, defining relationships, and aligning the system with business objectives.
Define sales entities such as leads, opportunities, accounts, and contacts to match organizational structures
Organize parent-child relationships for accounts and contacts to manage complex hierarchies
Establish security roles and permissions to protect data and ensure compliance
Configure business units to segment data access and reporting efficiently
A carefully structured environment ensures a smooth configuration process, allowing workflows, analytics, and automation to function effectively.
Customizing Sales Workflows
Sales workflows are the backbone of an efficient CRM system. They automate repetitive tasks, enforce business rules, and maintain consistency across the sales process.
Automate lead assignment, qualification, and conversion to reduce manual work and improve response times
Define opportunity stages and criteria to standardize the sales pipeline
Implement automated notifications, reminders, and follow-ups to enhance productivity
Establish approval processes for quotes, discounts, and special sales actions to ensure compliance
Customized workflows enable sales teams to focus on high-value activities while maintaining consistent processes.
Managing Accounts, Contacts, Leads, and Opportunities
Accurate and organized customer data is essential for effective CRM management. Dynamics 365 Sales provides tools for managing these core entities.
Maintain detailed information on accounts and contacts, including communication history and relationship insights
Track leads from initial contact through qualification to conversion
Monitor opportunities through defined stages in the sales pipeline
Segment data by geography, industry, or sales stage to support targeted engagement and reporting
Proper management of these entities ensures sales teams have a complete view of customer interactions and can prioritize opportunities effectively.
Product Catalogs, Price Lists, and Quotes
Dynamics 365 Sales allows organizations to manage products, pricing, and quotes efficiently, ensuring accurate transactions and consistent customer communication.
Organize products and services into categories, defining attributes and bundles for complex offerings
Create multiple price lists for different regions, customer types, or sales channels
Configure discounts, promotions, and special pricing to align with marketing campaigns
Automate quote generation, order creation, and invoicing to reduce errors and accelerate sales processes
Managing product catalogs and pricing accurately helps ensure fast, error-free deal closure and a positive customer experience.
Implementing Dashboards and Key Performance Indicators
Dashboards provide real-time visibility into sales performance, enabling data-driven decision-making.
Track conversion rates, revenue, pipeline health, and win/loss ratios to measure performance
Monitor individual and team KPIs to identify areas for improvement
Create custom dashboards that highlight critical metrics and actionable insights
Leverage real-time reporting to make timely adjustments in a dynamic sales environment
Dashboards help sales teams and management stay informed, accountable, and motivated.
Automating Sales Processes
Automation is essential for improving efficiency and reducing manual errors in sales operations.
Automatically assign leads to the right sales representatives based on territory, expertise, or workload
Schedule reminders for calls, meetings, and emails to ensure timely engagement
Trigger updates in opportunity stages based on defined criteria
Synchronize emails and calendar events to track communications and meetings effortlessly
Automation allows sales teams to concentrate on strategy and customer engagement rather than administrative tasks.
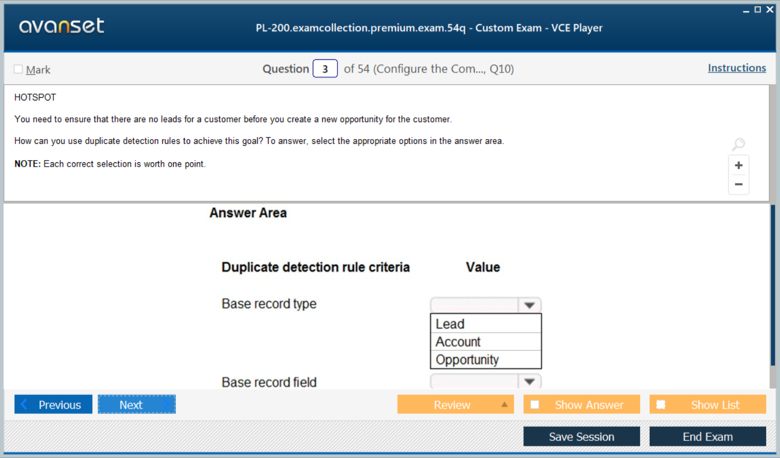
Ensuring Data Quality and Integrity
Reliable data underpins effective sales operations. Dynamics 365 Sales includes tools to maintain clean, accurate data.
Implement data validation rules to enforce consistency and correctness
Detect and merge duplicate records to maintain database accuracy
Enforce mandatory fields to support reporting and decision-making
Use audit trails to track changes and maintain accountability
High-quality data improves reporting accuracy, supports decision-making, and strengthens customer relationships.
Customizing Views and Forms
Custom views and forms allow users to interact with Dynamics 365 Sales efficiently.
Create personalized views for sales representatives to filter and sort relevant data
Develop role-based forms to display information appropriate for different user roles
Apply conditional formatting to highlight critical information and tasks
Incorporate interactive dashboards into forms for instant access to key metrics
Customization enhances usability, productivity, and user satisfaction across the organization.
Integration with Other Microsoft Tools
Integrating Dynamics 365 Sales with Microsoft tools enhances collaboration and data flow.
Use Power BI to build advanced analytics and reporting, providing actionable insights
Leverage Power Automate to streamline workflows across Dynamics 365, Outlook, and Teams
Integrate with Microsoft Teams for communication, file sharing, and collaboration
Synchronize Dynamics 365 with Outlook to track emails, appointments, and contacts
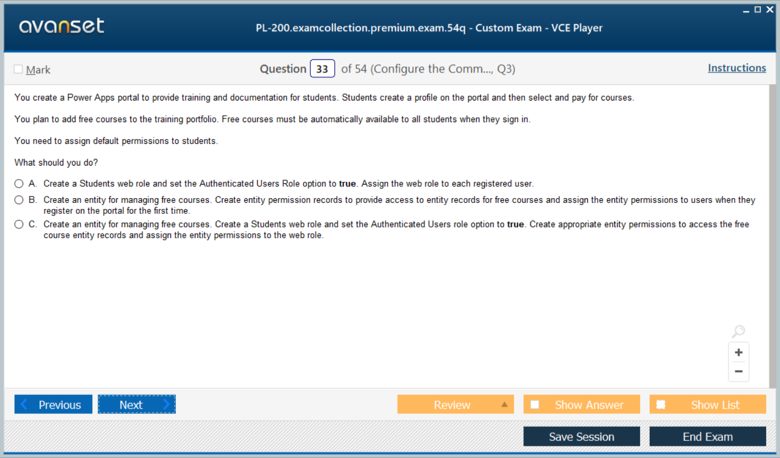
Build custom applications with Power Apps to address specific business requirements
Integration ensures a connected environment, making sales processes more efficient and insights more actionable.
Driving Adoption Across the Organization
Even a well-configured system requires effective user adoption to deliver value.
Provide comprehensive training for all roles within the sales organization
Develop user guides and role-specific documentation
Collect feedback to identify usability issues and areas for improvement
Implement gamification or performance-tracking features to motivate adoption
Monitor system usage and offer additional support where needed
Successful adoption ensures that the system’s configuration, automation, and analytics capabilities are fully utilized.
Leveraging AI and Insights
AI capabilities in Dynamics 365 Sales enhance decision-making and sales effectiveness.
Use predictive lead scoring to focus on high-value prospects
Implement relationship insights to guide customer engagement strategies
Apply sales forecasting tools to anticipate revenue and allocate resources
Configure alerts to guide sales reps on critical follow-ups
Analyze customer behavior to refine engagement approaches
AI-driven insights help sales teams make informed decisions, close deals faster, and foster stronger customer relationships.
Monitoring and Reporting
Regular monitoring and reporting ensure the sales system delivers measurable outcomes.
Track key metrics like conversion rates, pipeline health, and sales cycle duration
Create tailored reports for management, teams, and individual representatives
Monitor workflow efficiency to identify bottlenecks
Analyze revenue by region, product, or representative for strategic insights
Leverage real-time dashboards for immediate visibility into performance
Effective reporting empowers stakeholders to make timely, data-driven decisions that improve sales outcomes.
Case Studies: Successful Implementations
Real-world examples demonstrate the impact of Dynamics 365 Sales when configured properly.
A technology company reduced sales cycle time by 20% through automated workflows and dashboards
A financial services firm improved customer engagement and retention by 15% using opportunity tracking and follow-up automation
A retail organization increased revenue by 10% through integration with Power BI and targeted marketing campaigns
These examples highlight the tangible business benefits that skilled consultants can deliver.
Best Practices for Configuration
To ensure success, functional consultants should follow these best practices:
Align configurations with business goals and sales strategy
Engage stakeholders during the setup process to ensure adoption
Test workflows and automation in sandbox environments before deployment
Continuously monitor performance and refine processes
Maintain clear documentation of configurations and workflows
Configuring Dynamics 365 Sales requires a balance of technical expertise and business understanding. Functional consultants play a critical role in establishing workflows, automating processes, ensuring data integrity, and integrating the system with other Microsoft tools.
A properly configured Dynamics 365 Sales environment streamlines operations, enhances customer engagement, improves decision-making through analytics, and drives measurable business outcomes. Certified consultants who master these practices position themselves as indispensable assets to their organizations, enabling sales teams to operate at peak efficiency and deliver exceptional results.
Maximizing Customer Engagement with Dynamics 365 Sales
Customer engagement is at the heart of successful sales operations. Microsoft Dynamics 365 Sales provides organizations with tools to track, manage, and optimize interactions with customers throughout the sales lifecycle. Effective engagement ensures that prospects are nurtured, opportunities are maximized, and customer relationships are strengthened. Functional consultants play a critical role in designing and configuring systems that support personalized, efficient, and impactful engagement strategies.
Understanding Customer Engagement
Customer engagement involves more than simply responding to inquiries. It encompasses building meaningful relationships, understanding customer needs, and providing timely, relevant communications. Dynamics 365 Sales allows sales teams to capture detailed interaction histories, monitor activities, and gain insights into the quality of engagement.
Track customer interactions across multiple channels, including emails, calls, meetings, and social media
Record communication history and contextual details to support personalized outreach
Identify key stakeholders and decision-makers within accounts
Monitor customer activity and engagement levels to prioritize efforts
By capturing and analyzing these interactions, organizations can ensure that every engagement is purposeful and contributes to overall sales objectives.
Leveraging Dynamics 365 Insights
One of the most powerful aspects of Dynamics 365 Sales is its ability to provide actionable insights through analytics and AI. Functional consultants configure these tools to help sales teams make informed decisions and improve outcomes.
Use predictive lead scoring to identify high-potential prospects
Apply relationship analytics to understand customer engagement patterns and identify gaps
Monitor opportunity progress with pipeline and stage analytics
Generate actionable alerts and recommendations for follow-up activities
Utilize AI-driven forecasting to predict revenue trends and adjust strategies accordingly
These insights empower sales teams to focus on opportunities with the highest potential and make data-driven decisions that improve engagement and revenue.
Customizing Dashboards for Engagement Monitoring
Dashboards are critical for monitoring customer engagement in real-time. Dynamics 365 Sales allows functional consultants to create dashboards that display metrics relevant to sales representatives, managers, and executives.
Track open activities, pending tasks, and overdue follow-ups
Monitor email response rates, meeting outcomes, and engagement frequency
Display key account health indicators, such as interaction consistency and relationship strength
Segment dashboards for different roles to ensure relevant insights for each user
Integrate charts, graphs, and trend indicators for quick understanding and decision-making
Customized dashboards ensure that teams have immediate visibility into engagement performance and can act proactively to nurture relationships.
Creating Custom Reports
Reporting is essential for evaluating the effectiveness of engagement strategies and identifying areas for improvement.
Generate detailed reports on lead conversion rates, opportunity progress, and account activity
Track engagement metrics by region, industry, or sales representative
Measure the impact of marketing campaigns and outreach initiatives
Analyze the effectiveness of follow-ups and interactions across different communication channels
Schedule automated reporting to provide management with regular updates
Well-designed reports provide actionable insights, helping organizations refine engagement strategies and drive consistent sales results.
Integrating Marketing and Sales
Customer engagement is most effective when marketing and sales efforts are aligned. Dynamics 365 Sales allows integration with Microsoft Dynamics 365 Marketing and other tools to create a unified approach.
Track campaign responses and lead interactions from marketing initiatives
Segment prospects and customers for targeted campaigns based on behavior and preferences
Synchronize data between marketing and sales teams to avoid duplication and ensure accuracy
Automate follow-ups from marketing campaigns to maintain timely engagement
Measure ROI of marketing activities and their influence on sales performance
Integration ensures a seamless experience for prospects and maximizes the impact of marketing efforts on revenue generation.
Using AI for Predictive Engagement
AI capabilities in Dynamics 365 Sales enhance engagement by predicting customer behavior and guiding sales teams.
Predict the likelihood of a lead converting into an opportunity
Identify customers at risk of churn and implement proactive retention strategies
Recommend next-best actions based on historical engagement patterns
Analyze sentiment from communications to gauge customer satisfaction
Automate prioritization of tasks to focus on high-value opportunities
By leveraging AI, sales teams can focus efforts strategically, improve customer relationships, and increase the probability of closing deals.
Enhancing Sales Productivity
Engagement is closely tied to sales productivity. Dynamics 365 Sales provides features that help streamline workflows and reduce administrative burdens.
Automate task creation and assignment based on customer interactions
Synchronize emails, meetings, and calls directly within the system
Use templates and standardized communication processes to save time
Monitor productivity metrics to identify bottlenecks and optimize workflows
Encourage collaboration across teams by integrating with Microsoft Teams and SharePoint
Improving productivity ensures that sales representatives spend more time building relationships and closing deals rather than managing administrative tasks.
Maintaining Customer Data Accuracy
Accurate and up-to-date data is essential for meaningful engagement. Functional consultants implement strategies and tools to ensure data integrity.
Enforce data entry standards and mandatory fields for key customer information
Use duplicate detection to merge redundant records
Implement validation rules to prevent errors in contact details, addresses, and account information
Regularly review and clean data to maintain accuracy
Provide training and support to users to ensure adherence to data management practices
Reliable data ensures that engagement efforts are targeted, relevant, and effective.
Case Study: Improving Engagement in a Global Organization
A multinational technology company leveraged Dynamics 365 Sales to improve customer engagement across its global operations.
Custom dashboards provided real-time visibility into lead and opportunity activity
Integration with marketing automation tools allowed targeted outreach and follow-up
AI-driven recommendations guided sales representatives on high-value opportunities
Automated task management ensured timely follow-ups and reduced missed engagements
Detailed reporting enabled managers to identify areas for improvement and coach teams effectively
As a result, the company increased customer satisfaction, improved lead conversion rates, and accelerated revenue growth, demonstrating the value of well-configured engagement strategies.
Best Practices for Customer Engagement
To maximize the impact of Dynamics 365 Sales on engagement, functional consultants should follow these best practices:
Align engagement processes with organizational goals and sales strategies
Customize dashboards and reports for different roles to provide relevant insights
Leverage AI and predictive analytics to prioritize opportunities and tasks
Integrate sales with marketing tools to ensure consistent communication
Maintain high-quality, accurate data for all customer interactions
Train users on best practices for engagement and system usage
Continuously monitor metrics and refine strategies based on performance data
Following these best practices ensures that customer engagement is both effective and measurable, driving stronger relationships and improved sales outcomes.
Enhancing Customer Experience
Beyond internal processes, Dynamics 365 Sales helps improve the overall customer experience.
Ensure timely responses to inquiries and requests
Provide personalized communication based on customer history and preferences
Track interactions to maintain continuity in multi-channel engagement
Offer proactive recommendations and solutions to anticipate customer needs
Use analytics to understand customer sentiment and adjust engagement strategies
A strong focus on customer experience strengthens loyalty, encourages repeat business, and supports long-term growth.
Reporting and Decision-Making
Accurate reporting and actionable insights enable informed decision-making at all levels of the organization.
Monitor sales pipeline health and forecast revenue accurately
Identify trends in engagement and areas requiring attention
Evaluate the performance of individual representatives and teams
Measure the effectiveness of campaigns and engagement initiatives
Use dashboards and visualizations to communicate insights clearly and quickly
Effective reporting ensures that sales leaders can make strategic decisions that align with business objectives.
Continuous Improvement in Engagement Strategies
Customer engagement strategies must evolve as business needs and market conditions change.
Regularly review engagement metrics and feedback from customers and sales teams
Update workflows, dashboards, and automation rules to reflect current priorities
Introduce new features from Dynamics 365 updates to enhance capabilities
Conduct ongoing training and coaching to ensure best practices are followed
Test new engagement approaches and measure their impact before wide-scale implementation
Continuous improvement ensures that organizations remain competitive and maintain strong relationships with customers.
Maximizing customer engagement with Dynamics 365 Sales is a strategic effort that combines technology, data, and process optimization. Functional consultants play a critical role in configuring the system, integrating tools, leveraging AI, and enabling sales teams to interact with customers effectively.
By capturing detailed interactions, providing actionable insights, and automating routine tasks, Dynamics 365 Sales empowers organizations to deliver personalized, timely, and impactful customer experiences. Well-executed engagement strategies improve conversion rates, strengthen customer relationships, and drive measurable business outcomes.
Certified consultants who master these engagement principles help organizations harness the full potential of Dynamics 365 Sales, creating a sales ecosystem that is productive, data-driven, and customer-focused.
Advancing Your Career with Dynamics 365 Sales Functional Consultant Certification
Earning the Microsoft Certified: Dynamics 365 Sales Functional Consultant Associate certification is not just about validating technical skills—it is a strategic step for advancing your career in CRM, sales technology, and business consulting. This certification demonstrates your ability to configure, manage, and optimize Dynamics 365 Sales solutions, positioning you as an expert capable of delivering tangible business results.
Career Opportunities for Certified Professionals
Certification opens doors to a wide range of career paths in sales technology and CRM consulting. Professionals who hold this certification are highly sought after in industries that rely on digital sales, analytics, and customer engagement. Common roles include:
Dynamics 365 Consultant
CRM Specialist
Sales Solution Architect
Customer Engagement Analyst
Business Process Consultant
These roles span industries such as technology, financial services, retail, healthcare, and manufacturing, reflecting the versatility of Dynamics 365 Sales expertise.
Earning Potential and Market Demand
Certified Dynamics 365 Sales Functional Consultants often command higher salaries due to their specialized skills. Organizations recognize the value of professionals who can streamline sales operations, improve customer engagement, and leverage data to drive revenue. Salary potential varies by region, industry, and experience but is consistently higher than non-certified professionals in similar roles.
Market demand is growing as more organizations adopt Dynamics 365 Sales to digitize and optimize their sales processes. Companies increasingly prioritize hiring certified professionals who can deliver measurable business outcomes.
Building a Professional Portfolio
Beyond the certification, building a professional portfolio enhances credibility and career prospects. A strong portfolio may include:
Documentation of successfully implemented sales workflows and configurations
Dashboards and reports developed for performance tracking and decision-making
Case studies or examples demonstrating measurable business impact
Integration projects with other Microsoft tools such as Power BI, Power Automate, and Teams
Training materials or process guides created for end-users
A well-documented portfolio showcases expertise to potential employers or clients, reinforcing your certification credentials.
Real-World Applications of Skills
Certified professionals apply their knowledge to solve real-world business challenges. Practical applications include:
Designing and implementing sales pipelines that reflect organizational goals
Automating routine tasks to improve productivity and reduce errors
Analyzing engagement metrics to guide strategic decision-making
Integrating Dynamics 365 Sales with marketing, service, and analytics tools
Customizing dashboards, forms, and workflows to meet user needs
By applying these skills, professionals ensure that organizations gain maximum value from their Dynamics 365 Sales implementation.
Enhancing Business Performance
Functional consultants play a key role in driving business performance. Effective configuration and management of Dynamics 365 Sales lead to:
Shorter sales cycles through streamlined processes
Increased lead conversion rates due to prioritized engagement
Improved customer satisfaction and retention
Better forecasting and resource allocation using data insights
Enhanced collaboration between sales, marketing, and service teams
The ability to deliver measurable improvements in these areas strengthens a consultant’s value to the organization.
Maintaining Certification and Continuous Learning
Microsoft certifications require ongoing learning to remain current with platform updates and evolving business practices. Maintaining certification ensures that professionals remain competitive and proficient.
Participate in refresher courses and advanced training modules
Monitor Microsoft release notes and platform updates
Engage in professional communities for best practices and insights
Pursue related certifications in Power Platform, Dynamics 365 Marketing, or Customer Service
Apply new features and enhancements in real-world environments
Continuous learning reinforces skills, keeps knowledge current, and expands career opportunities.
Networking and Professional Communities
Active participation in professional communities enhances learning, networking, and career growth.
Join Microsoft Tech Community forums for discussion and support
Attend industry events, webinars, and conferences to stay informed
Engage in LinkedIn groups and other CRM-focused communities
Collaborate with peers to share solutions, workflows, and best practices
Contribute insights and experiences to blogs, case studies, or presentations
Networking fosters professional relationships, opens opportunities, and provides exposure to emerging trends in CRM and sales technology.
Consulting and Advisory Opportunities
Certified Dynamics 365 Sales Functional Consultants often take on consulting or advisory roles, helping organizations optimize sales operations and CRM strategies.
Assess organizational sales processes and recommend improvements
Configure Dynamics 365 Sales to align with business goals and compliance requirements
Train and support end-users to maximize adoption
Provide insights based on analytics and reporting to inform strategic decisions
Lead integration projects with other systems and tools
These consulting opportunities allow professionals to apply expertise broadly, often across multiple industries, expanding career potential.
Real-World Success Stories
Organizations that leverage certified professionals experience measurable improvements. Examples include:
A retail chain that automated its sales pipeline, improving lead conversion by 25%
A technology company that integrated Dynamics 365 Sales with Power BI, enabling real-time sales performance insights
A financial services firm that used AI-driven recommendations to increase upsell and cross-sell opportunities by 15%
These examples highlight the direct impact certified consultants have on revenue growth, customer satisfaction, and operational efficiency.
Developing Leadership Skills
As professionals gain experience, certification can serve as a foundation for leadership roles.
Lead teams in CRM implementation and optimization projects
Mentor junior consultants or sales analysts
Oversee adoption strategies to ensure organizational alignment
Drive change management initiatives to maximize system utilization
Influence sales strategy using data-driven insights and reports
Leadership skills combined with technical expertise create highly valued professionals capable of strategic contributions to organizational growth.
Strategic Use of Data and Analytics
Certified consultants enable organizations to leverage data for strategic advantage.
Track key performance indicators such as conversion rates, revenue, and pipeline health
Identify trends and opportunities for improvement
Forecast revenue and resource allocation more accurately
Customize dashboards for executives, managers, and sales teams
Provide actionable insights to improve decision-making across the organization
Strategic use of analytics ensures that organizations can make informed, timely, and effective business decisions.
Preparing for Advanced Certifications
The Dynamics 365 Sales Functional Consultant Associate certification can serve as a stepping stone for advanced certifications.
Microsoft Certified: Dynamics 365 Customer Service Functional Consultant
Microsoft Certified: Power Platform App Maker Associate
Microsoft Certified: Dynamics 365 Finance and Operations certifications
Microsoft Certified: Dynamics 365 Solution Architect Expert
Pursuing additional certifications broadens expertise, opens new career paths, and enhances professional credibility.
Tips for Career Growth
To maximize the benefits of certification, professionals should consider:
Gaining hands-on experience with live or trial Dynamics 365 environments
Building a portfolio of successful projects and case studies
Engaging in continuous learning and professional development
Networking within industry communities and forums
Exploring consulting, advisory, or leadership opportunities
These strategies help professionals leverage their certification for long-term career growth and success.
Conclusion
The Microsoft Certified: Dynamics 365 Sales Functional Consultant Associate certification is more than a credential—it is a career accelerator. It validates expertise in configuring, managing, and optimizing Dynamics 365 Sales, while opening doors to diverse opportunities in CRM consulting, sales technology, and business strategy.
Certified professionals are well-equipped to improve customer engagement, streamline sales processes, enhance reporting and analytics, and deliver measurable business outcomes. They can pursue consulting, advisory, and leadership roles, applying their skills across industries and organizations.
By maintaining certification, engaging in continuous learning, and building a professional portfolio, Dynamics 365 Sales Functional Consultants can achieve sustained career growth. Ultimately, this certification empowers professionals to become strategic partners in driving organizational success, providing value that goes beyond technical knowledge to encompass leadership, insight, and business impact.
ExamCollection provides the complete prep materials in vce files format which include Microsoft Certified: Dynamics 365 Sales Functional Consultant Associate certification exam dumps, practice test questions and answers, video training course and study guide which help the exam candidates to pass the exams quickly. Fast updates to Microsoft Certified: Dynamics 365 Sales Functional Consultant Associate certification exam dumps, practice test questions and accurate answers vce verified by industry experts are taken from the latest pool of questions.


Microsoft Microsoft Certified: Dynamics 365 Sales Functional Consultant Associate Video Courses


Top Microsoft Certifications


Top Microsoft Certification Exams
- AZ-104
- AZ-305
- AB-100
- AI-103
- SC-300
- DP-700
- PL-300
- AB-900
- MD-102
- SC-200
- AZ-900
- SC-401
- MS-102
- DP-600
- SC-100
- AZ-700
- AZ-500
- AI-900
- AB-731
- AB-730
- GH-300
- AI-102
- PL-400
- AZ-400
- AZ-204
- AZ-140
- DP-300
- AI-901
- SC-900
- AZ-801
- SC-500
- AI-300
- MS-700
- DP-800
- PL-900
- AZ-800
- PL-200
- PL-600
- DP-750
- AB-620
- MB-800
- MB-310
- DP-900
- MB-330
- MB-820
- MB-230
- MS-721
- MB-280
- AB-410
- GH-900
- MB-500
- DP-420
- GH-200
- MB-700
- PL-500
- GH-500
- GH-100
- AI-200
- MB-335
- MS-900
- AZ-120
- SC-400
- DP-100
- MB-240
- GH-600
- 62-193
- MO-400
- MS-203
Site Search:


