Pass Your Amazon AWS Certified SysOps Administrator - Associate Certification Easy!
Amazon AWS Certified SysOps Administrator - Associate Certification Exams Questions & Answers, Accurate & Verified By IT Experts
Instant Download, Free Fast Updates, 99.6% Pass Rate.

$62.99
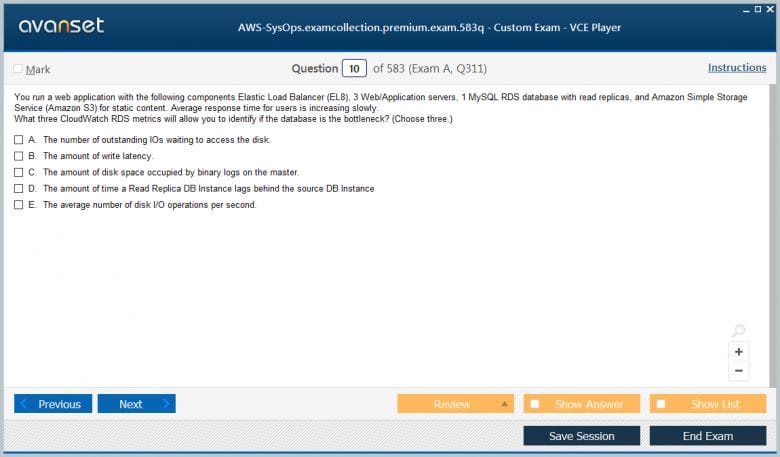
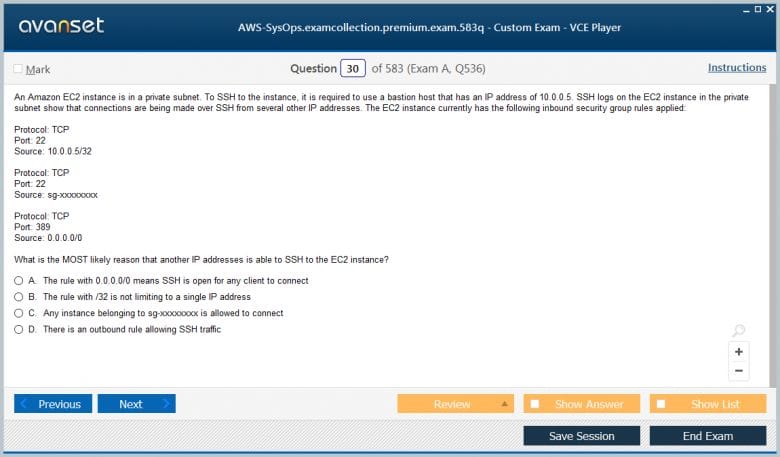
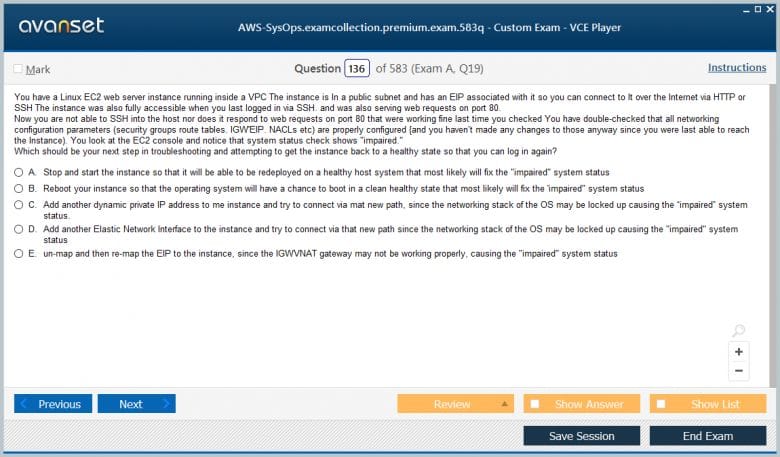
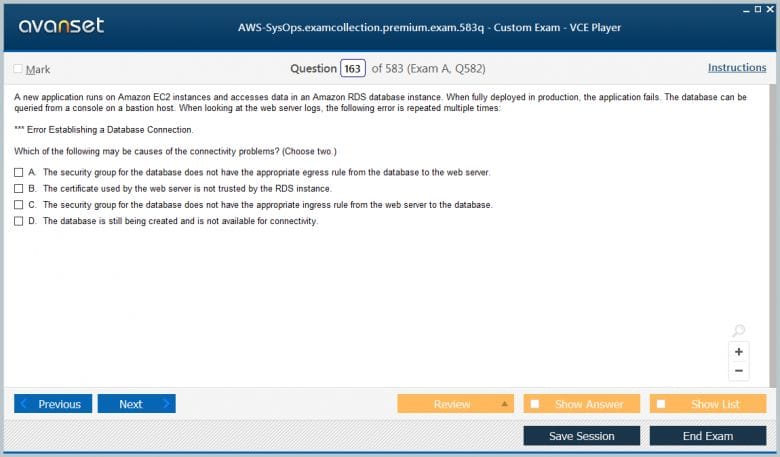
Amazon AWS Certified SysOps Administrator - Associate Certification Exams Screenshots
AWS Certified SysOps Administrator - Associate Product Reviews
Download Free AWS Certified SysOps Administrator - Associate Practice Test Questions VCE Files
| Exam | Title | Files |
|---|---|---|
Exam AWS Certified SysOps Administrator - Associate |
Title AWS Certified SysOps Administrator - Associate (SOA-C02) |
Files 6 |
Exam AWS-SysOps |
Title AWS Certified SysOps Administrator (SOA-C01) |
Files 22 |
Amazon AWS Certified SysOps Administrator - Associate Certification Exam Dumps & Practice Test Questions
Prepare with top-notch Amazon AWS Certified SysOps Administrator - Associate certification practice test questions and answers, vce exam dumps, study guide, video training course from ExamCollection. All Amazon AWS Certified SysOps Administrator - Associate certification exam dumps & practice test questions and answers are uploaded by users who have passed the exam themselves and formatted them into vce file format.
Introduction to Amazon AWS Certified SysOps Administrator – Associate
In the modern IT landscape, cloud computing has become the backbone of scalable, efficient, and cost-effective infrastructure management. Amazon Web Services (AWS) stands out as one of the most widely adopted cloud platforms, powering millions of applications worldwide. Among the certifications offered by AWS, the SysOps Administrator – Associate credential is designed for IT professionals focused on operations, system administration, and management within AWS environments.
This certification validates a candidate’s ability to deploy, manage, and operate scalable, fault-tolerant systems in AWS. It targets professionals who monitor cloud applications, optimize resource utilization, implement operational best practices, and ensure the security and compliance of AWS infrastructures. Achieving this certification demonstrates a comprehensive understanding of operational processes and the technical skills required to manage complex cloud ecosystems effectively.
Organizations increasingly depend on cloud infrastructure for business continuity, cost optimization, and digital transformation initiatives. Having certified SysOps administrators ensures operational excellence, enabling companies to maintain system reliability, improve performance, and reduce downtime. The credential not only enhances individual career prospects but also signals to employers that the holder has the expertise to manage and optimize AWS environments in real-world scenarios.
Key Roles and Responsibilities
The role of an AWS SysOps Administrator is multifaceted, encompassing operational, technical, and strategic aspects. Professionals in this position ensure that cloud systems are efficiently deployed, monitored, and maintained. The following outlines the core responsibilities:
Deployment and Configuration: SysOps administrators deploy AWS services such as EC2 instances, S3 storage, RDS databases, and networking components. They are responsible for ensuring these resources are configured according to best practices and aligned with business requirements.
Monitoring and Performance Management: Monitoring system health, performance metrics, and logs is crucial. Administrators leverage tools like Amazon CloudWatch, CloudTrail, and AWS Config to track performance, identify anomalies, and take corrective action before issues impact operations.
Automation and Process Optimization: Automation is central to operational efficiency. SysOps administrators use AWS CLI, SDKs, and tools such as CloudFormation or Elastic Beanstalk to automate resource provisioning, configuration management, and repetitive administrative tasks.
Security and Compliance: Ensuring secure operations involves configuring identity and access management (IAM), enforcing encryption standards, implementing security policies, and maintaining compliance with industry regulations and organizational guidelines.
Troubleshooting and Incident Management: Administrators diagnose and resolve operational issues, performing root cause analysis and implementing recovery strategies to minimize downtime. They manage alerts, conduct system audits, and maintain a proactive approach to incident resolution.
Cost Optimization: Part of operational responsibility includes analyzing resource utilization and identifying cost-saving opportunities. This involves selecting the right instance types, leveraging reserved instances, and using AWS cost management tools to reduce unnecessary spending.
Essential Skills for AWS SysOps Administrators
To excel as a SysOps Administrator and succeed in the certification exam, candidates need a comprehensive skill set. These skills encompass technical knowledge, operational expertise, and strategic insight:
Understanding Core AWS Services: Proficiency with EC2, S3, RDS, VPC, Lambda, CloudFormation, and IAM is fundamental. Administrators must know how these services interconnect, how to deploy them efficiently, and how to troubleshoot related issues.
Monitoring and Metrics Analysis: Competence in using CloudWatch, CloudTrail, AWS Config, and third-party monitoring tools allows administrators to track system performance, detect anomalies, and optimize workloads.
Automation Proficiency: Familiarity with scripting and automation tools such as AWS CLI, SDKs, and CloudFormation helps in automating deployment, scaling, and maintenance processes. Automation reduces errors and improves operational efficiency.
Networking and Security Knowledge: A strong understanding of networking concepts, including VPC configuration, subnets, route tables, NAT gateways, security groups, and firewall rules, is essential. Security expertise involves implementing IAM policies, encryption protocols, and compliance standards.
Disaster Recovery and High Availability: Administrators must design fault-tolerant architectures and implement backup and disaster recovery plans. This includes multi-region deployments, snapshots, and failover strategies.
Cost Management and Optimization: Efficient use of AWS resources requires analyzing usage patterns, selecting the right services, and optimizing storage, compute, and database resources to minimize operational costs without compromising performance.
Overview of the Certification Exam
The AWS Certified SysOps Administrator – Associate exam evaluates a candidate’s ability to perform operational tasks and manage AWS environments. Key details of the exam include:
Exam Format: The test includes multiple-choice and multiple-response questions, assessing both theoretical knowledge and practical problem-solving abilities.
Duration and Language: Candidates have 130 minutes to complete the exam. The test is offered in multiple languages, including English, Japanese, Korean, and Simplified Chinese.
Domains Covered: The exam assesses knowledge across several domains, including Monitoring and Metrics, Deployment and Provisioning, Security and Compliance, Networking and Content Delivery, High Availability and Business Continuity, and Data Management and Storage.
Recommended Experience: AWS recommends that candidates have at least two years of hands-on experience operating AWS-based systems and working knowledge of core AWS services. Familiarity with deployment, management, and operational best practices is essential for success.
Exam Preparation: Preparing for the exam involves studying AWS whitepapers, taking hands-on labs, practicing sample questions, and understanding case studies of real-world AWS environments. Practical experience is highly valuable, as it bridges the gap between theoretical knowledge and operational competence.
Deployment and Provisioning Best Practices
Efficient deployment and provisioning of AWS resources are critical to operational success. SysOps administrators must follow best practices to ensure systems are scalable, secure, and maintainable:
Infrastructure as Code (IaC): Tools like AWS CloudFormation and Terraform allow administrators to define infrastructure using code. This ensures consistency, version control, and repeatable deployments.
Automated Provisioning: Using AWS CLI, SDKs, and services like Elastic Beanstalk simplifies resource provisioning and reduces manual errors. Automated provisioning supports quick scaling and rapid deployment cycles.
Resource Tagging: Properly tagging resources improves visibility, cost tracking, and management. Tags can indicate environment type, owner, purpose, or application, helping administrators organize and optimize resources effectively.
Configuration Management: Services like AWS Systems Manager enable administrators to maintain consistent configurations across instances, deploy patches, and automate routine administrative tasks.
Testing and Validation: Before deploying production workloads, administrators should test configurations in staging or sandbox environments. Validating resource setups ensures reliability, security, and performance efficiency.
Monitoring, Logging, and Operational Visibility
Maintaining operational visibility is essential for proactive system management. SysOps administrators rely on monitoring and logging to identify issues, optimize performance, and meet compliance requirements:
CloudWatch Metrics and Alarms: CloudWatch provides detailed monitoring of AWS resources, including CPU utilization, disk I/O, and network traffic. Administrators can set alarms to notify teams of performance issues or threshold breaches.
CloudTrail Auditing: AWS CloudTrail logs all API calls, enabling administrators to audit system activity, track changes, and investigate security incidents.
Centralized Logging: Consolidating logs using services like CloudWatch Logs or third-party solutions improves analysis, reporting, and troubleshooting efficiency.
Operational Dashboards: Dashboards provide real-time visualization of system health and performance, helping administrators make informed decisions and respond promptly to emerging issues.
Automated Remediation: Using CloudWatch and AWS Lambda, administrators can trigger automated actions in response to predefined events, such as restarting an instance or scaling resources to handle load spikes.
Security and Compliance Management
Security is a top priority in cloud operations. SysOps administrators are responsible for implementing robust security measures and ensuring compliance with regulatory standards:
Identity and Access Management (IAM): Administrators manage users, roles, and permissions using IAM. Implementing least-privilege policies reduces the risk of unauthorized access.
Data Encryption: AWS provides multiple options for encrypting data at rest and in transit. Administrators must ensure sensitive information is encrypted using services like KMS and SSL/TLS.
Security Groups and Network ACLs: Configuring proper network security rules ensures that only authorized traffic reaches the resources.
Compliance and Auditing: Administrators use AWS Config, CloudTrail, and third-party tools to maintain compliance with standards such as HIPAA, PCI-DSS, or GDPR. Regular audits help identify gaps and enforce security best practices.
Incident Response Planning: Having a well-defined plan for security incidents, including automated alerting, investigation, and remediation, ensures rapid resolution and minimal operational impact.
High Availability and Disaster Recovery
Maintaining high availability and planning for disaster recovery are critical aspects of SysOps administration:
Multi-AZ Deployments: Deploying resources across multiple availability zones reduces the risk of service disruption due to hardware failure or maintenance events.
Automated Backups: Implementing regular backups for databases, storage, and configurations ensures that critical data can be restored in case of failure.
Failover Mechanisms: Configuring automated failover for critical applications ensures business continuity. Load balancers and routing policies can redirect traffic to healthy instances during outages.
Disaster Recovery Strategies: Administrators design recovery plans with defined RTO (Recovery Time Objective) and RPO (Recovery Point Objective), balancing cost with business requirements.
Testing Recovery Procedures: Regularly testing backup and recovery processes ensures that disaster recovery strategies are effective and that staff are prepared for emergencies.
Cost Optimization Strategies
Efficient cost management is an integral part of SysOps administration:
Resource Rightsizing: Analyzing usage patterns and selecting the appropriate instance types reduces costs without compromising performance.
Reserved and Spot Instances: Leveraging reserved instances or spot instances helps reduce long-term and short-term costs respectively.
Storage Optimization: Using lifecycle policies to move infrequently accessed data to lower-cost storage tiers optimizes expenses.
Monitoring and Alerts: AWS Cost Explorer and Budgets enable administrators to monitor spending and receive alerts when usage exceeds thresholds.
Operational Efficiency: Automating shutdowns for idle resources and removing unused assets reduces waste and enhances cost-effectiveness.
Exam Preparation Tips
Preparation for the AWS Certified SysOps Administrator – Associate exam requires a mix of theoretical knowledge and hands-on experience:
Hands-On Labs: Working with AWS services in real-world scenarios builds confidence and practical skills.
Study Resources: AWS whitepapers, online courses, and documentation provide in-depth knowledge of best practices, services, and operational strategies.
Practice Exams: Simulated tests help candidates understand the exam format, identify knowledge gaps, and improve time management.
Focus on Weak Areas: Regularly reviewing challenging topics, such as CloudFormation, monitoring, and networking, ensures comprehensive preparation.
Review Case Studies: Exam questions often include scenario-based problems. Understanding how to approach these scenarios is critical for success.
Career Benefits and Opportunities
Earning the AWS Certified SysOps Administrator – Associate credential opens up numerous career opportunities and benefits:
Enhanced Job Prospects: Certified professionals are in high demand by organizations seeking skilled cloud administrators.
Higher Earning Potential: Certification often correlates with increased salary and career advancement opportunities.
Professional Recognition: It validates expertise in cloud operations, signaling competence to employers and peers.
Broader Skill Set: Preparing for the certification enhances knowledge of AWS services, automation, security, and operational management.
Path to Advanced Roles: This certification serves as a foundation for more advanced AWS credentials, such as the AWS Certified DevOps Engineer – Professional.
The AWS Certified SysOps Administrator – Associate certification represents a significant milestone for IT professionals aiming to specialize in cloud operations. It validates essential skills in deployment, monitoring, automation, security, disaster recovery, and cost optimization, providing a competitive edge in a rapidly growing cloud market.
By earning this certification, professionals gain not only technical expertise but also the credibility to manage and optimize AWS environments effectively. Organizations benefit from having certified administrators who can ensure operational excellence, reduce downtime, and enhance system performance.
For IT professionals seeking to advance their careers in cloud operations, the SysOps Administrator – Associate certification offers a valuable pathway to professional growth, recognition, and long-term success.
Advanced Monitoring and Metrics Management
Effective monitoring is a cornerstone of successful cloud operations. AWS provides a comprehensive suite of monitoring tools that allow SysOps administrators to maintain visibility into system health, performance, and security. Amazon CloudWatch is the primary service for monitoring AWS resources, offering metrics such as CPU utilization, disk I/O, memory usage, and network traffic. Administrators can create dashboards to visualize these metrics in real-time, enabling rapid identification of performance bottlenecks or unusual activity.
CloudWatch also supports setting alarms, which trigger notifications or automated actions when defined thresholds are exceeded. This proactive approach allows administrators to address issues before they escalate, ensuring high availability and operational efficiency. In addition to CloudWatch, AWS CloudTrail provides detailed auditing of all API activity within the environment, enabling administrators to track changes, investigate security incidents, and maintain compliance with regulatory requirements.
Using these monitoring tools in combination allows administrators to correlate performance data with operational events, improving incident response and overall system management. Implementing centralized logging through CloudWatch Logs or third-party solutions further enhances visibility, making it easier to analyze system behavior, detect anomalies, and generate operational reports for management or compliance audits.
Automation and Operational Efficiency
Automation is a critical aspect of modern cloud operations. AWS offers a range of tools and services that allow administrators to automate routine tasks, improve consistency, and reduce the risk of human error. Infrastructure as Code (IaC) through AWS CloudFormation enables administrators to define and deploy entire environments using code. This ensures that infrastructure can be replicated reliably across multiple environments and reduces configuration drift.
AWS Systems Manager provides additional automation capabilities, including patch management, configuration compliance, and the execution of routine maintenance tasks. Administrators can create automation documents to perform complex operational workflows with minimal manual intervention. Using AWS Lambda, administrators can implement event-driven automation, such as automatically scaling resources based on usage metrics or remediating security issues detected through monitoring tools.
Automation not only increases operational efficiency but also allows administrators to focus on strategic tasks rather than repetitive maintenance. By standardizing processes and workflows, organizations achieve greater reliability, consistency, and faster deployment cycles. Automation also contributes to cost optimization by ensuring resources are used efficiently and unnecessary consumption is minimized.
Networking and Security Best Practices
A solid understanding of networking and security is essential for a SysOps administrator. AWS provides a highly configurable networking environment through Virtual Private Clouds (VPCs), subnets, route tables, NAT gateways, and security groups. Administrators must design and configure these components to ensure secure, reliable, and high-performing network connectivity for applications and services.
Security in AWS extends beyond network configuration. Identity and Access Management (IAM) allows administrators to control access to resources by defining users, groups, roles, and policies. Implementing least-privilege access and multi-factor authentication ensures that only authorized personnel can perform critical actions. Data encryption, both at rest and in transit, is vital for protecting sensitive information. Services such as AWS Key Management Service (KMS) and SSL/TLS certificates provide robust encryption capabilities.
Administrators should also regularly audit security configurations using AWS Config and other auditing tools. Maintaining compliance with industry regulations such as HIPAA, PCI-DSS, and GDPR is an integral part of operational responsibilities. Automated alerts and incident response plans ensure that potential security breaches are identified and mitigated promptly, minimizing operational impact.
High Availability and Scalability
Maintaining high availability and scalability is critical for cloud-based systems. SysOps administrators design architectures that are resilient to failures and can handle varying workloads without performance degradation. Deploying resources across multiple Availability Zones (AZs) ensures that applications remain available even in the event of a localized failure. Load balancers distribute traffic evenly across instances, improving both performance and reliability.
Scalability is achieved through services such as Auto Scaling, which adjusts the number of instances based on current demand. Administrators can define scaling policies that automatically add or remove instances in response to usage patterns, ensuring optimal performance while controlling costs. Combining high availability and scalability ensures that applications can handle sudden spikes in traffic, maintain uptime, and provide a seamless experience for users.
Disaster recovery planning complements high availability strategies by defining recovery objectives, implementing backups, and establishing failover procedures. Administrators must regularly test these procedures to ensure that recovery times meet organizational requirements and that systems can be restored quickly in the event of a catastrophic failure.
Backup and Disaster Recovery Strategies
Effective backup and disaster recovery (DR) planning is essential for operational resilience. AWS provides multiple services and features to support these strategies, including Amazon S3, Glacier, EBS snapshots, and RDS automated backups. Administrators should implement a combination of backup methods to ensure that critical data and configurations can be restored quickly.
Defining Recovery Time Objectives (RTO) and Recovery Point Objectives (RPO) is central to disaster recovery planning. RTO determines the acceptable downtime, while RPO defines the maximum tolerable data loss. These objectives guide the selection of backup strategies and replication methods. Multi-region replication and cross-AZ deployments enhance fault tolerance and support rapid recovery in case of localized failures.
Regular testing of DR plans is crucial to validate their effectiveness. Administrators simulate failure scenarios to ensure that backups are complete, recovery procedures are executable, and business continuity can be maintained. Effective DR planning not only mitigates risk but also instills confidence in the reliability of cloud operations.
Cost Management and Optimization Techniques
Managing costs is a vital responsibility for SysOps administrators. AWS provides a range of tools to monitor, analyze, and optimize spending across cloud resources. Using AWS Cost Explorer, administrators can track usage patterns, identify underutilized resources, and allocate costs to different projects or teams. Implementing budgets and alerts helps prevent overspending and ensures that operations remain within financial targets.
Rightsizing resources is a key cost optimization technique. Selecting appropriate instance types, adjusting storage tiers, and terminating idle resources reduces unnecessary expenditure without compromising performance. Reserved Instances and Spot Instances offer additional cost-saving opportunities by providing discounted pricing for predictable or flexible workloads.
Storage optimization also plays a critical role in cost management. Moving infrequently accessed data to lower-cost storage tiers, implementing lifecycle policies, and deleting obsolete data helps control storage costs. By combining monitoring, automation, and resource management, administrators can ensure that cloud operations remain efficient, cost-effective, and sustainable.
Incident Response and Troubleshooting
Proactive incident response and troubleshooting are critical for maintaining operational stability. SysOps administrators must be capable of diagnosing and resolving issues quickly to minimize downtime and prevent service disruptions. Monitoring tools, logs, and alerts provide the information needed to identify root causes and implement corrective actions.
Administrators should establish incident response procedures, including automated notifications, escalation processes, and remediation steps. Using tools such as CloudWatch Alarms and Lambda functions, common issues can be resolved automatically, reducing response time and operational overhead. Regularly reviewing incidents and post-mortem analyses helps identify recurring problems, improve processes, and enhance overall system reliability.
Effective troubleshooting requires a deep understanding of AWS services, interdependencies between resources, and the impact of configuration changes. By combining technical expertise with structured incident management, administrators can maintain system performance, security, and availability even during complex operational challenges.
Logging, Auditing, and Compliance
Maintaining detailed logs and conducting regular audits are essential for security, compliance, and operational insight. AWS CloudTrail captures all API activity, enabling administrators to track changes, detect unauthorized access, and investigate incidents. Centralized logging through CloudWatch Logs or third-party solutions allows for efficient analysis and reporting.
Auditing ensures that operational practices align with organizational policies and regulatory standards. Administrators should regularly review configurations, access controls, and system activity to verify compliance with requirements such as GDPR, HIPAA, and PCI-DSS. Automated compliance checks and continuous monitoring help identify deviations and enforce corrective actions promptly.
By combining logging, auditing, and compliance practices, administrators maintain transparency, accountability, and operational excellence, while reducing risk and ensuring that systems meet both technical and regulatory standards.
Automation for Operational Excellence
Continuous improvement in cloud operations is achieved through automation. Beyond basic task automation, advanced operational automation involves orchestration of workflows, automated scaling, patch management, and remediation of detected issues. AWS Systems Manager, Lambda, and Step Functions enable administrators to create sophisticated automation pipelines that maintain system health without manual intervention.
For example, automatic patch deployment ensures that instances are updated with the latest security and software updates, reducing vulnerabilities. Auto-scaling combined with CloudWatch metrics allows for dynamic adjustment of resources in response to load, ensuring consistent performance and cost efficiency. Automated remediation of alerts can restart failed instances, adjust configurations, or trigger notifications, allowing administrators to focus on higher-level operational strategy and optimization.
Best Practices for Certification Preparation
To achieve the AWS Certified SysOps Administrator – Associate certification, a combination of theoretical knowledge and hands-on experience is essential. Candidates should focus on mastering core AWS services, understanding operational best practices, and gaining experience in real-world deployment scenarios.
Studying AWS whitepapers, documentation, and case studies provides foundational knowledge, while hands-on labs and practice environments allow candidates to apply concepts in realistic scenarios. Sample questions and practice exams help identify knowledge gaps and improve exam readiness. Understanding scenario-based questions is particularly important, as the exam often tests practical decision-making and troubleshooting skills.
Collaborating with peers, participating in study groups, and reviewing community experiences can provide additional insights and strategies for success. By combining these approaches, candidates can build the confidence and expertise required to pass the exam and excel in professional cloud operations roles.
Career Advancement Opportunities
Earning the AWS Certified SysOps Administrator – Associate credential opens doors to advanced career opportunities. Certified professionals are recognized for their expertise in cloud operations, deployment, monitoring, security, and cost management. Organizations value this certification as it demonstrates the ability to manage complex AWS environments effectively.
Professionals can advance to roles such as senior SysOps administrator, cloud operations manager, DevOps engineer, or cloud architect. The certification also serves as a foundation for higher-level AWS credentials, including professional-level certifications that focus on advanced architecture, automation, and DevOps practices. In addition to career growth, certified professionals often enjoy higher earning potential, greater job security, and opportunities to work on cutting-edge cloud projects.
The AWS Certified SysOps Administrator – Associate certification equips IT professionals with the skills and knowledge needed to manage and optimize AWS environments effectively. Advanced monitoring, automation, security, high availability, disaster recovery, and cost optimization are core components of operational excellence.
By mastering these areas, administrators ensure that cloud infrastructure remains reliable, secure, scalable, and cost-efficient. Achieving this certification not only validates expertise but also enhances career opportunities, professional recognition, and the ability to contribute meaningfully to organizational success. For IT professionals committed to cloud operations, this certification represents both a milestone and a pathway to continued growth in the dynamic world of AWS cloud management.
Real-World Deployment Scenarios
Deploying applications in AWS involves understanding real-world business requirements, workload characteristics, and operational constraints. SysOps administrators are responsible for translating these needs into scalable, secure, and cost-effective solutions. A typical deployment scenario might involve hosting a web application with a database backend, requiring careful planning of EC2 instances, RDS configurations, S3 storage, and VPC networking.
Administrators must design architectures that ensure high availability, fault tolerance, and performance optimization. Decisions such as instance types, storage options, and network topology are influenced by factors like expected traffic, data volume, and regulatory compliance requirements. Deployments often include automation scripts to provision resources, configure instances, and integrate monitoring tools to maintain operational visibility. Real-world deployments also emphasize resilience, using multi-AZ and multi-region strategies to handle failures and maintain continuous service availability.
Scaling Strategies for Dynamic Workloads
Dynamic workloads require flexible scaling solutions to maintain performance and efficiency. AWS Auto Scaling enables SysOps administrators to automatically adjust the number of instances based on metrics like CPU utilization, network throughput, or application response times. Administrators define scaling policies to increase capacity during traffic spikes and reduce it during low usage periods, optimizing costs without compromising performance.
In addition to vertical scaling, which increases resources on existing instances, horizontal scaling adds or removes instances based on demand. Load balancers distribute traffic evenly across instances to prevent bottlenecks and ensure responsiveness. Scaling strategies should also consider database and storage layers, using read replicas, caching mechanisms, and storage tiers to balance performance and cost efficiency. Proper monitoring and analysis of scaling metrics are essential for fine-tuning policies and maintaining operational excellence.
Advanced Monitoring and Alerting
Effective monitoring and alerting systems are critical for proactive cloud operations. Administrators use Amazon CloudWatch to track resource metrics, set thresholds, and trigger alarms when anomalies occur. Alerts can notify teams through SNS (Simple Notification Service) or initiate automated remediation actions via Lambda functions.
Advanced monitoring involves correlating multiple metrics to identify root causes, rather than reacting to isolated alerts. For example, high CPU utilization coupled with increased network traffic may indicate a legitimate spike in user activity, whereas a combination of high CPU and low network traffic could suggest a misconfigured process or malfunctioning instance. Administrators also leverage CloudWatch Logs and AWS X-Ray to trace application requests, diagnose latency issues, and monitor microservices architectures for performance bottlenecks and errors.
Security and Compliance in Real-World Operations
Maintaining security and compliance is an ongoing responsibility for SysOps administrators. Real-world operations require implementing layered security measures, including network security, access controls, encryption, and monitoring for suspicious activity. AWS Identity and Access Management (IAM) allows administrators to define roles and permissions for users and applications, adhering to the principle of least privilege.
Administrators must also enforce encryption for data at rest and in transit using KMS, SSL/TLS, and S3 encryption options. Security groups and network ACLs control inbound and outbound traffic, protecting resources from unauthorized access. Compliance requirements, such as HIPAA, PCI-DSS, and GDPR, dictate auditing, reporting, and operational procedures. Continuous monitoring, periodic audits, and automated compliance checks ensure that operational practices meet regulatory standards, reducing risk and supporting organizational accountability.
Incident Management and Troubleshooting
Incident management is critical to maintaining service reliability. SysOps administrators develop structured procedures for identifying, responding to, and resolving operational issues. Monitoring tools provide alerts, while logs and dashboards offer insights into system health and behavior. Administrators perform root cause analysis to determine the underlying issues and implement solutions to prevent recurrence.
Effective troubleshooting involves understanding AWS service dependencies, network configurations, and application behavior. Administrators often simulate failure scenarios to identify potential weaknesses and validate recovery processes. Collaboration with development teams ensures that application-specific issues are addressed, and automated remediation tools help resolve recurring operational problems efficiently. Documenting incidents and lessons learned improves response strategies and strengthens operational resilience over time.
Backup Strategies and Data Recovery
Robust backup strategies are vital for protecting critical data and ensuring business continuity. AWS offers multiple options, including snapshots for EC2 instances, RDS automated backups, and Amazon S3 versioning. Administrators must design backup policies that meet recovery objectives, balancing cost, data retention, and restoration speed.
Recovery point objectives (RPO) and recovery time objectives (RTO) guide backup frequency and storage locations. Multi-region replication and cross-AZ backups enhance fault tolerance and availability. Administrators test recovery procedures regularly to confirm that backups are complete and restoration processes are efficient. Automated backup schedules, combined with lifecycle policies, help manage storage costs while maintaining readiness for unexpected data loss or system failures.
Automation for Reliability
Automation plays a key role in achieving operational reliability. Using AWS Systems Manager, administrators can automate tasks such as patch management, configuration compliance, and operational workflows. Lambda functions enable event-driven automation, responding to system alerts, scaling requirements, or security incidents without manual intervention.
Automation reduces human error, ensures consistency, and accelerates operational processes. For example, automated scaling adjusts compute capacity in response to workload changes, while automated remediation can restart failed instances, clean up misconfigured resources, or trigger alerts for further investigation. Administrators should continuously evaluate and refine automation scripts to align with evolving workloads and organizational requirements.
Cost Optimization in Operational Scenarios
Operational cost management is an integral responsibility of SysOps administrators. Analyzing resource utilization, rightsizing instances, and identifying idle or underutilized resources help control expenses. Administrators can leverage AWS Trusted Advisor and Cost Explorer to review usage patterns and implement cost-saving measures.
Reserved Instances and Spot Instances offer strategic opportunities to reduce costs for predictable and flexible workloads. Storage costs can be optimized using tiered storage, lifecycle policies, and archival options. Monitoring and alerting for budget thresholds ensures that resource usage remains aligned with financial objectives. Combining proactive monitoring, automation, and cost management tools enables administrators to maintain operational efficiency while minimizing expenses.
Networking in Complex Environments
Designing and managing networking in AWS requires a thorough understanding of VPCs, subnets, routing tables, and network security. Administrators configure VPC peering, NAT gateways, and VPN connections to enable secure and efficient communication between services and external networks.
Security groups and network ACLs provide granular control over traffic flow, while monitoring tools help identify anomalies or misconfigurations. Properly architected networks support high availability, performance, and compliance requirements. Administrators must also plan for future growth, ensuring that network architectures are scalable and adaptable to evolving business needs.
Case Studies in SysOps Operations
Practical case studies illustrate how SysOps administrators manage real-world AWS environments. For instance, deploying a global e-commerce platform may involve multi-region redundancy, auto-scaling EC2 instances, RDS read replicas, and S3 for static content storage. Administrators monitor performance, apply patches automatically, and implement cost optimization strategies to handle variable traffic while maintaining uptime.
Another scenario might involve a financial services application with strict compliance requirements. Administrators implement encryption, audit logging, and access controls, ensuring that sensitive data remains protected and that operational practices adhere to regulatory standards. Case studies help administrators understand best practices, anticipate challenges, and apply learned strategies to similar environments effectively.
Advanced Monitoring Techniques
Beyond basic monitoring, advanced techniques allow administrators to anticipate potential issues and optimize performance. Predictive analytics using CloudWatch metrics and machine learning can identify trends that indicate upcoming capacity requirements or system bottlenecks. Administrators can set dynamic thresholds and adaptive alerts to improve response times.
Integration of multiple monitoring tools enables correlation of logs, metrics, and events, providing a holistic view of system health. Custom dashboards visualize complex relationships between resources, applications, and dependencies. By leveraging advanced monitoring techniques, administrators enhance operational insight, improve incident response, and proactively maintain system reliability.
Security Automation and Threat Detection
Automating security processes enhances protection while reducing operational overhead. AWS GuardDuty, Macie, and Security Hub provide automated threat detection, vulnerability analysis, and compliance monitoring. Administrators can integrate these services with automated remediation workflows, responding to suspicious activity without manual intervention.
For example, GuardDuty alerts can trigger Lambda functions to isolate compromised instances, adjust security group rules, or notify security teams. Administrators also implement automated IAM audits and compliance checks, ensuring that access controls remain aligned with organizational policies. Security automation allows continuous monitoring and proactive threat mitigation in complex cloud environments.
Real-Time Operational Visibility
Achieving real-time operational visibility is essential for maintaining high-performing AWS systems. Administrators combine CloudWatch dashboards, logging services, and third-party monitoring tools to observe resource utilization, application performance, and network behavior simultaneously.
Real-time insights enable quick decision-making, allowing administrators to adjust resources, troubleshoot issues, or optimize workflows as needed. Event-driven automation further enhances responsiveness by initiating corrective actions immediately when operational thresholds are breached. Continuous visibility ensures that systems remain reliable, secure, and aligned with business objectives.
Cost Analysis and Reporting
Comprehensive cost analysis supports operational and strategic decision-making. Administrators use AWS Cost Explorer, Budgets, and Trusted Advisor to track expenses, identify trends, and forecast future costs. Detailed reporting allows teams to allocate budgets effectively, plan resource usage, and optimize financial performance.
Regular review of usage patterns highlights opportunities for cost reduction, such as consolidating underutilized instances, selecting cost-efficient storage tiers, or leveraging reserved instances. Effective cost reporting provides transparency, accountability, and a foundation for ongoing operational improvements.
Continuous Improvement Practices
Operational excellence requires a mindset of continuous improvement. SysOps administrators regularly review metrics, incidents, and process effectiveness to identify areas for enhancement. Lessons learned from incidents inform changes to procedures, automation, and monitoring practices.
Administrators also stay informed about new AWS services, features, and best practices, integrating innovative solutions into operational workflows. Continuous improvement ensures that cloud operations remain efficient, resilient, and aligned with evolving business and technical requirements.
Managing AWS environments as a SysOps administrator involves a combination of technical expertise, operational insight, and strategic thinking. Real-world deployments, scaling strategies, monitoring, automation, security, cost optimization, and continuous improvement are all critical for achieving operational excellence.
By mastering these skills and applying them in practical scenarios, administrators ensure that cloud infrastructure is reliable, secure, scalable, and cost-effective. The AWS Certified SysOps Administrator – Associate certification validates this expertise, enhancing career prospects, professional recognition, and the ability to contribute meaningfully to organizational success.
Advanced Automation and Orchestration
Automation is the cornerstone of operational efficiency in AWS environments. SysOps administrators use AWS automation tools to streamline deployment, monitoring, and management tasks. AWS Systems Manager enables administrators to create automated workflows for patching, configuration management, and maintenance operations. By using automation documents (runbooks), repetitive tasks can be executed reliably across multiple instances without human intervention.
AWS Lambda allows event-driven automation, enabling administrators to respond to changes in real-time. For example, a Lambda function can automatically restart a failed EC2 instance, adjust security group configurations, or notify the operations team about unusual activity. Step Functions allow orchestration of complex workflows, integrating multiple AWS services to execute end-to-end processes automatically. Advanced automation reduces operational errors, enhances consistency, and frees administrators to focus on strategic initiatives.
Multi-Region and Multi-AZ Deployments
High availability and resilience are critical in large-scale AWS environments. Multi-AZ deployments distribute resources across multiple availability zones within a region, protecting against localized failures. EC2 instances, RDS databases, and load balancers can be configured to operate in multiple AZs, ensuring continuity of service during infrastructure outages.
Multi-region deployments extend this concept by distributing resources across geographically distinct AWS regions. This approach provides disaster recovery capabilities, reduces latency for global users, and ensures compliance with regulatory requirements for data residency. Administrators must carefully plan networking, DNS, replication, and failover mechanisms to achieve seamless multi-region operations. Understanding the trade-offs between cost, latency, and resilience is key to designing effective multi-region architectures.
Advanced Monitoring and Proactive Operations
Maintaining operational excellence requires more than basic monitoring. SysOps administrators implement proactive monitoring strategies using CloudWatch, CloudTrail, and X-Ray to analyze metrics, trace requests, and identify potential issues before they affect users.
Custom CloudWatch dashboards provide real-time visualization of system performance, while anomaly detection and predictive analytics help anticipate performance degradation or resource saturation. Administrators can set dynamic alarms based on thresholds derived from historical patterns, enabling smarter response mechanisms. Integrating monitoring with automated remediation workflows allows for immediate action, such as scaling resources or adjusting configurations, enhancing operational reliability and minimizing downtime.
Security Automation and Governance
In complex AWS environments, maintaining security and governance is an ongoing responsibility. Administrators use services like AWS GuardDuty, Security Hub, and Macie to detect threats, enforce compliance, and monitor sensitive data. GuardDuty continuously analyzes account activity and network traffic for potential threats, while Security Hub consolidates findings and provides actionable insights.
Automated remediation can respond to security alerts without manual intervention, such as quarantining compromised resources or updating IAM policies. Administrators also implement security baselines using AWS Config rules and Systems Manager to enforce compliance across all resources. Security automation ensures continuous protection while reducing the operational burden on teams.
Incident Response and Root Cause Analysis
Efficient incident response is vital to minimize operational impact. SysOps administrators establish structured procedures for identifying, analyzing, and resolving incidents. Alerts from CloudWatch or third-party monitoring tools provide early warning, while detailed logs from CloudTrail and CloudWatch Logs help identify root causes.
Root cause analysis involves examining resource dependencies, configuration changes, and system metrics to determine the origin of failures. Post-incident reviews document lessons learned and inform process improvements. Administrators also implement automated remediation for recurring issues, allowing quick resolution and reducing downtime. A well-defined incident response strategy ensures consistent and effective handling of operational challenges.
Performance Optimization Techniques
Optimizing the performance of AWS workloads involves monitoring metrics, adjusting resources, and tuning configurations. Administrators analyze CPU, memory, disk, and network utilization to identify bottlenecks and underperforming components. Auto Scaling and Elastic Load Balancing allow dynamic adjustment of resources to match demand, maintaining optimal performance while controlling costs.
Caching mechanisms such as Amazon ElastiCache improve application responsiveness, while RDS read replicas reduce database load. Administrators also optimize storage by choosing appropriate tiers and implementing lifecycle policies. Regular performance reviews and tuning of infrastructure and applications ensure efficient resource utilization and an improved end-user experience.
Cost Management and Strategic Resource Planning
Cost efficiency is a core aspect of SysOps responsibilities. Administrators use AWS Cost Explorer, Budgets, and Trusted Advisor to monitor spending, forecast costs, and optimize resource usage. Rightsizing instances, consolidating workloads, and removing unused resources reduce unnecessary expenditures.
Reserved and Spot Instances provide cost savings for predictable or flexible workloads. Administrators also manage storage costs through tiered options and lifecycle policies. Strategic resource planning aligns operational decisions with budget constraints, ensuring that cloud infrastructure remains financially sustainable without compromising performance or reliability.
Backup, Restore, and Disaster Recovery
Backup and disaster recovery planning are essential for resilience. Administrators implement automated backup schedules using services like RDS automated backups, EBS snapshots, and S3 versioning. These strategies ensure that data and system configurations can be restored quickly in case of failures.
Recovery Time Objectives (RTO) and Recovery Point Objectives (RPO) define acceptable downtime and data loss, guiding the design of backup and replication strategies. Multi-region replication, cross-AZ snapshots, and automated failover processes enhance reliability. Regular testing of backup and recovery procedures ensures readiness and operational continuity during unexpected events.
Compliance Monitoring and Reporting
Organizations often require adherence to industry standards and regulatory frameworks. AWS Config, Security Hub, and third-party tools help administrators monitor compliance continuously. Config rules enforce policies for resource configuration, while automated alerts notify teams of violations.
Detailed reporting allows organizations to demonstrate adherence to standards such as HIPAA, PCI-DSS, or GDPR. Administrators can generate compliance dashboards, track trends, and ensure that operational practices remain aligned with regulatory requirements. Continuous compliance monitoring minimizes risk and strengthens organizational accountability.
Advanced Networking and Traffic Management
Complex AWS environments require sophisticated networking and traffic management strategies. Administrators configure VPCs, subnets, route tables, NAT gateways, and VPN connections to ensure secure and efficient communication. Network segmentation and access control lists help isolate workloads, improving security and operational performance.
Traffic management using Elastic Load Balancing, Route 53, and CloudFront enhances application availability, reduces latency, and distributes workloads effectively. Administrators monitor network performance, troubleshoot connectivity issues, and optimize routing policies to maintain reliable and responsive operations.
Automation for Continuous Improvement
Continuous improvement in operations relies on iterative automation. Administrators analyze operational metrics, incident patterns, and system performance to identify areas for enhancement. Automation workflows are updated to incorporate best practices, address recurring issues, and streamline complex processes.
By combining monitoring, automation, and analytics, administrators create feedback loops that improve operational efficiency, reliability, and scalability. Continuous improvement practices ensure that AWS environments remain resilient, cost-effective, and aligned with evolving business needs.
Multi-Tenant and Hybrid Cloud Considerations
Managing multi-tenant or hybrid cloud environments adds complexity to operations. Administrators must maintain isolation, security, and performance across multiple tenants while integrating on-premises infrastructure with AWS services. VPNs, Direct Connect, and hybrid networking strategies enable seamless communication and workload migration.
Monitoring, automation, and compliance practices extend to hybrid environments, ensuring consistent operational standards. Administrators design solutions that balance security, performance, and cost across both cloud and on-premises resources, supporting enterprise-scale operations.
Real-Time Dashboards and Analytics
Operational visibility is enhanced through real-time dashboards and analytics. Administrators consolidate metrics, logs, and events into dashboards that provide a comprehensive view of system health and performance. Advanced analytics identify trends, predict resource needs, and detect anomalies.
Integration with machine learning services enables predictive insights, allowing proactive adjustments to resources, configurations, or security policies. Real-time dashboards facilitate informed decision-making and rapid response to operational events, enhancing system reliability and performance.
Advanced Troubleshooting Scenarios
Complex AWS environments require advanced troubleshooting skills. Administrators analyze interdependent services, network configurations, and application behaviors to identify and resolve issues. Using CloudWatch, CloudTrail, X-Ray, and VPC Flow Logs, administrators trace issues from root cause to resolution.
Scenario-based troubleshooting includes performance degradation, connectivity failures, security breaches, and configuration errors. Administrators apply structured problem-solving approaches, leveraging automation where possible to expedite remediation. Documenting troubleshooting procedures builds institutional knowledge and improves response effectiveness.
Continuous Professional Development
The AWS ecosystem evolves rapidly, with new services, features, and best practices introduced frequently. SysOps administrators must engage in continuous professional development, learning about emerging tools, automation techniques, and operational strategies.
Participating in training programs, studying AWS whitepapers, attending workshops, and exploring hands-on labs ensures that administrators remain proficient. Staying current with industry trends and certifications enhances career growth, operational effectiveness, and the ability to implement innovative solutions in complex cloud environments.
Advanced operations for AWS SysOps administrators involve automation, orchestration, multi-region deployments, proactive monitoring, security automation, cost optimization, and continuous improvement. By mastering these areas, administrators ensure that AWS environments remain secure, resilient, scalable, and cost-efficient.
The AWS Certified SysOps Administrator – Associate credential validates these advanced skills, enhancing professional credibility, career opportunities, and organizational value. Professionals who apply these strategies contribute to operational excellence, optimized resource utilization, and the reliable delivery of cloud services.
Advanced Cloud Automation Frameworks
Cloud automation frameworks provide structured methods for deploying, monitoring, and managing AWS environments. SysOps administrators leverage tools such as AWS CloudFormation, AWS Systems Manager, and AWS Lambda to create repeatable, reliable operational processes. CloudFormation allows infrastructure to be defined as code, ensuring consistent deployment across multiple environments.
Systems Manager enables automated patching, configuration management, and operational task execution through runbooks. Lambda functions allow administrators to implement event-driven automation, responding to operational triggers such as instance failures, security alerts, or scaling events. Combining these tools into a comprehensive automation framework reduces human error, increases operational efficiency, and ensures compliance with organizational policies.
Multi-Region Operations and Global Management
Managing multi-region AWS deployments ensures high availability, disaster recovery, and optimized performance for global users. Administrators must design architectures that replicate resources across regions, balancing latency, cost, and resilience. Multi-region operations often involve Route 53 for global DNS routing, multi-region replication for S3 buckets, and cross-region database replication for RDS instances.
Administrators plan for failover scenarios, ensuring that services remain available during regional outages. Monitoring and alerting systems track health and performance across regions, while automated remediation workflows minimize downtime. Effective global management requires careful planning, coordination, and ongoing monitoring to maintain seamless user experiences worldwide.
Operational Excellence and Governance
Operational excellence encompasses best practices in performance, reliability, and cost management. Administrators implement governance frameworks using AWS Config, CloudTrail, and Security Hub to enforce compliance, track resource configurations, and monitor security events. Operational metrics, dashboards, and reporting tools provide visibility into performance, availability, and cost efficiency.
Governance ensures that operational policies, compliance requirements, and industry standards are consistently followed. Administrators review incidents, conduct audits, and implement continuous improvement processes to refine operations. By integrating operational excellence and governance practices, organizations achieve reliable, efficient, and compliant cloud operations.
Disaster Recovery and Business Continuity
Disaster recovery planning is a core responsibility of SysOps administrators. Administrators design backup, replication, and failover strategies to meet organizational recovery objectives. Multi-AZ and multi-region deployments enhance fault tolerance, while automated backups, snapshots, and versioning ensure data durability.
Recovery Time Objectives (RTO) and Recovery Point Objectives (RPO) guide the selection of replication methods, storage options, and failover procedures. Regular testing of disaster recovery plans validates the effectiveness of strategies and ensures that critical systems can be restored promptly. Business continuity planning ensures that operations remain uninterrupted, even during significant infrastructure or application failures.
Cost Management and Optimization Strategies
Cost optimization is an ongoing operational priority. Administrators monitor resource usage, analyze spending trends, and implement strategies to minimize unnecessary expenditure. Tools such as AWS Cost Explorer, Budgets, and Trusted Advisor provide insights into usage patterns, potential cost-saving opportunities, and resource recommendations.
Rightsizing EC2 instances, leveraging Spot and Reserved Instances, and optimizing storage tiers help reduce costs while maintaining performance. Administrators also implement automated policies to identify idle or underutilized resources, ensuring efficient utilization. Effective cost management aligns operational practices with financial objectives, enabling sustainable cloud operations.
Security Best Practices and Automation
Security is a continuous concern in AWS environments. Administrators implement layered security measures including IAM policies, encryption, security groups, and network ACLs. Automating security processes ensures that these measures are consistently applied and monitored.
AWS GuardDuty, Security Hub, and Macie provide continuous threat detection and compliance monitoring. Automated remediation workflows respond to potential security incidents, such as isolating compromised resources, updating access policies, or notifying security teams. By integrating security automation into daily operations, administrators maintain a secure environment while reducing operational overhead.
Advanced Monitoring and Predictive Analytics
Predictive analytics and advanced monitoring enable proactive management of AWS resources. Administrators use CloudWatch, CloudTrail, and X-Ray to track metrics, analyze trends, and identify potential performance bottlenecks. Machine learning insights can anticipate resource saturation, traffic spikes, or unusual patterns in system behavior.
Dynamic dashboards provide real-time visibility into system health, resource utilization, and application performance. Integrating predictive analytics with automated scaling and remediation workflows allows administrators to address potential issues before they impact users, improving reliability and performance.
Real-World Operational Scenarios
Hands-on experience with real-world operational scenarios is essential for mastering AWS SysOps responsibilities. Administrators manage workloads ranging from web applications and databases to serverless architectures and global deployments. Scenarios may involve scaling EC2 fleets, configuring RDS replicas, implementing caching with ElastiCache, or orchestrating complex multi-service workflows.
Each scenario requires a deep understanding of AWS services, dependencies, and best practices. Administrators apply monitoring, automation, security, and cost optimization strategies to ensure operational excellence. By practicing real-world scenarios, professionals develop problem-solving skills and the ability to handle diverse operational challenges effectively.
Troubleshooting Complex Environments
Complex AWS environments require advanced troubleshooting skills. Administrators must diagnose issues that span multiple services, networks, and regions. Using logs, metrics, and tracing tools, they identify root causes, validate solutions, and implement corrective actions.
Troubleshooting scenarios may include performance degradation, connectivity issues, security breaches, or configuration errors. Structured problem-solving approaches and automated remediation workflows reduce downtime and improve operational efficiency. Documenting lessons learned ensures continuous improvement and builds institutional knowledge.
Automation Pipelines and CI/CD Integration
Integration of automation pipelines and Continuous Integration/Continuous Deployment (CI/CD) processes enhances operational agility. Administrators work alongside development teams to implement automated build, test, and deployment workflows. Services such as AWS CodePipeline, CodeBuild, and CodeDeploy enable seamless integration with operational automation.
Automation pipelines reduce manual intervention, improve consistency, and accelerate release cycles. Administrators monitor deployment metrics, apply rollback mechanisms, and ensure that automated processes adhere to governance and compliance standards. CI/CD integration supports rapid innovation while maintaining operational stability.
Performance Optimization and Capacity Planning
Capacity planning ensures that resources meet application demands without overprovisioning. Administrators analyze historical usage, forecast future requirements, and adjust instance types, storage options, and scaling policies accordingly. Performance optimization involves tuning EC2 instances, RDS configurations, caching strategies, and network settings.
Regular review of performance metrics and resource utilization allows administrators to fine-tune systems, prevent bottlenecks, and maintain cost efficiency. Combining capacity planning with automated scaling and predictive analytics ensures optimal performance for dynamic workloads.
Compliance and Audit Readiness
Maintaining compliance and audit readiness is a critical aspect of AWS operations. Administrators implement continuous monitoring, logging, and reporting to meet regulatory standards such as HIPAA, PCI-DSS, or GDPR. AWS Config rules, CloudTrail logs, and Security Hub findings provide visibility into configuration compliance and access control.
Auditing procedures include reviewing access policies, monitoring configuration changes, and generating compliance reports. Administrators establish processes to address deviations promptly, ensuring that operational practices remain aligned with regulatory and organizational requirements.
Career Development and Certification Benefits
The AWS Certified SysOps Administrator – Associate credential enhances career opportunities, demonstrating proficiency in cloud operations, automation, monitoring, and security. Professionals with this certification are recognized for their ability to manage complex AWS environments effectively.
Career pathways include senior SysOps administrator, DevOps engineer, cloud operations manager, and cloud architect roles. Certification also provides a foundation for professional-level AWS certifications, expanding knowledge in architecture, DevOps practices, and advanced operational strategies. Continuous learning and hands-on experience complement certification, ensuring long-term career growth and operational expertise.
Exam Preparation Strategies
Effective preparation for the SysOps Administrator – Associate exam involves a combination of theoretical knowledge and practical experience. Candidates should study AWS documentation, whitepapers, and best practice guides while engaging in hands-on labs and practice environments.
Scenario-based questions are common in the exam, requiring problem-solving skills and practical application of concepts. Reviewing sample questions, participating in study groups, and using practice exams help identify knowledge gaps and improve readiness. Understanding operational workflows, automation, monitoring, and troubleshooting principles is essential for success.
Real-Time Monitoring and Automation Integration
Integrating real-time monitoring with automation enhances operational responsiveness. Administrators connect CloudWatch metrics, CloudTrail logs, and third-party monitoring tools to automated workflows. For example, an alert triggered by high CPU usage can automatically scale instances, adjust load balancer settings, or notify the operations team.
This integration reduces response times, prevents downtime, and ensures consistent adherence to operational policies. Real-time monitoring combined with automation enables proactive management of AWS resources and improves overall system reliability.
Continuous Learning and Industry Trends
Staying current with AWS updates, industry trends, and emerging best practices is crucial for operational excellence. Administrators should follow AWS announcements, explore new services, participate in training programs, and engage with professional communities.
Continuous learning ensures that administrators can leverage the latest tools and methodologies, optimize operations, and maintain a competitive edge in cloud management. Adopting new approaches and technologies enhances efficiency, security, and reliability in rapidly evolving cloud environments.
Conclusion
The AWS Certified SysOps Administrator – Associate certification equips professionals with advanced skills in automation, multi-region management, monitoring, security, cost optimization, and operational excellence. Mastery of these areas ensures that cloud environments are resilient, scalable, secure, and cost-effective.
Achieving this certification validates expertise, enhances career prospects, and prepares administrators to tackle real-world challenges in complex AWS operations. Professionals who combine hands-on experience, continuous learning, and strategic application of operational best practices contribute significantly to organizational success, ensuring reliable, efficient, and secure cloud infrastructure.
ExamCollection provides the complete prep materials in vce files format which include Amazon AWS Certified SysOps Administrator - Associate certification exam dumps, practice test questions and answers, video training course and study guide which help the exam candidates to pass the exams quickly. Fast updates to Amazon AWS Certified SysOps Administrator - Associate certification exam dumps, practice test questions and accurate answers vce verified by industry experts are taken from the latest pool of questions.


Amazon AWS Certified SysOps Administrator - Associate Video Courses
")
")
Top Amazon Certifications


Top Amazon Certification Exams
- AWS Certified Generative AI Developer - Professional AIP-C01
- AWS Certified Solutions Architect - Associate SAA-C03
- AWS Certified Solutions Architect - Professional SAP-C02
- AWS Certified AI Practitioner AIF-C01
- AWS Certified Cloud Practitioner CLF-C02
- AWS Certified Security - Specialty SCS-C03
- AWS Certified Machine Learning Engineer - Associate MLA-C01
- AWS Certified CloudOps Engineer - Associate SOA-C03
- AWS Certified Advanced Networking - Specialty ANS-C01
- AWS Certified DevOps Engineer - Professional DOP-C02
- AWS Certified Data Engineer - Associate DEA-C01
- AWS Certified Developer - Associate DVA-C02
- AWS Certified Security - Specialty SCS-C02
- AWS Certified SysOps Administrator - Associate
Site Search:


