Tutorial: How to convert PDF to VCE using Exam Formatter
Let's assume that you already have the PDF file you wish to convert to VCE format.
Launch Exam Formatter.
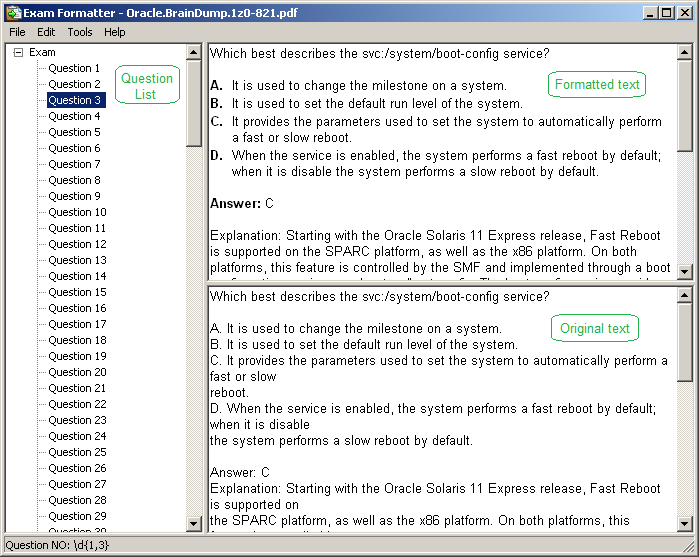
From the "File" menu, click "Import". Select a PDF file and click "Open".
If text will not be devided into separate questions, do the following.
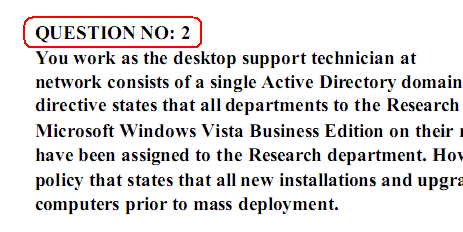
Find the question numbering format in the PDF file. For example:
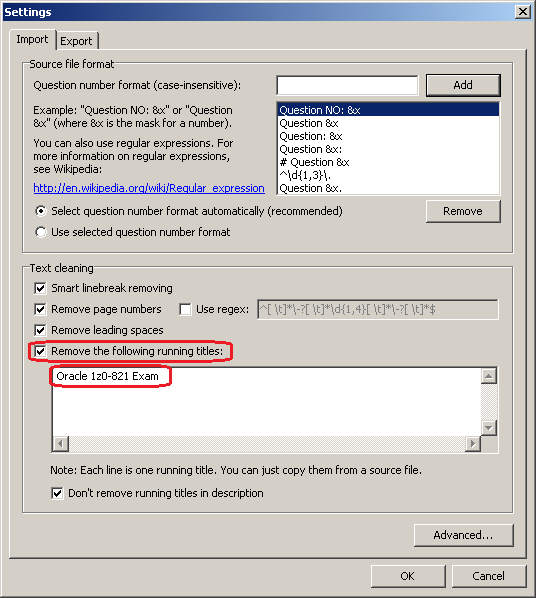
From the "File" menu, click "Settings". In the "Question number format" field, specify the question number string but replace the numberic value with &x. Click "Add".
Select "Use selected question number format". Click "OK".
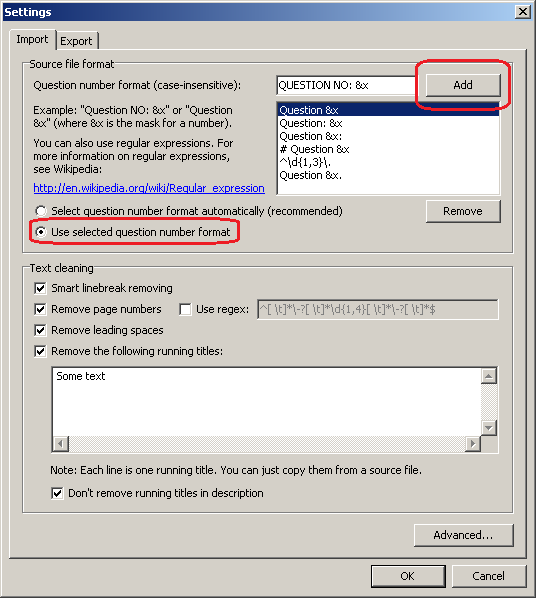
In the original text find and copy running title line to the Clipboard.
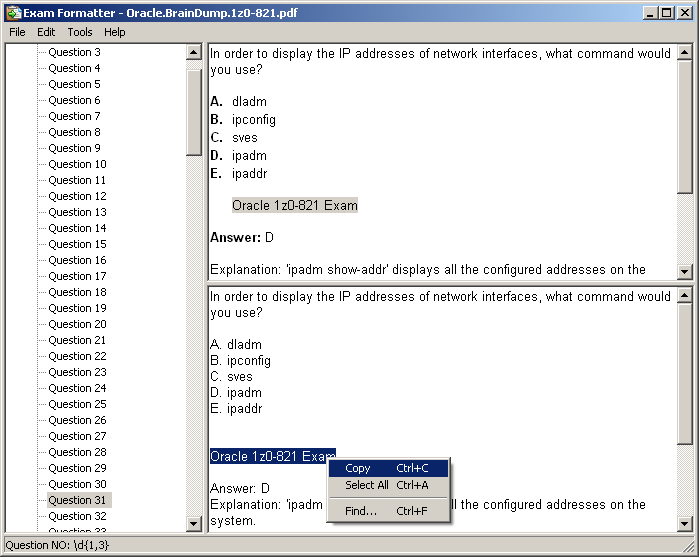
Check "Remove the following running titles". Paste the running title line from the Clipboard. Click "OK".
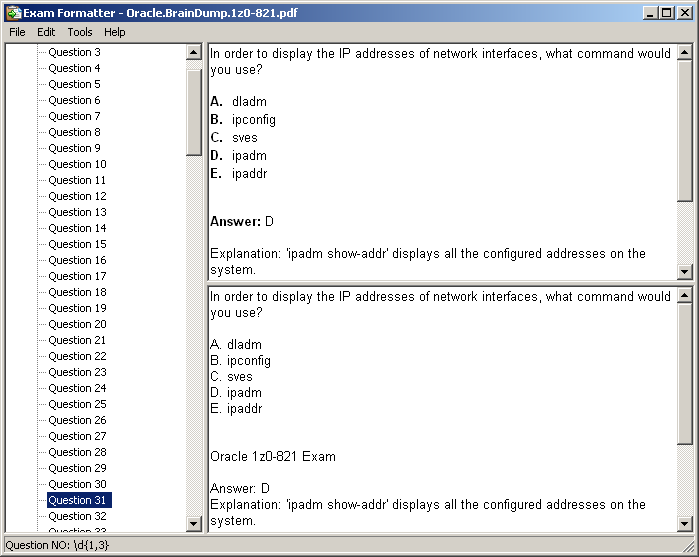
The specified running title will be removed from the text of each question.
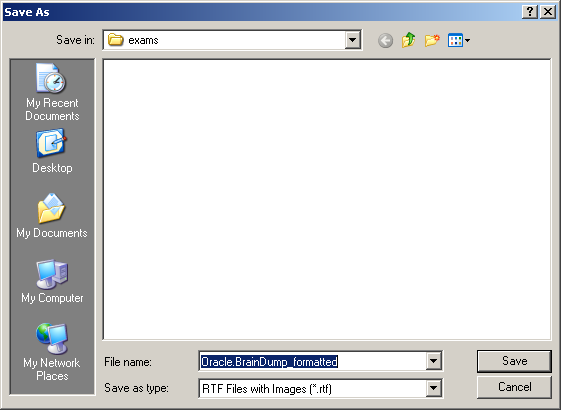
From the "File" menu, click "Save As...". In the "Save As" dialog box, click "Save".
Visual CertExam Designer will be launched, if you have it installed.
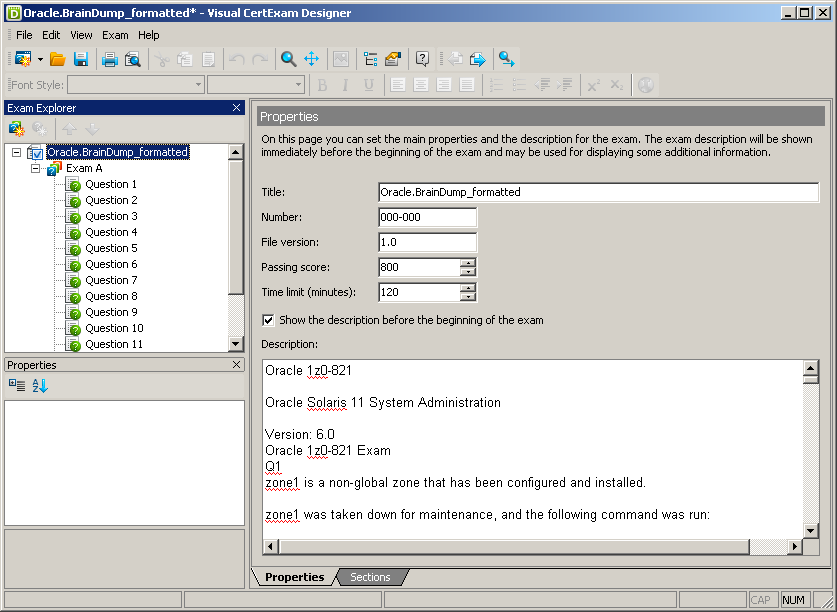
From the "File" menu, click "Save". In the "Save As" dialog box, click "Save".

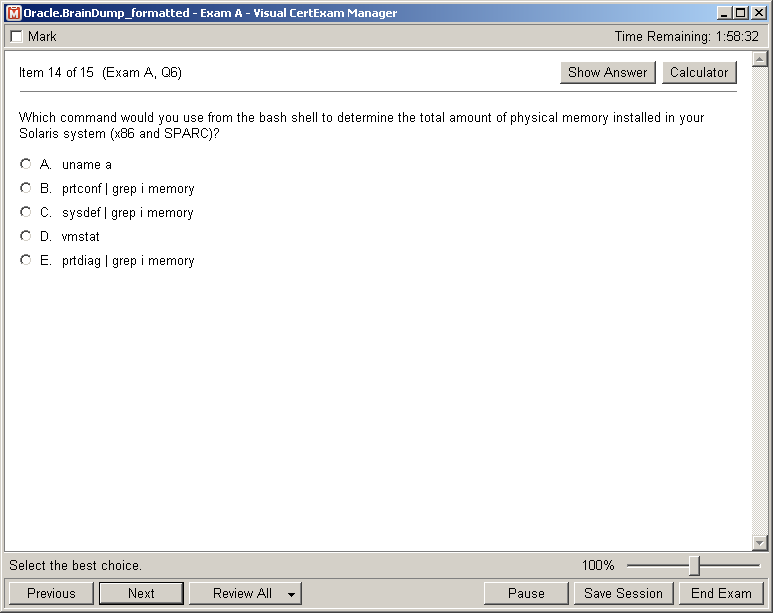
Now you can open the created VCE file in Visual CertExam Manager.


SPECIAL OFFER: GET 10% OFF


Pass your Exam with ExamCollection's PREMIUM files!
- ExamCollection Certified Safe Files
- Guaranteed to have ACTUAL Exam Questions
- Up-to-Date Exam Study Material - Verified by Experts
- Instant Downloads
SPECIAL OFFER: GET 10% OFF
Use Discount Code:
MIN10OFF
A confirmation link was sent to your e-mail.
Please check your mailbox for a message from support@examcollection.com and follow the directions.

Download Free Demo of VCE Exam Simulator
Experience Avanset VCE Exam Simulator for yourself.
Simply submit your e-mail address below to get started with our interactive software demo of your free trial.
- Realistic exam simulation and exam editor with preview functions
- Whole exam in a single file with several different question types
- Customizable exam-taking mode & detailed score reports