- Home
- Salesforce
- Salesforce Developer (Salesforce Developer Certification) Dumps
Pass Your Salesforce Developer Certification Easy!
Salesforce Developer Certification Exams Questions & Answers, Accurate & Verified By IT Experts
Instant Download, Free Fast Updates, 99.6% Pass Rate.

$89.98
Or Purchase Salesforce Developer Exams Individually
| CRT-450 | Salesforce Certified Platform Developer I | $69.99 | Add to cart |
| DEV-450 | Salesforce Certified Platform Developer I (SU18) | $69.99 | Add to cart |
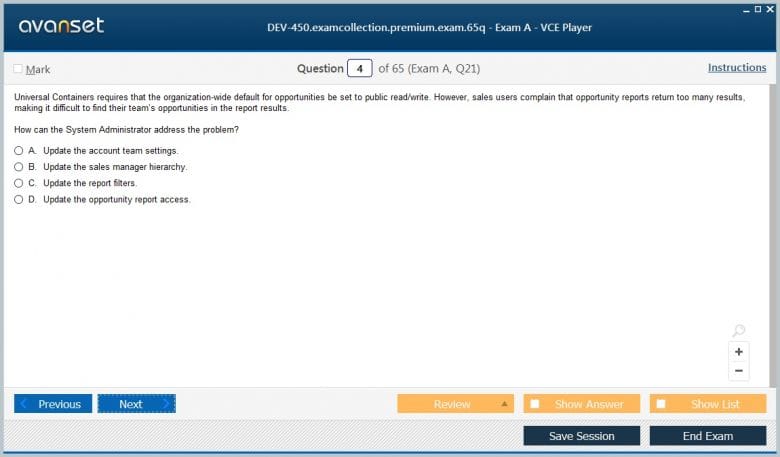
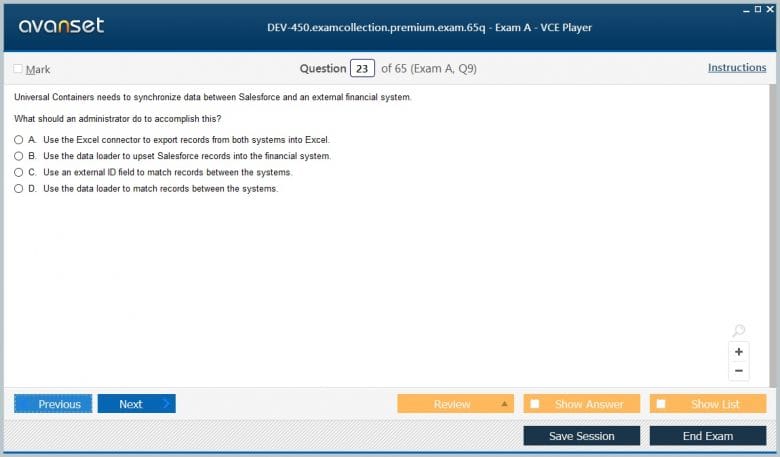
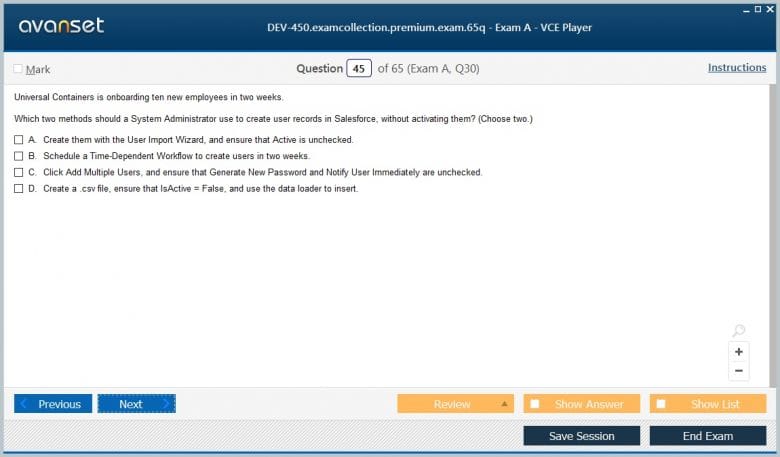
Salesforce Developer Certification Exams Screenshots

Salesforce Developer Product Reviews
Download Free Salesforce Developer Practice Test Questions VCE Files
| Exam | Title | Files |
|---|---|---|
Exam CRT-450 |
Title Salesforce Certified Platform Developer I |
Files 8 |
Exam DEV-450 |
Title Salesforce Certified Platform Developer I (SU18) |
Files 3 |
Salesforce Developer Certification Exam Dumps & Practice Test Questions
Prepare with top-notch Salesforce Developer certification practice test questions and answers, vce exam dumps, study guide, video training course from ExamCollection. All Salesforce Developer certification exam dumps & practice test questions and answers are uploaded by users who have passed the exam themselves and formatted them into vce file format.
Mastering Salesforce Developer 1 Certification: Your Ultimate Career Transformation Guide
The contemporary digital landscape demands professionals who possess specialized expertise in cloud-based customer relationship management platforms. Among the myriad certifications available in the technology sector, the Salesforce Platform Developer 1 Certification stands as a beacon of professional excellence, offering unprecedented opportunities for career advancement and financial prosperity.
This comprehensive certification program represents far more than a simple credential; it embodies a transformative journey that elevates professionals from conventional developers to sophisticated architects of business solutions. The certification process encompasses an extensive curriculum designed to cultivate expertise in custom application development, advanced programming methodologies, and intricate platform optimization techniques.
Professional growth trajectories in the technology sector have evolved dramatically over the past decade. Organizations worldwide increasingly recognize the paramount importance of cloud-based solutions, particularly those built upon the Salesforce ecosystem. This recognition has created an exponential demand for certified professionals who can navigate the complexities of platform development while delivering innovative solutions that drive business success.
Unlocking Professional Excellence Through Salesforce Platform Developer 1 Certification
The certification journey encompasses multiple dimensions of technical proficiency, from fundamental programming concepts to sophisticated implementation strategies. Candidates embark upon an intellectual odyssey that challenges their existing knowledge while introducing revolutionary approaches to software development within the Salesforce environment. This multifaceted learning experience ensures that certified professionals emerge with comprehensive skill sets that transcend traditional development boundaries.
Contemporary market dynamics underscore the critical importance of specialized certifications in determining career trajectories. Professionals who invest in rigorous certification programs consistently outperform their uncertified counterparts in terms of salary negotiations, promotional opportunities, and project leadership assignments. The Salesforce Platform Developer 1 Certification exemplifies this principle by providing tangible evidence of technical competency and professional commitment.
The certification process itself represents a meticulously crafted educational framework that balances theoretical knowledge with practical application. Candidates engage with complex scenarios that mirror real-world challenges, ensuring that their newly acquired skills translate seamlessly into professional environments. This pragmatic approach distinguishes the certification from purely academic pursuits, creating genuinely valuable professional assets.
Market research indicates that certified professionals experience substantial increases in earning potential immediately following certification completion. These financial benefits extend beyond initial salary improvements, encompassing long-term career stability, enhanced negotiating power, and access to exclusive professional opportunities. The return on investment for certification preparation typically materializes within the first year of certification completion.
Comprehensive Understanding of Salesforce Platform Developer 1 Certification Framework
The Salesforce Platform Developer 1 Certification represents a sophisticated credentialing system designed for professionals seeking to demonstrate expertise in custom application development within the Salesforce ecosystem. This certification validates comprehensive knowledge of programming languages, development methodologies, and platform-specific optimization techniques essential for creating robust business solutions.
The certification framework encompasses six distinct knowledge domains, each addressing critical aspects of platform development. These domains include Salesforce fundamentals, data modeling and management, logic and process automation, user interface development, testing methodologies, and debugging and deployment tools. Each domain contributes to a holistic understanding of the development lifecycle within the Salesforce environment.
Salesforce fundamentals constitute the foundational knowledge base upon which all advanced concepts are built. This domain explores the architectural principles underlying the Salesforce platform, including multi-tenant environment considerations, model-view-controller design patterns, and core customer relationship management object capabilities. Professionals must demonstrate thorough understanding of these concepts before progressing to more complex development scenarios.
Data modeling and management represent critical competencies for any developer working within the Salesforce ecosystem. This domain addresses relationship types, schema design implications, entity relationship visualization, and data import/export procedures. Mastery of these concepts enables developers to create efficient, scalable database structures that support complex business requirements while maintaining optimal performance characteristics.
Logic and process automation constitute the most substantial portion of the certification examination, reflecting the paramount importance of these skills in real-world development scenarios. This comprehensive domain covers programmatic schema access, formula fields, rollup summary fields, declarative process automation, Apex programming language fundamentals, SOQL and SOSL query languages, trigger development, governor limit considerations, and security implementation strategies.
User interface development skills enable certified professionals to create engaging, intuitive interfaces that enhance user experience while maximizing functionality. This domain encompasses Visualforce page development, Lightning component framework utilization, web content integration, and responsive design principles. These skills are increasingly important as organizations prioritize user experience in their technology investments.
Testing methodologies ensure that developed applications meet quality standards while functioning reliably in production environments. This domain addresses unit testing frameworks, test data management, test execution procedures, and the distinctions between various testing approaches. Thorough testing competency prevents costly production issues while maintaining application integrity.
Debugging and deployment tools complete the certification framework by addressing the practical aspects of application lifecycle management. This domain covers debugging techniques, development environment utilization, metadata deployment processes, and environment management strategies. These skills ensure that developed applications transition smoothly from development through production environments.
Strategic Career Advantages and Professional Benefits
The acquisition of Salesforce Platform Developer 1 Certification catalyzes transformative career changes that extend far beyond immediate technical competency improvements. Certified professionals consistently experience accelerated career progression, enhanced earning potential, expanded professional networks, and increased job security within an increasingly competitive technology marketplace.
Career progression acceleration represents one of the most tangible benefits of certification completion. Certified professionals demonstrate measurable competency in highly sought-after skills, positioning themselves as preferred candidates for promotional opportunities, team leadership roles, and strategic project assignments. This competitive advantage becomes particularly pronounced in organizations that prioritize technical excellence and continuous professional development.
Salary enhancement opportunities emerge immediately upon certification completion, with many professionals experiencing substantial increases in base compensation, bonus eligibility, and stock option allocations. Market research consistently demonstrates that certified professionals command premium salaries compared to their uncertified counterparts, with the salary differential often exceeding the total investment in certification preparation.
Professional network expansion occurs naturally through the certification process, as candidates interact with fellow professionals, industry experts, and certification instructors. These connections frequently lead to collaborative opportunities, consulting engagements, and career advancement prospects that would not otherwise be available. The Salesforce professional community is particularly supportive of certified members, creating ongoing opportunities for knowledge sharing and professional growth.
Job security improvements result from the specialized nature of Salesforce development skills and the continuing growth of the Salesforce ecosystem. Organizations investing in Salesforce implementations require certified professionals to maximize their technology investments, creating stable demand for qualified developers. This demand stability provides certified professionals with enhanced negotiating power and reduced career uncertainty.
Geographic mobility increases significantly for certified professionals, as Salesforce implementations span global markets across diverse industries. Certified professionals can pursue opportunities in virtually any geographic location while maintaining their specialized skill set's relevance. This mobility is particularly valuable for professionals seeking international career experiences or relocating for personal reasons.
Consulting and freelance opportunities proliferate for certified professionals who choose to pursue independent career paths. The specialized nature of Salesforce development creates substantial demand for experienced consultants who can assist organizations with implementation, optimization, and troubleshooting challenges. These opportunities often provide enhanced financial returns and professional autonomy compared to traditional employment arrangements.
Thought leadership positions become accessible to certified professionals who demonstrate expertise through successful project implementations and knowledge sharing activities. Many certified professionals leverage their expertise to become conference speakers, technical writers, training instructors, or industry consultants. These positions provide professional recognition while creating additional income streams and career diversification opportunities.
Detailed Examination Structure and Assessment Methodology
The Salesforce Platform Developer 1 Certification examination employs a comprehensive assessment methodology designed to evaluate candidates' theoretical knowledge and practical application capabilities across multiple competency domains. The examination structure reflects real-world development scenarios while maintaining standardized evaluation criteria that ensure consistent certification quality.
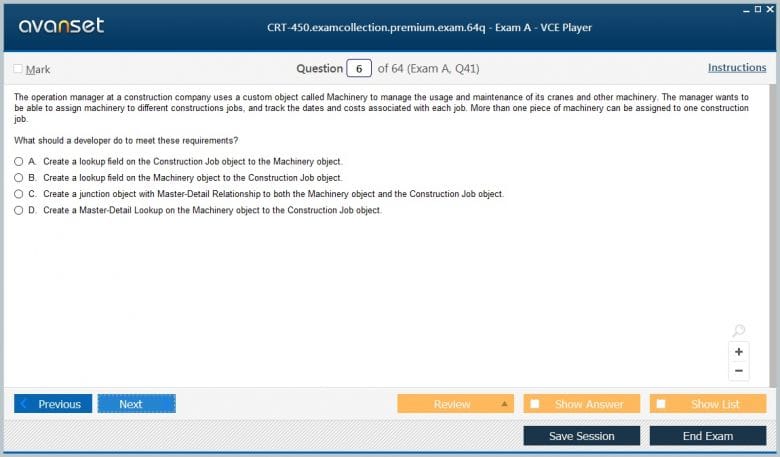
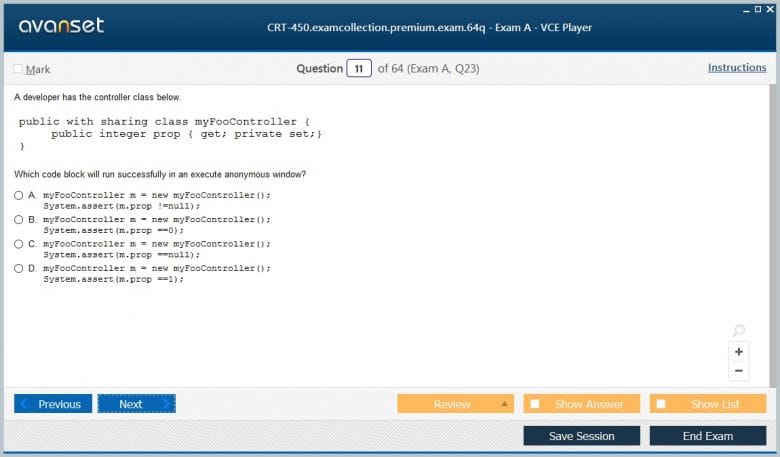
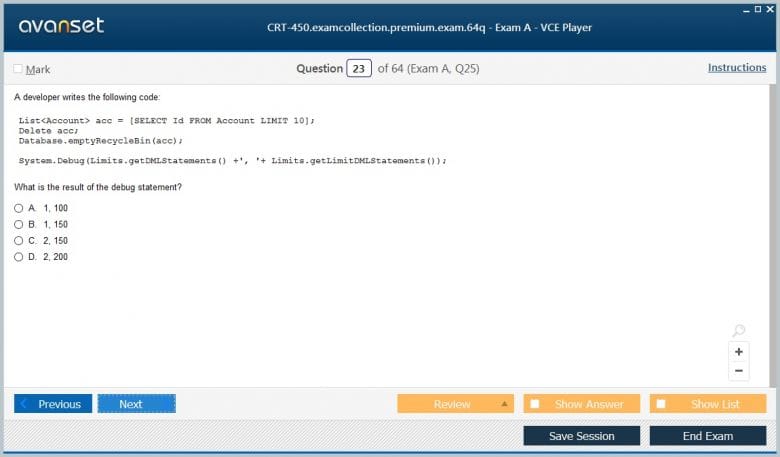
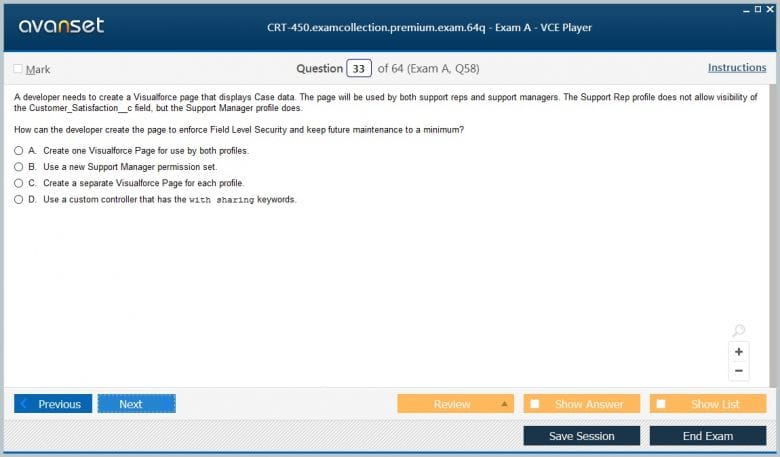
The examination consists of sixty-five questions, including sixty scored multiple-choice and multiple-select questions plus five unscored questions used for statistical analysis and future examination development. This question distribution allows for comprehensive coverage of all certification domains while providing sufficient statistical reliability for accurate competency assessment.
Time allocation for examination completion totals one hundred ten minutes, requiring candidates to maintain an average pace of approximately one minute and forty seconds per question. This timing constraint evaluates not only knowledge accuracy but also the practical application speed essential for professional development environments. Successful candidates must balance thoroughness with efficiency throughout the examination process.
The passing threshold is established at sixty-five percent, requiring candidates to correctly answer at least thirty-nine of the sixty scored questions. This threshold ensures that certified professionals possess sufficient competency to perform effectively in real-world development scenarios while maintaining achievable standards for dedicated candidates who complete thorough preparation programs.
Question formats include single-answer multiple-choice questions, multiple-answer multiple-select questions, and scenario-based questions that require analysis of complex development situations. This format diversity ensures comprehensive evaluation of different learning styles while mimicking the varied problem-solving approaches required in professional development environments.
Content weighting reflects the relative importance of different competency domains within typical development roles. Salesforce fundamentals comprise seven percent of examination content, data modeling and management constitute twelve percent, logic and process automation represent forty-six percent, user interface development accounts for ten percent, testing methodologies encompass twelve percent, and debugging and deployment tools comprise ten percent of total examination content.
Scenario-based questions present realistic development challenges that require candidates to apply multiple concepts simultaneously. These questions evaluate higher-order thinking skills essential for successful platform development, including problem analysis, solution design, implementation planning, and troubleshooting capabilities. Candidates must demonstrate comprehensive understanding rather than mere memorization of isolated concepts.
The examination delivery options include both online proctored and testing center-based formats, providing flexibility for candidates with varying scheduling and location constraints. Online proctoring utilizes sophisticated monitoring technology to ensure examination integrity while allowing candidates to complete the assessment from convenient locations. Testing center options provide traditional proctored environments for candidates who prefer conventional examination settings.
Comprehensive Preparation Strategies and Study Methodologies
Successful certification preparation requires a systematic approach that combines theoretical study with practical application, ensuring comprehensive mastery of all certification domains. Effective preparation strategies incorporate multiple learning modalities while addressing individual learning preferences and professional experience levels.
Foundation knowledge development begins with thorough review of Salesforce platform documentation, including developer guides, implementation guides, and best practices documentation. These authoritative sources provide comprehensive coverage of certification topics while ensuring accuracy and currency of information. Candidates should allocate substantial time to documentation review, taking detailed notes and creating personal reference materials for ongoing use.
Hands-on practice represents the most critical component of effective preparation, as certification questions frequently address practical implementation scenarios that require experiential knowledge. Candidates should create developer organizations and complete extensive practice exercises that mirror real-world development challenges. This practical experience reinforces theoretical concepts while developing the intuitive understanding essential for examination success.
Structured learning programs provide comprehensive curriculum coverage with expert instruction and peer interaction opportunities. Many candidates benefit from formal training programs that offer systematic progression through certification topics, interactive learning experiences, and instructor support for complex concepts. These programs often include practice examinations and performance feedback that identify knowledge gaps requiring additional attention.
Study group participation facilitates collaborative learning while providing diverse perspectives on complex topics. Candidates can form study groups with colleagues or join online communities dedicated to certification preparation. Group discussions often reveal alternative approaches to problem-solving while reinforcing learning through teaching others.
Practice examination completion serves multiple preparation purposes, including familiarity with question formats, time management skill development, and knowledge gap identification. Candidates should complete multiple practice examinations under simulated conditions, analyzing results to identify areas requiring additional study. Regular practice examination completion builds confidence while improving examination-taking strategies.
Technical skill development extends beyond certification requirements to encompass broader development competencies that enhance professional value. Candidates should pursue additional training in related technologies, development methodologies, and industry best practices that complement their Salesforce expertise. This broader skill development creates more comprehensive professional profiles while improving long-term career prospects.
Resource diversification ensures comprehensive topic coverage while accommodating different learning preferences. Effective preparation incorporates textbooks, online courses, video tutorials, podcasts, blogs, forums, and peer discussions. This diverse resource utilization prevents knowledge gaps while maintaining engagement through varied learning experiences.
Advanced Technical Competencies and Implementation Expertise
The certification process develops sophisticated technical competencies that transcend basic programming skills, encompassing advanced development methodologies, optimization techniques, and architectural design principles essential for enterprise-level implementations. These competencies distinguish certified professionals from conventional developers while enabling complex solution development.
Apex programming language mastery represents a fundamental requirement for certification success, encompassing syntax comprehension, object-oriented programming principles, exception handling, and performance optimization techniques. Candidates must demonstrate proficiency in variable declaration, data type utilization, control flow implementation, class and interface development, and database manipulation through Data Manipulation Language statements.
SOQL and SOSL query optimization skills enable efficient data retrieval while minimizing system resource consumption. Certified professionals understand query structure, filtering mechanisms, relationship traversal, aggregate function utilization, and result set limitation techniques. These skills are essential for developing scalable applications that maintain performance under varying load conditions.
Visualforce development capabilities encompass page creation, controller implementation, component utilization, and responsive design principles. Candidates must understand the relationship between Visualforce pages and Apex controllers, data binding mechanisms, user input validation, and security consideration implementation. These skills enable creation of sophisticated user interfaces that enhance user experience while maintaining functionality.
Lightning component framework proficiency represents increasingly important competencies as organizations migrate toward modern user interface technologies. Certified professionals understand component architecture, event handling, attribute passing, and integration with existing Salesforce functionality. These skills position professionals for continued relevance as platform evolution continues.
Trigger development expertise encompasses event handling, bulk processing, governor limit consideration, and recursive trigger prevention. Candidates must understand trigger context variables, execution order, exception handling, and testing methodologies specific to trigger implementations. These skills are essential for implementing complex business logic while maintaining system stability.
Security implementation knowledge ensures that developed applications maintain data integrity while preventing unauthorized access. Certified professionals understand sharing and visibility settings, field-level security, profile and permission set configuration, and programmatic security enforcement. These competencies are essential for enterprise implementations where data security is paramount.
Deployment and lifecycle management skills enable smooth transition of developed applications from development through production environments. Candidates must understand metadata deployment, change set creation, continuous integration principles, and environment management strategies. These skills ensure that developed applications function reliably across different environments while minimizing deployment-related issues.
Industry Demand Analysis and Market Opportunities
The global demand for Salesforce platform expertise continues expanding exponentially as organizations across diverse industries recognize the strategic value of customer relationship management optimization and business process automation. This demand creates unprecedented opportunities for certified professionals while establishing Salesforce development as a recession-resistant career specialization.
Market growth statistics demonstrate the robust expansion of the Salesforce ecosystem, with platform adoption rates increasing substantially year-over-year across all industry sectors. Organizations ranging from small businesses to multinational corporations are implementing Salesforce solutions to enhance customer engagement, streamline operations, and gain competitive advantages through data-driven decision making.
Industry diversification has expanded Salesforce implementation beyond traditional sales and marketing applications to encompass healthcare, education, government, nonprofit, manufacturing, and financial services sectors. This diversification creates opportunities for certified professionals to specialize in vertical markets while applying their technical expertise to unique industry challenges and regulatory requirements.
Geographic distribution of opportunities spans global markets, with particular growth in emerging economies where organizations are rapidly adopting cloud-based technologies. Certified professionals can pursue opportunities in virtually any geographic location while maintaining their skill set's relevance and market value. This geographic flexibility is particularly attractive for professionals seeking international career experiences.
Salary progression data consistently demonstrates substantial earning potential for certified professionals, with compensation levels often exceeding those of traditional software developers with comparable experience levels. The specialized nature of Salesforce development skills creates premium pricing for professional services while establishing stable long-term career prospects.
Consulting market expansion provides opportunities for certified professionals to pursue independent career paths while commanding premium hourly rates for specialized expertise. Many organizations prefer engaging certified consultants for implementation projects rather than hiring full-time employees, creating substantial demand for qualified independent professionals.
Enterprise adoption trends indicate continued growth in large-scale implementations that require sophisticated technical expertise and project management capabilities. These implementations often involve complex integrations, custom development, and ongoing optimization that create long-term engagement opportunities for certified professionals.
Technology evolution within the Salesforce platform ensures continued relevance for certified professionals while creating opportunities for ongoing skill development and specialization. The platform's continuous enhancement through new features, capabilities, and integration options maintains demand for professionals who can leverage these innovations effectively.
Sustained Professional Development and Career Advancement Pathways
The completion of Salesforce Platform Developer 1 Certification represents the beginning rather than the culmination of a comprehensive professional development journey that encompasses continuous learning, skill expansion, and career progression through increasingly sophisticated roles and responsibilities.
Advanced certification pathways provide structured progression opportunities that build upon foundational developer competencies while introducing specialized expertise areas. The Platform Developer 2 Certification addresses advanced development concepts, while specialized certifications in areas such as integration architecture, application architecture, and system architecture create opportunities for vertical career progression.
Specialization opportunities enable certified professionals to develop expertise in specific industry sectors, technical domains, or functional areas that align with personal interests and market demands. These specializations often command premium compensation while creating distinctive professional profiles that differentiate candidates in competitive job markets.
Leadership development naturally evolves from technical expertise as certified professionals assume responsibility for project management, team leadership, and strategic planning activities. Many certified professionals progress into roles such as technical architects, development managers, and implementation consultants that leverage their technical foundation while expanding their professional scope.
Thought leadership positions become accessible through knowledge sharing activities such as blog writing, conference speaking, training instruction, and community participation. These activities enhance professional visibility while establishing expertise recognition that creates additional career opportunities and income diversification possibilities.
Salesforce Platform Developer Certification Success
The modern technological landscape presents unprecedented opportunities for skilled professionals seeking to establish themselves within cloud-based enterprise solutions. Platform development expertise has become increasingly valuable as organizations worldwide migrate their operations to sophisticated customer relationship management systems that streamline business processes while enhancing operational efficiency. Professional certification in these specialized platforms represents a strategic investment in career advancement, opening pathways to lucrative positions across diverse industries and organizational structures.
Contemporary business environments demand professionals who possess comprehensive understanding of platform architecture, development methodologies, and integration capabilities. The rapid expansion of cloud-based solutions has created substantial market demand for qualified developers who can architect, implement, and maintain complex business applications that serve millions of users globally. This growing ecosystem provides exceptional career opportunities for individuals willing to invest in acquiring specialized technical competencies and maintaining current knowledge of evolving platform capabilities.
Professional certification programs offer structured learning pathways that transform theoretical knowledge into practical expertise applicable to real-world business challenges. These comprehensive educational experiences encompass fundamental programming concepts, advanced development techniques, and industry best practices that enable certified professionals to deliver high-quality solutions meeting enterprise-grade requirements. The certification process itself serves as a rigorous validation of technical proficiency while demonstrating commitment to professional excellence and continuous learning.
Strategic Career Advancement Through Platform Specialization
Platform development specialization creates distinctive competitive advantages in today's technology-driven marketplace. Organizations across all industries require skilled professionals capable of customizing, extending, and integrating powerful business applications that support complex operational requirements. This specialized expertise commands premium compensation packages while offering exceptional job security in an increasingly volatile employment landscape.
The certification journey begins with foundational understanding of platform architecture, including data models, security frameworks, and user interface design principles. Aspiring developers must master declarative development approaches alongside traditional programming methodologies, creating comprehensive skill sets that address diverse business requirements through innovative technical solutions. This multifaceted competency development ensures certified professionals can adapt to varying project demands while maintaining high standards of code quality and system performance.
Advanced technical competencies encompass custom object creation, complex workflow automation, and sophisticated reporting capabilities that transform raw business data into actionable insights. These skills enable professionals to architect scalable solutions supporting organizational growth while maintaining system integrity and user experience standards. The depth of knowledge required for certification ensures that qualified professionals possess genuine expertise rather than superficial familiarity with platform capabilities.
Professional recognition through certification significantly enhances career trajectory potential, positioning individuals for leadership roles within technology teams and consultant positions serving multiple client organizations. The rigorous examination process validates comprehensive understanding of platform capabilities while demonstrating ability to apply theoretical knowledge to practical business scenarios. This validation provides employers with confidence in certified professionals' capabilities while offering individuals clear differentiation in competitive job markets.
Career advancement opportunities extend beyond traditional employment structures, enabling certified professionals to pursue entrepreneurial ventures, freelance consulting arrangements, and specialized training delivery roles. The growing demand for platform expertise creates diverse revenue generation possibilities while offering flexibility in professional engagement models. This versatility proves particularly valuable for professionals seeking work-life balance optimization or geographic location independence.
Comprehensive Technical Competency Development
Technical mastery requires deep understanding of declarative development tools alongside traditional programming languages that extend platform functionality beyond standard configuration options. Certified professionals must demonstrate proficiency in creating custom applications, implementing complex business logic, and integrating external systems through various connectivity protocols and data exchange mechanisms.
Database management competencies form the foundation of effective platform development, requiring thorough understanding of relational data modeling, query optimization techniques, and data security implementation strategies. These fundamental skills enable developers to design efficient data structures supporting complex business processes while maintaining system performance under varying load conditions. Advanced database concepts include trigger development, batch processing implementation, and scheduled automation that ensures data integrity across all system interactions.
User interface development encompasses both standard configuration approaches and custom component creation using modern web technologies. Certified professionals must understand responsive design principles, accessibility requirements, and user experience optimization techniques that create intuitive interfaces supporting diverse user populations and device types. This comprehensive approach ensures applications remain usable and effective across varying technological environments and user skill levels.
Integration capabilities represent critical competencies for modern platform developers, requiring understanding of REST and SOAP web services, authentication protocols, and data transformation techniques. These skills enable seamless connectivity with external systems, creating unified business processes that span multiple applications and data sources. Advanced integration scenarios include real-time data synchronization, complex workflow orchestration, and error handling strategies that maintain system reliability under challenging operational conditions.
Security implementation represents paramount importance in contemporary platform development, requiring comprehensive understanding of permission models, data encryption techniques, and vulnerability mitigation strategies. Certified professionals must demonstrate ability to implement robust security frameworks protecting sensitive business information while maintaining system usability and performance standards. This security expertise becomes increasingly valuable as organizations face growing cybersecurity threats and regulatory compliance requirements.
Testing methodologies form essential components of professional development practices, requiring systematic approaches to code validation, performance verification, and user acceptance confirmation. Certified professionals must understand automated testing frameworks, deployment strategies, and change management processes that ensure system reliability and minimize business disruption during application updates and enhancements.
Market Demand Analysis and Career Opportunities
Contemporary market analysis reveals exponential growth in demand for specialized platform developers across industries ranging from healthcare and financial services to manufacturing and retail organizations. This widespread adoption creates abundant career opportunities while ensuring long-term job security for qualified professionals who maintain current technical competencies and adapt to evolving platform capabilities.
Geographic distribution of opportunities spans global markets, with particularly strong demand in technology hubs, major metropolitan areas, and emerging economic regions where digital transformation initiatives drive organizational modernization efforts. Remote work opportunities have expanded significantly, enabling certified professionals to access positions with organizations worldwide while maintaining flexible lifestyle preferences and optimizing compensation potential through strategic job selection.
Compensation analysis indicates substantial premium for certified professionals compared to general software developers, reflecting the specialized nature of platform expertise and limited supply of qualified candidates. Salary progression typically accelerates rapidly as professionals gain experience and pursue advanced certifications, creating clear pathways for financial advancement throughout career development. Additional compensation opportunities include performance bonuses, equity participation, and consulting revenue that supplement base salary arrangements.
Industry specialization opportunities enable professionals to develop domain expertise alongside technical competencies, creating highly valuable skill combinations that command exceptional market premiums. Healthcare, financial services, manufacturing, and government sectors offer particularly attractive specialization pathways where platform expertise intersects with industry-specific regulatory requirements and business process complexities.
Entrepreneurial opportunities emerge as certified professionals develop comprehensive understanding of business processes and technology solutions, enabling establishment of successful consulting practices, software development companies, and training organizations serving the growing market demand. These ventures often achieve significant financial success while providing professional autonomy and creative fulfillment that traditional employment structures cannot match.
Contract and consulting opportunities provide flexibility and premium hourly rates for experienced professionals seeking project-based engagement models. These arrangements often yield higher annual compensation than permanent positions while offering diverse experience across multiple industries and organizational structures. Successful consultants frequently develop ongoing client relationships that provide stable revenue streams and referral opportunities for business expansion.
Advanced Development Methodologies and Best Practices
Professional development practices encompass comprehensive methodologies ensuring code quality, system performance, and maintainability standards that support long-term application success. These practices include structured development lifecycle management, version control implementation, and collaborative development approaches that enable teams to deliver complex projects efficiently while maintaining high quality standards.
Code architecture principles guide the creation of scalable, maintainable applications that adapt to changing business requirements without requiring complete system redesign. Certified professionals must understand design patterns, separation of concerns, and modular development approaches that create flexible system architectures supporting organizational growth and evolution. These architectural competencies prove essential for enterprise-scale implementations serving thousands of users with complex business processes.
Performance optimization techniques enable applications to maintain responsiveness and reliability under varying load conditions, requiring deep understanding of system resource management, query optimization, and caching strategies. Advanced performance concepts include bulk data processing, asynchronous operations, and resource utilization monitoring that ensures optimal system performance across all operational scenarios.
Deployment strategies encompass comprehensive approaches to moving applications from development environments through testing phases to production implementation, requiring understanding of change management processes, risk mitigation techniques, and rollback procedures. Professional deployment practices minimize business disruption while ensuring system reliability and user satisfaction during application updates and enhancements.
Quality assurance methodologies integrate testing procedures throughout the development lifecycle, ensuring applications meet functional requirements while maintaining performance and security standards. Certified professionals must understand unit testing, integration testing, and user acceptance testing approaches that validate system behavior across all operational scenarios.
Documentation standards ensure that applications remain maintainable and extensible throughout their operational lifecycle, requiring comprehensive technical documentation, user guides, and process documentation that enables knowledge transfer and system evolution. Professional documentation practices prove essential for team collaboration and long-term system success.
Collaborative development practices enable teams to work effectively on complex projects while maintaining code quality and project timeline adherence. These practices include code review processes, pair programming techniques, and agile development methodologies that optimize team productivity while ensuring deliverable quality standards.
Educational Pathways and Certification Preparation
Comprehensive preparation strategies encompass multiple learning modalities including self-directed study, instructor-led training, hands-on practice environments, and peer collaboration that ensure thorough understanding of platform capabilities and development methodologies. Successful candidates typically invest substantial time in practical application development alongside theoretical knowledge acquisition.
Study resource utilization requires strategic selection of official documentation, community-generated content, practice examinations, and hands-on exercises that reinforce theoretical concepts through practical application. The most effective preparation approaches combine multiple resource types while focusing on areas of individual weakness and strength optimization.
Hands-on practice environments provide essential opportunities to apply theoretical knowledge through real-world scenario simulation, enabling candidates to develop practical competencies alongside examination preparation. These practice experiences often reveal knowledge gaps requiring additional study while building confidence in technical abilities.
Time management strategies prove crucial for working professionals pursuing certification while maintaining current job responsibilities and personal commitments. Successful candidates typically establish consistent study schedules, set realistic milestone goals, and utilize available time efficiently through focused preparation activities.
Examination strategies encompass understanding question formats, time management techniques, and stress reduction approaches that optimize performance during the certification assessment. Experienced candidates recommend multiple practice examinations to familiarize themselves with question styles and identify areas requiring additional preparation focus.
Continuing education requirements ensure certified professionals maintain current knowledge of platform evolution while developing complementary skills that enhance professional value. This ongoing education often includes advanced technical training, business skill development, and industry-specific knowledge acquisition that supports career advancement objectives.
Peer learning opportunities through study groups, online communities, and professional meetups provide valuable knowledge sharing, motivation, and networking benefits that enhance the certification journey while building lasting professional relationships.
Professional Network Development and Community Engagement
Industry community participation creates valuable opportunities for knowledge sharing, professional development, and career advancement through connections with experienced professionals, potential employers, and collaborative project partners. Active community engagement demonstrates commitment to professional growth while providing access to insider knowledge and opportunity awareness.
Professional association membership provides structured networking opportunities, continuing education resources, and career advancement support through formal programs designed to connect professionals and share industry knowledge. These associations often offer exclusive access to training resources, certification discounts, and job placement assistance that significantly enhance career development potential.
Conference and event participation enables face-to-face networking with industry leaders, technology experts, and potential business partners while providing exposure to cutting-edge developments and emerging trends. These events often feature intensive training sessions, product demonstrations, and strategic presentations that advance professional knowledge while expanding professional networks.
Online community engagement through forums, social media platforms, and collaborative projects creates ongoing opportunities for knowledge sharing, problem-solving assistance, and professional recognition within the broader technology community. Active participation in these communities often leads to consulting opportunities, job referrals, and collaborative partnerships.
Mentorship relationships provide guidance, career advice, and professional development support from experienced professionals who understand industry dynamics and career progression pathways. These relationships often prove invaluable for navigating career transitions, technical challenges, and strategic decision-making throughout professional development.
Knowledge sharing through blog writing, presentation delivery, and training development establishes professional credibility while contributing to community knowledge base expansion. These activities often lead to speaking opportunities, consulting engagements, and thought leadership recognition within the professional community.
Local user group participation provides regular networking opportunities within geographic regions while offering consistent access to training resources, job opportunities, and collaborative project possibilities. These groups often serve as launching points for career advancement and business development initiatives.
Strategic Blueprint for Sustained Career Elevation
In an era defined by rapid digital disruption, evolving business models, and accelerated automation, long-term career success demands more than just technical proficiency. It requires a deliberate and evolving strategy that aligns personal aspirations with market realities. For professionals navigating the dynamic landscape of information technology, enterprise systems, and cloud ecosystems—such as Oracle’s technology stack—success hinges on clear direction, sustained learning, and a multidimensional approach to growth.
Strategic career planning is the compass guiding this journey. It encompasses deliberate goal setting, methodical skill development, periodic opportunity reassessment, and proactive adaptation to external change. Professionals who embed strategy into their career architecture stay resilient in uncertain markets and remain valuable to organizations amidst shifting priorities. This long-range perspective does not focus solely on immediate promotions or salary increments; it cultivates relevance, builds enduring expertise, and strengthens the capacity to lead, innovate, and thrive over time.
Strategic planning in professional life must begin with clarity—knowing what outcomes one wants, what environments align with their strengths, and what legacy they intend to build. From there, each decision—whether it involves pursuing Oracle certifications, shifting specializations, or expanding leadership competencies—becomes purposeful rather than reactive. The key is to cultivate an iterative mindset: one that evolves as the market evolves.
Selecting Specialization Pathways for High-Impact Growth
Selecting a specialization is one of the most defining career decisions a professional will make. In today’s enterprise environments, general knowledge often fails to deliver the depth required to lead initiatives, optimize infrastructure, or solve complex challenges. Specialization, especially within high-value verticals such as Oracle database administration, cloud infrastructure, or enterprise analytics, equips professionals to become indispensable contributors to mission-critical functions.
Choosing the right path requires balancing internal motivations with external opportunity landscapes. Professionals should begin by identifying domains where they experience both natural interest and long-term viability. This might involve deep-diving into Oracle Cloud Infrastructure, mastering autonomous databases, or leading data governance initiatives. Market analysis—evaluating current demand, growth projections, compensation ranges, and saturation levels—can guide the final decision. A high-growth area today may stagnate tomorrow, so trend-watching is essential.
Additionally, professionals must assess how their chosen specialty aligns with macro trends such as AI integration, security compliance, data democratization, or hybrid cloud adoption. Oracle certifications offer multiple tracks, allowing individuals to focus on implementation, development, architecture, or analytics. Selecting a specialization that offers layered credentials—where one can move from associate to professional to expert level—ensures deeper mastery and broader recognition.
By choosing specialization over generalization, professionals create rare value propositions. Their nuanced expertise becomes difficult to replicate, justifying higher compensation, greater responsibility, and opportunities to lead cross-functional initiatives.
Balancing Breadth and Depth With Skill Portfolio Diversification
While specialization provides focused value, diversification ensures professional resilience. The technology sector is in constant flux, influenced by emerging platforms, regulatory shifts, and evolving customer expectations. Professionals who cultivate adjacent skills—without sacrificing their core expertise—remain agile and better positioned to pivot when industries transform.
A balanced skill portfolio includes three pillars: technical mastery, business insight, and interpersonal aptitude. On the technical side, diversification may involve acquiring proficiencies in scripting, containerization, DevOps methodologies, or cybersecurity principles alongside Oracle certifications. For instance, understanding how Oracle interacts with Kubernetes environments, or how to secure data pipelines in hybrid environments, adds considerable operational value.
Business acumen is increasingly important for technical roles. Professionals who can interpret enterprise needs, translate them into technical requirements, and deliver results aligned with ROI considerations are more valuable than those who simply implement solutions. Skills such as stakeholder communication, strategic alignment, budgeting, and risk assessment elevate professionals from executors to advisors.
Finally, soft skills are no longer optional. Leadership, emotional intelligence, adaptability, and conflict resolution are essential in cross-functional teams, remote environments, and customer-facing roles. Together, these competencies allow professionals to operate with autonomy, influence strategic direction, and manage complex teams or projects.
Diversifying skills should not be haphazard. Professionals should strategically target competencies that complement their core domain while expanding their versatility across roles, functions, and industries.
Shaping an Influential and Authentic Professional Identity
In today’s interconnected digital economy, your reputation precedes you. A strong professional brand amplifies the value of your Oracle certifications and accelerates career opportunities. It communicates expertise, builds trust, and differentiates you from others with similar credentials or experience.
Professional branding begins with consistent delivery—executing projects with precision, integrity, and effectiveness. However, it also requires visibility. Professionals must actively share their insights, accomplishments, and thought leadership across appropriate platforms. This can include authoring technical blogs, contributing to industry publications, speaking at webinars, mentoring newer professionals, or engaging with the broader Oracle user community.
A cohesive online presence is equally vital. Your profiles, portfolios, and digital artifacts should tell a compelling, unified story of your skills, values, and impact. Align your resume, LinkedIn presence, GitHub repositories, and certification verifications to present a polished and credible identity.
Authenticity is crucial. Professionals should avoid overselling or mimicking others. Instead, focus on articulating real experiences, sharing genuine insights, and demonstrating growth. By building a brand rooted in both expertise and authenticity, you create a magnetic professional identity—one that attracts new opportunities, earns peer respect, and fosters long-term influence.
Professional branding also serves as a safeguard. In times of transition or market downturn, those with established credibility often find roles faster and secure better compensation. Reputation compounds—like financial investments—growing stronger with every authentic contribution.
Embracing Continuous Learning as a Core Career Philosophy
In any field touched by technology, knowledge is perishable. Continuous learning is not a luxury—it is a survival mechanism. Oracle technologies, and the broader enterprise IT ecosystem, evolve constantly with new versions, features, architectural patterns, and compliance requirements. Professionals must commit to lifelong learning to retain relevance and sharpen their competitive edge.
Continuous learning spans structured and unstructured modalities. This may include enrolling in advanced Oracle certification courses, attending industry conferences, participating in sandbox environments, or consuming expert-authored content. It also involves informal learning—peer discussions, hands-on experimentation, error log decoding, and project post-mortems.
Successful professionals embed learning into their routines. They schedule time for study, track their progress, reflect on lessons learned, and seek feedback regularly. Learning is viewed not as an event, but as an ongoing discipline integrated into their weekly rhythm.
Beyond technical updates, professionals must also expand into business strategies, regulatory trends, and adjacent domains like artificial intelligence, big data, and cybersecurity. A professional fluent in Oracle Cloud implementation who also understands data ethics or digital transformation frameworks holds strategic value.
Learning investment compounds over time, much like branding. Each new certification, skill, or insight multiplies opportunities, increases career flexibility, and supports elevated roles. This commitment also signals to employers and clients that you are future-ready, proactive, and prepared to lead in dynamic environments.
Conclusion
Career advancement is not only about effort—it’s about demonstrable outcomes. Professionals must measure, track, and articulate the value they deliver to their teams, organizations, and clients. Strategic performance tracking ensures you remain focused on high-impact activities and can provide quantifiable evidence during reviews, negotiations, or new role applications.
Establishing key performance indicators tailored to your role is the starting point. For technical roles, this may involve metrics related to system uptime, query optimization, incident resolution time, or infrastructure cost reduction. For project leads or architects, metrics might include budget adherence, delivery velocity, stakeholder satisfaction, or user adoption rates.
Tracking tools such as dashboards, project retrospectives, and milestone journals enable ongoing reflection. They help professionals identify strengths, improvement areas, and alignment gaps with organizational goals. By consistently reviewing performance data, professionals become more self-aware, more focused, and more impactful in their roles.
Additionally, performance measurement supports storytelling. During promotion discussions or job interviews, professionals who can describe not only what they did—but what it accomplished—stand out. This narrative credibility is enhanced by metrics, showcasing ROI and strategic alignment.
Employers and clients increasingly expect data-driven evaluations. Professionals who can quantify their impact, showcase improvement trajectories, and demonstrate alignment with business outcomes rise faster and are trusted with greater responsibilities.
The modern career landscape is fraught with uncertainty—economic downturns, industry shifts, technological obsolescence, and organizational restructuring are frequent realities. Professionals who fail to anticipate and prepare for these shifts risk stagnation or displacement. Career longevity requires robust risk management strategies that insulate individuals from volatility while maintaining forward momentum.
One pillar of risk mitigation is financial preparedness. Maintaining an emergency fund, reducing debt, and creating income buffers allows professionals to make empowered career decisions rather than reactive compromises during instability. It buys time to upskill, seek new opportunities, or pivot without desperation.
Another key strategy is proactive network cultivation. Strong professional relationships provide not only job leads but also emotional support, industry insight, and project partnerships during transitions. Professionals should consistently invest in networking, not only when in need.
Diversifying one’s skillset is perhaps the most important hedge against obsolescence. Professionals should monitor industry signals—such as decreasing demand for legacy systems or growing emphasis on cloud-native platforms—and upskill accordingly. Holding current, in-demand Oracle certifications, supplemented by adjacent domain expertise, builds agility and relevance.
Finally, mindset is crucial. Professionals must embrace adaptability, resilience, and reinvention. Those who view change as an opportunity rather than a threat remain energized, open to reinvention, and attractive to modern organizations seeking innovation.
ExamCollection provides the complete prep materials in vce files format which include Salesforce Developer certification exam dumps, practice test questions and answers, video training course and study guide which help the exam candidates to pass the exams quickly. Fast updates to Salesforce Developer certification exam dumps, practice test questions and accurate answers vce verified by industry experts are taken from the latest pool of questions.


Salesforce Salesforce Developer Video Courses

Top Salesforce Certifications


Top Salesforce Certification Exams
- Certified Agentforce Specialist
- Certified Data Cloud Consultant
- Certified Integration Architect
- ADM-201
- Certified Tableau Data Analyst
- Certified Platform Developer
- Certified Platform App Builder
- Certified Business Analyst
- Certified Service Cloud Consultant
- Certified Sharing and Visibility Architect
- Certified OmniStudio Developer
- Certified Development Lifecycle and Deployment Architect
- Certified Tableau Desktop Foundations
- Certified Marketing Cloud Email Specialist
- Certified Marketing Cloud Developer
- Certified Platform Developer II
- Public Sector Solutions Accredited Professional
- Certified Revenue Cloud Consultant
- Certified OmniStudio Consultant
- Certified MuleSoft Developer I
- Certified Advanced Administrator
- Certified CPQ Specialist
- Financial Services Cloud Accredited Professional
- Certified Data Architect
- Certified Experience Cloud Consultant
- Field Service Consultant
- Certified Marketing Cloud Engagement Administrator
- DEV-450
- Certified Industries CPQ Developer
- Certified Tableau Consultant
- Certified MuleSoft Developer
- Certified Sales Cloud Consultant
- Certified Platform Sharing and Visibility Architect
- Certified Platform Data Architect
- Certified MuleSoft Integration Architect I
- B2B Commerce for Developers Accredited Professional
- Certified Platform Administrator II
- Certified Tableau Server Administrator
Site Search:


