- Home
- Video Courses
- Certifications
- 220-1001: CompTIA A+ Certification Exam: Core 1 Dumps


220-1001: CompTIA A+ Certification Exam: Core 1 Certification Video Training Course
220-1001: CompTIA A+ Certification Exam: Core 1 Certification Video Training Course includes 13 Lectures which proven in-depth knowledge on all key concepts of the exam. Pass your exam easily and learn everything you need with our 220-1001: CompTIA A+ Certification Exam: Core 1 Certification Training Video Course.
Curriculum for CompTIA A+ 220-1001 Certification Video Training Course


220-1001: CompTIA A+ Certification Exam: Core 1 Certification Video Training Course Info:
The Complete Course from ExamCollection industry leading experts to help you prepare and provides the full 360 solution for self prep including 220-1001: CompTIA A+ Certification Exam: Core 1 Certification Video Training Course, Practice Test Questions and Answers, Study Guide & Exam Dumps.
CompTIA A+ Certification: 220-1001 Exam Preparation
Introduction to the CompTIA A+ 220-1001 Exam
The CompTIA A+ 220-1001 exam represents the first of two required tests for the globally recognized CompTIA A+ certification. This credential is designed to validate foundational knowledge and practical skills needed by IT professionals who aim to support, troubleshoot, and maintain a wide range of computer and networking systems. The exam code 220-1001 specifically focuses on hardware, networking, mobile devices, and cloud computing, making it a crucial milestone for aspiring technicians entering the field of information technology.
The overview of this course is structured to provide learners with a comprehensive pathway to mastering the exam objectives. It begins by introducing the key domains of the test, then gradually immerses learners into advanced topics such as virtualization and troubleshooting. The content is carefully sequenced so that students with little or no prior IT experience can build their understanding step by step.
Why the A+ Certification Matters
Technology is the backbone of nearly every business and organization in the modern world. The CompTIA A+ certification serves as the foundation of an IT career because it verifies the essential skills employers demand from entry-level technicians. Certified professionals demonstrate competence in configuring, managing, and supporting hardware and software systems, and this credibility opens doors to a variety of IT positions including technical support specialist, field service technician, and IT support administrator.
Employers across industries recognize A+ as a benchmark certification. Unlike vendor-specific credentials that are tied to a particular manufacturer, the A+ is vendor-neutral, meaning it covers a wide spectrum of technologies and platforms. This universality makes it one of the most versatile certifications in the IT industry. For learners who wish to enter the field with confidence and job-ready skills, A+ is an unmatched starting point.
Structure of the Training Course
This training course has been designed into four large parts, each covering specific elements of the CompTIA A+ 220-1001 exam. The first part introduces the overview and explains the modules, helping learners orient themselves before diving into the deeper topics. The second part addresses requirements, setting the expectations and prerequisites for participants. The third part covers detailed course descriptions and the audience who will benefit most. The final part will build on these foundations to ensure learners are fully prepared for the exam.
Within this first part, learners will explore the big picture of what the course entails. They will gain clarity about how the modules align with exam objectives and how each section builds toward mastery of hardware, networking, mobile technology, virtualization, and cloud services.
Learning Outcomes of the Course
Upon completion of the training program, learners will be able to demonstrate a robust understanding of computer hardware, assemble and configure various systems, establish and manage wired and wireless networks, support mobile and embedded devices, troubleshoot hardware and software issues, and understand the essentials of cloud computing. By mastering these outcomes, students will not only prepare for the CompTIA A+ 220-1001 exam but also develop real-world competencies necessary for entry-level IT roles.
Relevance of the Exam Domains
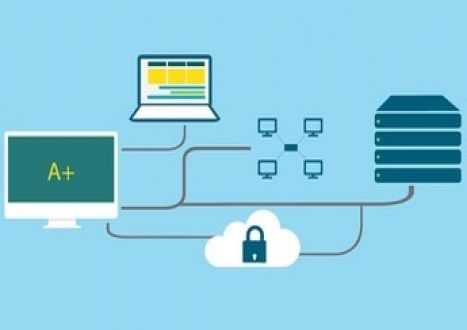
The exam domains covered by CompTIA A+ 220-1001 are hardware, networking, mobile devices, hardware and network troubleshooting, and cloud computing. These domains reflect the real-world demands of IT support. Every day, technicians are asked to repair malfunctioning devices, install new systems, secure connectivity, and manage complex networks. Without mastery of these fundamentals, it would be difficult to advance into specialized fields such as cybersecurity or systems administration. Therefore, a thorough understanding of the exam domains is crucial not only for passing the test but also for building a sustainable IT career.
Modules
Module One: Understanding Hardware Components
This module introduces the foundational knowledge of hardware, starting with the anatomy of a computer system. Learners will study central processing units, random access memory, power supplies, storage devices, and motherboards. The focus is on identifying, installing, and configuring these components. By mastering this module, students will gain hands-on skills in assembling and upgrading personal computers.
The study of hardware also extends to peripherals such as printers, scanners, and external drives. An IT support specialist must be able to troubleshoot not only internal components but also external devices connected through USB, HDMI, and other interfaces. This module ensures learners can work confidently with a variety of devices and connections.
Module Two: Networking Fundamentals
Networking is the lifeline of modern computing environments, and this module introduces the principles of both wired and wireless networks. Learners will explore concepts such as IP addressing, subnetting, routing, switching, and wireless standards. They will study the common tools and commands used to test and troubleshoot connectivity issues.
Special attention is given to cabling standards, network topologies, and protocols such as TCP/IP, DNS, and DHCP. By understanding these concepts, students will not only prepare for the exam but also acquire practical skills they will use daily in IT roles. The module concludes with a study of basic network security, teaching learners how to protect against common threats and vulnerabilities.
Module Three: Mobile Devices
This module focuses on mobile technology including laptops, smartphones, and tablets. The growing importance of mobile devices in business and personal settings has created a demand for technicians who can support them effectively. Learners will gain the ability to configure and troubleshoot mobile operating systems, synchronize devices, and resolve issues related to wireless connectivity.
Key areas of study include replacing laptop components such as keyboards and screens, managing battery and charging systems, and understanding the differences between mobile and desktop architectures. By the end of this module, learners will have a strong grasp of how to support the mobile devices that dominate the modern workplace.
Module Four: Hardware and Network Troubleshooting
Troubleshooting is at the heart of the CompTIA A+ certification. This module trains learners in the systematic approach required to diagnose and resolve hardware and network issues. Students will study methodologies such as identifying problems, establishing theories, testing solutions, and verifying functionality.
Practical case studies form a major part of this module, exposing learners to real-world scenarios they are likely to encounter in the field. From repairing faulty motherboards to diagnosing intermittent wireless connections, students will gain confidence in applying logical problem-solving strategies. This module ensures they are not only prepared for exam questions but also job-ready.
Module Five: Virtualization and Cloud Computing
As IT environments evolve, cloud computing and virtualization have become indispensable. This module introduces learners to the basics of virtual machines, cloud storage, and cloud-based applications. Students will examine how virtualization allows multiple operating systems to run on a single physical machine and how cloud services reduce the need for local infrastructure.
By completing this module, learners will be able to describe the benefits and risks of cloud adoption, configure basic virtualization setups, and support end users working with cloud applications. This knowledge positions them to adapt to the rapidly changing landscape of IT.
Module Six: Putting It All Together
The final module integrates all prior knowledge and prepares learners for the exam environment. Students will review practice questions, simulate troubleshooting scenarios, and revisit key concepts from hardware, networking, mobile devices, troubleshooting, and cloud computing.
This module is designed to build confidence and ensure learners can recall and apply knowledge under exam conditions. More importantly, it fosters the ability to translate exam preparation into practical skills that can be used in real IT support roles.
Requirements of the Course
Introduction to Course Requirements
Every structured training program needs clearly defined requirements to set expectations and ensure learners are prepared to succeed. The CompTIA A+ 220-1001 course is no different. While the certification is designed as an entry-level credential, students will benefit from certain academic, technical, and personal prerequisites. Understanding these requirements helps create a realistic learning pathway, avoids unnecessary frustration, and maximizes the chances of success in both the course and the certification exam.
The requirements of this training program are divided into several categories. These include technical prerequisites, educational background, personal skills, equipment requirements, and time commitments. By examining each of these in depth, learners gain a clear picture of what is expected and how to prepare themselves fully before beginning.
Educational Background Requirements
Although the CompTIA A+ certification is considered entry-level, learners are expected to possess a basic educational foundation. Most candidates entering the course will have completed secondary school or equivalent, as this provides the fundamental literacy and numeracy skills required to grasp technical concepts. Reading comprehension is particularly important because the exam includes scenario-based questions that require careful interpretation.
Learners with previous exposure to technology, whether through formal education or personal interest, will find it easier to progress. However, lack of prior IT coursework is not a barrier. The course is designed to guide even those with minimal experience, provided they bring curiosity, persistence, and the ability to learn independently.
Technical Prerequisites
Technical prerequisites ensure that students have enough familiarity with computers to follow the lessons effectively. At a minimum, learners should be comfortable using an operating system, navigating file structures, and performing basic software installations. They should also understand common tasks such as connecting to the internet, managing files and folders, and adjusting system settings.
While in-depth technical knowledge is not expected, familiarity with common devices such as laptops, smartphones, and printers will provide a useful foundation. Students who already troubleshoot simple problems for family, friends, or themselves often discover that they meet the technical prerequisites naturally.
Personal Skills and Attributes
Beyond technical knowledge, learners need certain personal attributes to succeed in this course. Problem-solving is at the heart of IT support, so students should possess a curious and analytical mindset. The ability to break down complex issues into smaller steps and test solutions systematically is invaluable for both the exam and real-world troubleshooting.
Patience and perseverance are equally important. Not every problem will have an immediate or obvious solution, and learners must be willing to test, fail, and try again until the correct resolution is found. Good communication skills are also vital because IT professionals often translate technical concepts into plain language for end users.
Finally, a strong motivation to learn and a commitment to continuous development are required. Technology evolves rapidly, and the A+ certification is only the beginning of a lifelong learning journey in IT.
Equipment Requirements
To fully benefit from the CompTIA A+ 220-1001 training course, learners need access to specific equipment. A personal computer is essential, preferably with specifications capable of running virtual machines and modern operating systems. This allows students to practice configurations, installations, and troubleshooting in a safe, simulated environment without damaging production systems.
Access to both Windows and Linux operating systems is recommended, as the exam may touch on multiple platforms. A stable internet connection is also essential for accessing study materials, practice exams, and cloud-based labs. Learners should also have access to mobile devices such as a smartphone and tablet to practice configuration and troubleshooting scenarios.
Hands-on experience with hardware components such as spare hard drives, RAM modules, motherboards, and networking equipment can be extremely valuable. While the course provides theoretical knowledge, physically handling equipment enhances understanding and retention.
Software Requirements
Learners will need access to common productivity software such as word processors, spreadsheets, and PDF readers for note-taking and study purposes. In addition, virtualization software such as VirtualBox, VMware, or Hyper-V is recommended to create virtual environments for practicing operating system installations and configurations.
Security software, including antivirus tools and firewalls, may also be required when working with test systems to simulate real-world environments. Learners should ensure their systems are up-to-date with patches and that they can download and install necessary utilities during the course.
Time Commitment Requirements
Completing the CompTIA A+ 220-1001 course requires a significant investment of time. Learners should expect to dedicate several hours each week to studying course materials, engaging in labs, and reviewing practice exams. On average, learners who are new to IT may require up to three months of consistent study to prepare adequately for the exam, though this may vary depending on prior experience.
Daily engagement, even in small increments, is strongly encouraged. Reviewing concepts regularly helps build retention, while hands-on labs reinforce learning through practice. Learners must be disciplined enough to set aside study time consistently, balancing their course requirements with personal and professional commitments.
Language and Communication Requirements
Because the exam and course materials are provided in English, learners must have strong reading and comprehension skills in the language. They must be able to interpret technical documentation, understand exam scenarios, and communicate effectively in written and spoken English. For non-native speakers, additional study in technical English may be beneficial before attempting the certification.
Health and Ergonomic Considerations
While often overlooked, physical readiness is also part of the requirements. IT technicians spend long hours working on computers and handling hardware. Learners should ensure they have an ergonomic study environment, including a comfortable chair, desk, and proper lighting. Extended periods of study can strain eyesight and posture, so breaks and healthy routines are recommended.
Students who practice building and repairing hardware must also be aware of electrostatic discharge precautions and safe handling of components. Proper grounding equipment and anti-static measures should be in place to prevent damage to sensitive devices.
Financial Requirements
The cost of the CompTIA A+ 220-1001 exam is another important consideration. Learners must budget for the exam voucher, study materials, practice tests, and potentially additional hardware or software for labs. While this represents an investment, the return is substantial in terms of career opportunities and earning potential.
Some learners may seek financial assistance through employers, scholarships, or training programs offered by local institutions. Planning ahead ensures that financial obstacles do not interfere with progress through the course.
Institutional and Instructor Requirements
In addition to personal requirements, learners should consider the requirements of the training institution or instructor. Reliable access to instructional support, whether through live sessions, forums, or email communication, enhances the learning experience. Students should verify that the course provider offers comprehensive resources including lectures, labs, and exam simulations.
Psychological Readiness and Growth Mindset
Finally, learners must be psychologically prepared for the challenges of the course. The A+ certification journey involves complex concepts and practical tasks that can be intimidating for beginners. A growth mindset, characterized by the belief that abilities can be developed through effort and perseverance, is critical.
Mistakes and setbacks should be viewed as opportunities for learning rather than failures. This mindset not only aids in passing the certification but also builds resilience for a long and successful IT career.
Meeting the Requirements and Moving Forward
Meeting the requirements of the CompTIA A+ 220-1001 training course is not about perfection but preparation. Learners do not need to be experts in technology before beginning, but they do need the right tools, mindset, and commitment. With the proper foundation in place, students can engage fully with the modules, progress steadily through the curriculum, and build the competence required to pass the exam and launch their careers in IT.
Course Descriptions and Who This Course Is For
Introduction to the Course Description
The CompTIA A+ 220-1001 training course is designed as a comprehensive learning pathway that equips students with the knowledge and hands-on skills needed to succeed in both the certification exam and real-world IT roles. The course introduces fundamental concepts of hardware, networking, mobile devices, virtualization, cloud computing, and troubleshooting. It emphasizes practical application, ensuring that learners can translate theoretical understanding into technical competence.
The description of this course goes beyond a simple list of topics. It captures the essence of what learners can expect, how the training experience unfolds, and why the material is relevant to both aspiring IT professionals and working technicians. The course is structured to balance theory and practice, guiding learners from foundational principles to advanced troubleshooting techniques.
Purpose of the Course
The primary purpose of this training course is to prepare students for the CompTIA A+ 220-1001 certification exam. By mastering the exam domains, learners prove their ability to install, configure, maintain, and troubleshoot hardware and network systems. Beyond exam preparation, the course also aims to cultivate a mindset of problem-solving, adaptability, and customer service—qualities that define successful IT professionals.
This course also serves as an entry point into the IT industry. For many students, the CompTIA A+ certification is the first credential on their career ladder. It provides confidence, credibility, and the skills required to perform effectively in support and technical roles.
Scope of the Course
The scope of the course is broad but targeted. It covers the full range of objectives outlined by CompTIA for the 220-1001 exam. This includes detailed instruction on mobile devices, networking technology, hardware components, virtualization, cloud computing, and troubleshooting procedures. Each area is covered thoroughly, with special emphasis on real-world applications.
Practical labs and exercises ensure that learners not only understand concepts but also can apply them. By the conclusion of the course, students are expected to demonstrate readiness for both the certification test and entry-level IT job responsibilities.
Course Delivery Style
The course is delivered in a style that blends structured content with interactive learning. Lessons combine explanations, demonstrations, and opportunities for hands-on practice. The goal is to create a dynamic and engaging learning environment where students progress steadily without feeling overwhelmed.
The teaching approach encourages learners to experiment, ask questions, and practice repeatedly. This interactive style mirrors the realities of IT work, where success often depends on the ability to test solutions and adapt quickly to unexpected challenges.
Emphasis on Hands-On Learning
A defining feature of this course is its emphasis on hands-on learning. While theoretical knowledge forms the backbone of IT education, practical application is what cements skills. Throughout the training, learners are encouraged to build and configure systems, troubleshoot simulated problems, and explore virtualization platforms.
Hands-on labs not only prepare learners for exam scenarios but also replicate the challenges of real IT support environments. This focus ensures that learners graduate from the course with confidence in their ability to perform practical tasks, not just answer multiple-choice questions.
Integration of Exam Objectives
The course description must align with the official exam objectives published by CompTIA. Each domain of the 220-1001 exam is mapped to a corresponding set of lessons and labs within the training. By following this structured alignment, learners can track their progress against the official standards and ensure complete coverage of the test material.
This integration also means that learners develop familiarity with the language, style, and scope of exam questions. By the time they sit for the test, they are comfortable with both the technical content and the exam format.
Accessibility of the Course
The course is designed to be accessible to a wide range of learners. Individuals with little or no prior IT experience can begin confidently, provided they meet the general requirements outlined earlier. The course also accommodates different learning styles, offering detailed explanations for those who prefer theory and practical labs for those who learn by doing.
The training materials are structured to avoid unnecessary jargon, making complex concepts understandable without oversimplifying. For learners with prior IT experience, the course offers opportunities to deepen knowledge and refine troubleshooting strategies.
Support and Resources within the Course
Learners are supported with a variety of resources throughout the course. These include lectures, lab exercises, practice exams, and study guides. Instructors or facilitators provide guidance, answer questions, and help students overcome challenges.
Access to online forums or discussion groups may also be included, allowing learners to connect with peers, share experiences, and exchange troubleshooting strategies. This collaborative environment mirrors professional IT workplaces where teamwork and knowledge-sharing are essential.
Who This Course Is For: Aspiring IT Professionals
This course is particularly well-suited for individuals who aspire to enter the IT industry. For someone just beginning their journey, the CompTIA A+ certification represents a critical first step. It demonstrates competence to potential employers and opens the door to entry-level positions such as IT support specialist, help desk technician, or field service technician.
Aspiring IT professionals benefit from the structured pathway this course provides. It eliminates guesswork by aligning content with exam objectives and job requirements. For those seeking their first role in technology, completing this course builds both skills and confidence.
Who This Course Is For: Career Changers
Many learners come to the CompTIA A+ 220-1001 training course as career changers. They may have worked in unrelated fields but recognize the opportunities available in IT. For such learners, this course offers a gateway into a growing and dynamic industry.
Career changers often bring transferable skills such as communication, problem-solving, and customer service, all of which are highly valued in IT support roles. This course provides the technical knowledge they need to combine with those existing strengths, creating a compelling professional profile for prospective employers.
Who This Course Is For: Students and Recent Graduates
Students and recent graduates represent another significant audience for this course. Whether completing secondary school, college, or university, many young learners view IT as a promising career path. The CompTIA A+ certification offers them a recognized credential that enhances their employability.
This course is especially valuable for students because it provides structure and clarity during a period when many are uncertain about career direction. By completing the training, students position themselves ahead of peers who lack certification, signaling to employers their readiness for technical roles.
Who This Course Is For: Working IT Professionals
Even individuals already employed in IT can benefit from this course. Some technicians may be working without formal certification, relying on experience and informal learning. For them, completing the CompTIA A+ 220-1001 course validates their skills and provides official recognition of their expertise.
Other professionals may use this course as a refresher or stepping stone to more advanced certifications. By revisiting foundational concepts, they strengthen their knowledge base and prepare for certifications such as CompTIA Network+, Security+, or vendor-specific credentials.
Who This Course Is For: Employers and Organizations
The course is not only valuable for individuals but also for employers and organizations seeking to train their staff. Companies that rely on IT support teams can use this course to ensure consistent standards of knowledge and troubleshooting across their workforce.
Employers benefit when their technicians are A+ certified, as this translates into more efficient support, reduced downtime, and improved customer satisfaction. For organizations, sponsoring employees through the course is an investment in operational stability and productivity.
Why This Course Appeals to a Broad Audience
The diversity of learners who enroll in this course demonstrates its broad appeal. Whether an aspiring technician, a career changer, a student, a working professional, or an employer, each group finds value in the structured training, exam preparation, and practical skills offered.
The CompTIA A+ certification is vendor-neutral and widely recognized, which makes the course relevant across industries and geographies. This universality ensures that learners are not restricted to specific technologies or organizations, giving them flexibility in their career paths.
The Value Proposition of the Course
Ultimately, the course offers a clear value proposition. Learners invest time and resources in exchange for a credential that enhances employability, validates competence, and opens doors to future opportunities. The practical skills developed during the training extend beyond exam success and into everyday work situations.
For employers, the course ensures that their staff are equipped with standardized, recognized skills. For individuals, it represents the foundation of a long-term career in technology.
Conclusion to the Course Description and Audience
The CompTIA A+ 220-1001 training course is more than exam preparation—it is a transformative experience that equips learners with skills, confidence, and a pathway into the IT industry. The course is carefully structured to meet the needs of diverse learners, from beginners and students to experienced professionals and organizations.
By describing the course in detail and identifying its audience, we see its true scope and impact. This training does not simply teach concepts; it empowers individuals to launch or enhance careers in a field that continues to shape the modern world.
Student Feedback
Similar CompTIA Video Courses


Only Registered Members Can Download VCE Files or View Training Courses
Please fill out your email address below in order to Download VCE files or view Training Courses. Registration is Free and Easy - you simply need to provide an email address.
- Trusted By 1.2M IT Certification Candidates Every Month
- VCE Files Simulate Real Exam Environment
- Instant Download After Registration.
Log into your ExamCollection Account
Please Log In to download VCE file or view Training Course
Only registered Examcollection.com members can download vce files or view training courses.


