- Home
- Video Courses
- Certifications
- PCNSA: Palo Alto Networks Certified Network Security Administrator Dumps


PCNSA: Palo Alto Networks Certified Network Security Administrator Certification Video Training Course
PCNSA: Palo Alto Networks Certified Network Security Administrator Certification Video Training Course includes 76 Lectures which proven in-depth knowledge on all key concepts of the exam. Pass your exam easily and learn everything you need with our PCNSA: Palo Alto Networks Certified Network Security Administrator Certification Training Video Course.
Curriculum for Palo Alto Networks PCNSA Certification Video Training Course


PCNSA: Palo Alto Networks Certified Network Security Administrator Certification Video Training Course Info:
The Complete Course from ExamCollection industry leading experts to help you prepare and provides the full 360 solution for self prep including PCNSA: Palo Alto Networks Certified Network Security Administrator Certification Video Training Course, Practice Test Questions and Answers, Study Guide & Exam Dumps.
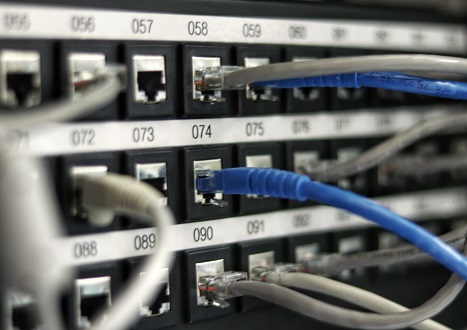
Palo Alto Firewall PCNSA Version 11 Training
Course Overview
The Palo Alto Firewall PCNSA Version 11 Training course is designed to equip IT professionals with the knowledge and skills needed to effectively manage and secure modern network environments using Palo Alto Networks technologies. This course provides both theoretical foundations and practical insights into firewall configuration, security policy management, and threat prevention. Students will learn through hands-on labs, real-world examples, and structured lessons that cover all essential aspects of Palo Alto firewall administration.
Importance of Network Security
Network security is critical in today’s digital environment. Organizations face constant threats from malware, phishing, ransomware, and advanced persistent threats. The PCNSA training emphasizes the role of firewalls in safeguarding networks, preventing unauthorized access, and ensuring the integrity of data traffic. Understanding security frameworks and protocols is a foundational skill for network administrators.
Role of Palo Alto Firewalls
Palo Alto firewalls are next-generation security devices that go beyond traditional firewalls. They provide deep packet inspection, application awareness, and threat intelligence integration. The course explains how these devices filter traffic based on applications, users, and content, rather than just IP addresses and ports. This approach ensures more granular security and improved threat prevention.
Target Audience
This course is suitable for network administrators, security engineers, IT professionals, and anyone seeking to obtain the PCNSA certification. No prior experience with Palo Alto firewalls is required, although a basic understanding of networking concepts such as TCP/IP, routing, and VPNs is beneficial. The training accommodates learners who want to enhance their professional skills and achieve industry-recognized certification.
Learning Objectives
Students will gain knowledge of the core concepts of Palo Alto firewalls, including firewall architecture, management, and configuration. By the end of the course, participants will be able to implement security policies, monitor traffic, manage user access, and configure network interfaces. The course also prepares students for the PCNSA v11 certification exam by providing exam-focused guidance and practice scenarios.
Hands-On Labs
The training includes interactive lab sessions that allow learners to practice configuring firewalls, creating security policies, and analyzing traffic. Labs are designed to simulate real-world network environments and provide experiential learning opportunities. Students gain confidence in deploying firewall features, troubleshooting issues, and optimizing security configurations.
Firewall Architecture Overview
Understanding firewall architecture is essential for effective management. The course covers the components of Palo Alto firewalls, including management, control, and data planes. Each component plays a specific role in processing traffic and enforcing security policies. The architecture section provides insights into how traffic is inspected, logged, and managed.
Security Policy Configuration
Security policies are the backbone of network protection. The course guides learners through creating policies that control traffic based on applications, users, and content. Students learn how to implement allow, deny, and log rules, as well as how to prioritize and optimize policies for better performance. Emphasis is placed on best practices and compliance considerations.
Threat Prevention Techniques
Threat prevention is a key feature of Palo Alto firewalls. The course explains how to configure antivirus, anti-spyware, vulnerability protection, URL filtering, and file blocking. Students explore real-world attack scenarios and learn how to mitigate risks using firewall features. The section also covers automated updates and integration with threat intelligence services.
User Identification and Role-Based Access
Controlling access based on user identity enhances network security. The training demonstrates how to integrate firewalls with directory services, define user roles, and enforce access policies. Students learn to map users to security rules, monitor user activity, and manage authentication methods. Role-based access ensures that the right users have appropriate permissions.
Logging and Monitoring Traffic
Monitoring network traffic is crucial for detecting anomalies and ensuring compliance. The course teaches how to configure logging, generate reports, and analyze traffic patterns. Students explore the use of dashboards, alerts, and traffic summaries to maintain visibility across the network. Real-time monitoring enables proactive threat detection and quick incident response.
VPN Configuration and Management
Secure remote access is a common requirement for modern organizations. This course provides guidance on configuring site-to-site and remote-access VPNs using Palo Alto firewalls. Learners explore encryption methods, tunnel management, and troubleshooting techniques. Understanding VPNs ensures secure connectivity for remote users and branch offices.
Interface and Zone Management
Network segmentation and traffic isolation are fundamental to security. The course explains how to configure interfaces, assign zones, and manage virtual routers. Students learn to separate traffic between internal, external, and DMZ networks, enforcing policies based on zones. This section also covers NAT configurations and interface monitoring.
Integration with Other Security Services
Palo Alto firewalls can be integrated with other security solutions such as SIEMs, endpoint protection, and cloud services. The course highlights the benefits of integration for threat intelligence, incident response, and centralized management. Students learn how to connect firewalls to external systems to enhance visibility and security efficiency.
Troubleshooting and Best Practices
Effective firewall management requires troubleshooting skills. The course covers common issues such as misconfigured policies, traffic blocking, and connectivity problems. Best practices for deployment, configuration, and maintenance are emphasized to ensure optimal firewall performance. Students gain practical skills to identify and resolve problems efficiently.
Exam Preparation and Certification
PCNSA v11 certification validates knowledge and skills in deploying and managing Palo Alto firewalls. The course provides exam-focused guidance, including practice questions, scenario analysis, and study tips. Learners build confidence in applying concepts to real-world environments and passing the certification exam.
Summary of Course Benefits
Completing this course equips IT professionals with a strong foundation in Palo Alto firewall technologies. Students gain practical skills, improve network security, and enhance career prospects. The combination of theory, hands-on labs, and exam preparation ensures a comprehensive learning experience.
Learning Pathway and Progression
The course is structured to allow progressive learning. Beginners start with fundamental concepts and gradually move to advanced topics such as threat prevention, VPNs, and integration with security services. Each module builds on the previous one, providing a cohesive and structured learning journey. Continuous assessment ensures knowledge retention and practical competence.
Real-World Applications
Palo Alto firewall skills are applicable across various industries including finance, healthcare, government, and education. Organizations rely on firewalls to protect sensitive data, comply with regulations, and maintain operational continuity. Students gain insights into industry-specific use cases, preparing them to handle diverse network environments.
Interactive Learning Approach
The course emphasizes interactive learning through simulations, quizzes, and scenario-based exercises. This approach reinforces understanding, improves retention, and develops problem-solving skills. Students engage in active learning, applying concepts in controlled lab environments that mimic real network challenges.
Instructor Expertise
The course is delivered by certified instructors with hands-on experience in network security. Instructors provide practical examples, guidance on best practices, and insights into current industry trends. Students benefit from expert knowledge and mentorship, enhancing both learning outcomes and confidence in applying skills.
Career Impact
Completion of the PCNSA v11 course opens opportunities for roles such as network security administrator, firewall engineer, and IT security specialist. Professionals gain credibility and recognition, positioning themselves for career growth and advancement in cybersecurity and network management.
Course Requirements Overview
The Palo Alto Firewall PCNSA Version 11 course is designed to be accessible to IT professionals at different stages of their career. However, there are certain requirements that learners should meet to ensure they can fully benefit from the course. These requirements cover technical knowledge, hardware and software needs, as well as soft skills that support effective learning.
Technical Background
While the course is beginner-friendly regarding Palo Alto firewall configuration, it assumes that participants have a foundational understanding of networking concepts. Familiarity with IP addressing, TCP/IP, subnets, routing protocols, and network layers will significantly enhance comprehension. A basic understanding of network security principles, such as firewalls, VPNs, and access control, is also recommended.
Networking Knowledge
Participants should be comfortable with core networking concepts. Understanding how data moves across networks, how protocols interact, and how traffic flows is essential. Learners should know about common network devices such as routers, switches, and access points. Knowledge of VLANs, NAT, and DNS will help students grasp firewall configuration and policy management more effectively.
Operating System Requirements
The course includes hands-on labs that require interaction with virtualized firewall environments. Students will need access to a computer running modern operating systems such as Windows 10/11, macOS, or Linux distributions. Compatibility with virtualization software such as VMware Workstation, VMware Player, or VirtualBox is essential for lab exercises.
Software and Tools
Participants will need software to access Palo Alto virtual firewalls for practice. This includes the Palo Alto Networks VM-Series or similar virtual appliances. Additionally, tools such as web browsers, terminal emulators, and network analyzers are recommended. These tools facilitate configuration, testing, monitoring, and troubleshooting exercises.
Hardware Specifications
A system with sufficient RAM, CPU, and storage is necessary for smooth lab performance. At minimum, students should have a computer with 8GB RAM, multi-core processor, and at least 50GB free disk space for virtual machines. Higher specifications will improve lab performance and allow simultaneous execution of multiple virtual devices for complex scenarios.
Internet Connectivity
Reliable internet access is required for accessing online resources, downloading virtual firewalls, and connecting to cloud-based labs. Consistent bandwidth ensures uninterrupted participation in interactive labs, video sessions, and course updates. Students should plan to use a stable connection to avoid disruptions during hands-on exercises.
Browser Requirements
Since some course materials and lab interfaces are web-based, students should use modern web browsers. Chrome, Firefox, or Edge are recommended to ensure compatibility with Palo Alto web interfaces. Browser updates should be maintained to support the latest features and security standards.
Virtualization Skills
Basic familiarity with virtualization software is beneficial. Students should understand how to create, configure, and manage virtual machines. Knowledge of virtual networking, snapshots, and resource allocation ensures effective use of virtual firewalls during labs. Virtualization proficiency enables learners to focus on firewall configuration rather than troubleshooting virtual machine issues.
Time Commitment
The PCNSA v11 course is designed for comprehensive learning. Participants should allocate sufficient time for lessons, labs, and practice exercises. A commitment of several hours per week is necessary to absorb material and complete hands-on activities. Consistent engagement enhances knowledge retention and practical skill development.
Prerequisite Courses
While there are no mandatory prerequisites, learners with prior exposure to networking or security courses will find it easier to grasp advanced topics. Previous courses in TCP/IP, cybersecurity fundamentals, or general firewall administration can provide helpful context. The course is structured to gradually introduce concepts, allowing beginners to catch up while ensuring advanced learners remain challenged.
Soft Skills and Learning Approach
Successful completion of the course requires more than technical knowledge. Problem-solving skills, analytical thinking, and attention to detail are essential for configuring firewalls and troubleshooting issues. Learners should approach labs methodically, experiment with configurations, and analyze results. Patience and persistence are key to mastering practical skills.
Understanding Security Policies
To fully engage with the course, students should understand basic security policy concepts. Knowledge of access control, rule hierarchy, and traffic filtering helps learners comprehend firewall functionality. Understanding how policies affect network traffic provides context for hands-on exercises and real-world application scenarios.
Familiarity with VPNs
VPNs are a critical component of modern network security. Students who have experience with site-to-site or remote-access VPNs will find related modules easier to understand. Concepts such as tunneling protocols, encryption, and authentication are introduced in the course, so prior knowledge accelerates learning.
Awareness of Threats
An understanding of common cyber threats enhances engagement with threat prevention modules. Knowledge of malware, phishing, ransomware, and intrusion techniques allows learners to contextualize firewall features. Awareness of attack methods motivates practical exercises and reinforces the importance of proactive security management.
Access to Learning Resources
Participants are encouraged to have access to additional learning resources, including documentation, online forums, and study guides. Palo Alto Networks provides official documentation, knowledge bases, and community forums that support course content. Supplementary resources enable learners to explore advanced topics, clarify doubts, and stay current with updates.
Commitment to Practice
Hands-on practice is essential for mastery. Students should allocate time to configure, test, and troubleshoot virtual firewalls independently. Regular practice reinforces theoretical concepts, builds confidence, and develops problem-solving skills. Practical exercises bridge the gap between classroom learning and real-world application.
Organizational Support
For professionals taking the course as part of their job, support from their organization is beneficial. Access to lab equipment, test environments, and mentoring enhances the learning experience. Organizations that encourage application of learned skills in workplace scenarios help learners reinforce concepts and demonstrate value.
Recommended Study Plan
A structured study plan improves learning outcomes. Students should divide study time between theory, lab exercises, and review. Starting with foundational concepts and gradually moving to complex topics ensures steady progress. Reviewing previous modules before attempting labs reinforces knowledge and ensures a deeper understanding of concepts.
Understanding Firewall Terminology
The course uses specific terminology related to Palo Alto firewalls. Students should familiarize themselves with terms such as zones, interfaces, security rules, NAT, VPN, and logging. Familiarity with terminology enables smoother navigation of labs, exercises, and documentation, reducing the learning curve.
Prior Experience with IT Systems
While not mandatory, prior experience in IT infrastructure or network management is helpful. Learners with knowledge of server administration, routing protocols, or endpoint security will find it easier to contextualize firewall operations. Experience with troubleshooting, configuration management, and monitoring tools also enhances comprehension.
Self-Motivation and Curiosity
Self-motivation is a key requirement. Learners should actively engage with content, seek to experiment with configurations, and explore advanced features. Curiosity drives deeper understanding and encourages learners to connect theoretical knowledge with practical application. Active learning ensures maximum benefit from the course.
Preparing for the Exam
Students intending to take the PCNSA v11 exam should understand exam requirements and objectives. Familiarity with the exam blueprint, question format, and scoring criteria helps learners focus on relevant topics. Practicing lab scenarios aligned with exam objectives ensures readiness and increases the likelihood of success.
Summary of Requirements
The PCNSA v11 course is designed for a wide range of learners, but meeting the above requirements enhances success. Technical knowledge, hands-on practice, software and hardware readiness, and soft skills collectively ensure participants gain maximum benefit. Awareness of prerequisites, commitment to practice, and access to resources provide a strong foundation for effective learning.
Preparing Your Learning Environment
Before beginning the course, students should prepare their learning environment. This includes setting up a reliable computer, installing virtualization software, and ensuring access to Palo Alto virtual firewalls. Organizing study materials, scheduling dedicated time, and creating a distraction-free environment promotes focused learning and skill acquisition.
Importance of Meeting Requirements
Meeting course requirements ensures learners can fully engage with both theoretical and practical components. It reduces frustration, allows smooth participation in labs, and accelerates comprehension. By preparing in advance, students can focus on mastering concepts rather than overcoming technical obstacles.
Continuous Learning Mindset
A mindset oriented toward continuous learning is essential. The field of network security is dynamic, and firewalls are constantly evolving. Learners should be prepared to update their knowledge regularly, explore new features, and stay informed about emerging threats. This mindset enhances long-term professional growth.
Conclusion of Requirements Section
The requirements outlined in this part provide a clear roadmap for students preparing to enroll in the PCNSA v11 course. Meeting these prerequisites ensures an optimal learning experience, supports hands-on practice, and prepares learners for both the certification exam and real-world firewall administration. By understanding technical, hardware, software, and personal requirements, participants set themselves up for success throughout the training.
Course Description Overview
The Palo Alto Firewall PCNSA Version 11 course is a comprehensive program designed to provide learners with a deep understanding of next-generation firewall technologies. This course emphasizes both conceptual knowledge and practical skills. Participants gain expertise in configuring, managing, and monitoring Palo Alto firewalls in real-world network environments.
Next-Generation Firewall Focus
This course focuses on next-generation firewall (NGFW) capabilities, highlighting how Palo Alto firewalls differ from traditional security devices. Learners explore application-based filtering, user identification, content inspection, and advanced threat prevention. The course demonstrates how these features provide superior network protection and operational visibility.
Hands-On Learning Approach
Hands-on labs are a central component of the course. Students engage with virtual firewalls to simulate real-world network environments. Lab exercises cover firewall deployment, security policy configuration, traffic monitoring, VPN setup, and troubleshooting. Practical experience ensures learners can apply theoretical knowledge effectively in professional settings.
Firewall Architecture and Components
Participants explore the architecture of Palo Alto firewalls, including the management plane, control plane, and data plane. The course explains how each component functions to inspect, enforce, and log network traffic. Understanding architecture allows learners to optimize firewall performance and troubleshoot issues efficiently.
Security Policy Implementation
Security policies form the backbone of firewall operation. The course teaches learners to create, configure, and manage policies that govern traffic based on applications, users, and content. Participants gain insight into policy hierarchy, rule optimization, and policy testing to ensure robust network security.
Threat Prevention and Security Features
Learners explore the threat prevention capabilities of Palo Alto firewalls. The course covers antivirus protection, anti-spyware measures, vulnerability protection, URL filtering, and file blocking. Students understand how to configure automated updates, integrate threat intelligence, and respond proactively to potential network threats.
User Identification and Role Management
The course emphasizes user-based security control. Participants learn to integrate firewalls with directory services, define roles, and implement access policies. Understanding role-based access helps prevent unauthorized use of network resources while allowing legitimate users to perform their tasks efficiently.
Logging, Monitoring, and Reporting
Effective network management requires detailed monitoring. The course teaches how to configure logging, generate reports, and analyze traffic patterns. Participants learn to use dashboards, alerts, and reporting tools to maintain situational awareness. Real-time monitoring supports proactive threat detection and incident response.
VPN Configuration and Remote Access
Secure remote connectivity is a critical component of modern networks. This course covers site-to-site VPNs and remote-access VPNs. Students learn about encryption methods, tunnel configuration, authentication protocols, and troubleshooting techniques. VPN knowledge ensures secure connections for remote employees and branch offices.
Interface and Zone Management
Participants learn how to configure network interfaces, assign zones, and manage virtual routers. This knowledge enables effective network segmentation, traffic isolation, and policy enforcement. Understanding zone-based management ensures security policies are applied consistently across internal, external, and DMZ networks.
Integration with Security Ecosystems
Palo Alto firewalls can integrate with security information and event management systems, endpoint protection solutions, and cloud platforms. The course explores how integration improves threat intelligence sharing, centralized management, and incident response capabilities. Students gain skills to enhance organizational security posture.
Troubleshooting and Optimization
Firewall administration requires the ability to identify and resolve issues quickly. The course provides guidance on troubleshooting connectivity problems, policy conflicts, and configuration errors. Learners develop skills to optimize firewall performance, minimize downtime, and maintain secure network operations.
Real-World Case Studies
The course includes real-world scenarios and case studies. These examples illustrate practical applications of firewall features, policy implementation, and threat response. Students analyze challenges, propose solutions, and learn from successful deployment strategies used by organizations worldwide.
Certification Preparation
The PCNSA v11 certification validates knowledge and skills in Palo Alto firewall management. The course provides exam-oriented guidance, including practice exercises, review questions, and scenario-based learning. Participants are prepared to apply for certification confidently and demonstrate competence to employers.
Who This Course is For
The PCNSA v11 course is designed for network administrators, IT security professionals, system engineers, and anyone involved in network management. It is also suitable for learners seeking career advancement or certification in network security. No prior experience with Palo Alto firewalls is required, though familiarity with networking basics is recommended.
Career-Oriented Benefits
Completing this course provides immediate benefits for professionals. Students acquire hands-on skills, theoretical knowledge, and certification readiness. Career paths include network security administrator, firewall engineer, IT security specialist, and cybersecurity analyst. The course positions learners to meet organizational security needs effectively.
IT Professionals with Networking Background
Professionals with prior networking experience will find the course enhances their existing skills. Knowledge of routing, switching, and network protocols allows for faster comprehension of firewall configuration and policy management. The course builds on foundational IT knowledge to develop specialized security expertise.
Security-Focused Learners
Individuals focused on cybersecurity gain comprehensive exposure to advanced threat prevention techniques. Learners develop practical skills to secure networks, manage user access, and monitor traffic for anomalies. Exposure to real-world security challenges prepares participants for proactive threat management.
Students Seeking Certification
PCNSA certification is a valuable credential for those seeking recognition in network security. The course aligns closely with exam objectives, providing learners with structured preparation, practice labs, and review materials. Certification enhances employability, credibility, and career progression.
Beginners in Firewall Administration
The course is beginner-friendly in terms of Palo Alto firewall configuration. Learners without prior firewall experience are introduced to fundamental concepts gradually. The structured approach ensures a smooth learning curve while building practical skills through hands-on labs and guided exercises.
Professionals in Diverse Industries
Palo Alto firewall skills are applicable across sectors including finance, healthcare, education, government, and technology. Organizations rely on firewalls to protect sensitive data and ensure network reliability. The course equips professionals to implement security measures in varied operational environments.
IT Managers and Decision Makers
IT managers benefit from understanding firewall capabilities and limitations. Knowledge gained from the course allows managers to make informed decisions about security architecture, policy enforcement, and resource allocation. Understanding firewall operations enhances strategic planning and risk management.
Continuous Learners and Innovators
Professionals committed to continuous improvement find value in this course. Network security evolves rapidly, and the PCNSA v11 course provides a foundation for ongoing learning. Exposure to advanced features, integration techniques, and real-world scenarios fosters a mindset of innovation and adaptability.
Enhanced Problem-Solving Skills
Participants develop analytical and problem-solving skills applicable to network security challenges. Configuring policies, troubleshooting traffic, and responding to threats require critical thinking. The course emphasizes scenario-based exercises that enhance practical decision-making and technical reasoning.
Practical Application in the Workplace
The course prepares learners to apply knowledge immediately in professional settings. Firewall configuration, policy management, threat prevention, and monitoring skills are directly transferable to daily operations. Participants leave the course equipped to enhance network security and operational efficiency.
Learning Through Simulation
Virtual labs simulate complex network environments, enabling experiential learning. Participants experiment with configurations, monitor traffic, and test policies without impacting production systems. Simulation-based training reinforces theoretical concepts and develops confidence in practical application.
Collaboration and Knowledge Sharing
The course encourages collaboration among learners through discussions, peer exercises, and group problem-solving. Sharing experiences and approaches enhances understanding of firewall management. Collaborative learning fosters a community of practice that extends beyond the course duration.
Industry-Relevant Skills
Skills acquired in this course align with industry standards and expectations. Participants gain competency in configuring firewalls, implementing policies, monitoring traffic, and managing threats. These skills are recognized globally, increasing professional credibility and employability.
Preparation for Advanced Learning
The PCNSA v11 course lays the foundation for more advanced certifications and specialized training. Participants can progress to courses such as PCNSE (Palo Alto Certified Network Security Engineer) to deepen expertise. Foundational knowledge gained here supports ongoing professional development in network security.
Summary of Course Description
This course provides a structured, hands-on, and practical approach to learning Palo Alto firewall technologies. It covers architecture, security policy implementation, threat prevention, VPNs, monitoring, integration, and troubleshooting. Learners gain both theoretical knowledge and practical experience applicable to real-world scenarios.
Summary of Who This Course is For
The course is ideal for network administrators, IT security professionals, students, IT managers, beginners, and anyone seeking PCNSA certification. It is designed for learners across industries who want to enhance network security knowledge, practical skills, and career prospects. Hands-on labs, real-world examples, and structured modules ensure applicability in professional environments.
Student Feedback
Similar Palo Alto Networks Video Courses


Only Registered Members Can Download VCE Files or View Training Courses
Please fill out your email address below in order to Download VCE files or view Training Courses. Registration is Free and Easy - you simply need to provide an email address.
- Trusted By 1.2M IT Certification Candidates Every Month
- VCE Files Simulate Real Exam Environment
- Instant Download After Registration.
Log into your ExamCollection Account
Please Log In to download VCE file or view Training Course
Only registered Examcollection.com members can download vce files or view training courses.


